Use grid object archiving (GOA) tools to create or edit an inventory listing of grid objects. Later, you can create an archive file containing everything listed in the inventory.
- Make sure you have a connection profile for the grid domain controller (GDC) of the Data Federation domain that contains the grid objects you want to archive.
- To start a new inventory, select File > New > Grid Object Archive. The Grid Object Archive Inventory wizard appears.
- In the Container field, enter or browse and select the name of a project folder in your workspace directory.
- In the File name field, enter a name for the inventory file you are creating. The file name extension must be .goi.
- In the Select a Grid Domain Controller field, select the GDC from whose domain you will choose objects for this archive. All the objects in an archive must come from the same grid domain.
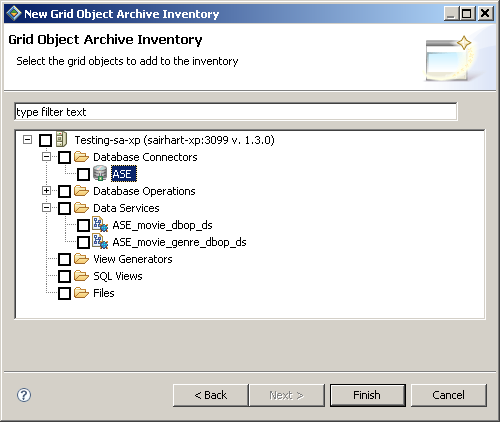
- Click Next. The wizard displays a hierarchy of archivable objects in the connected Data Federation domain.
- Expand the folders containing various types of grid objects (database connectors, database operations, and so on.) Then click check boxes in the wizard to select the objects you want to archive. To select...
- A particular object, click its checkbox
- All objects of a given type—all data services, for example—click the checkbox for that object type
- All archivable objects in this domain, click the checkbox next to the GDC (at the top of the list)
Note: If an object added to an inventory depends on other objects, WorkSpace Data Federation adds all of the dependent items to the inventory along with the one you selected. Dependencies between objects in the inventory are displayed on the right side of the GOA editor. Select an object to show its dependencies. - Click Finish. WorkSpace opens the new inventory file in the GOA editor. The inventory contains the items you selected in the wizard.
- To add an object to the inventory, drag it from the data catalog to the inventory in the editing pane. You can drag multiple items together. Note: An inventory can hold objects from a single domain. If you try to add objects from different domains, WorkSpace displays an error.
- To remove an object from the inventory, right-click it and select Delete from the context menu or press the Delete key.
- To save the inventory, type Ctrl+s or select File
> Save. CAUTION:A GOA inventory does not contain all the information needed to reproduce its contents. If any object in the inventory is modified, moved, or removed from the domain before you create an archive, the archive creation fails. Do not delete inventoried objects from the domain before creating an archive. If you modify or move an inventoried object before creating an archive, delete the object from the inventory and add it again to capture the changes.