Creating a Mobile Workflow Form

Create a mobile workflow form using the TravelRequest mobile business object.

Prerequisites
Complete Deploying the WorkFlow101 Mobile Application Project.
Task
  1. In the Sybase Unwired WorkSpace menu, click File > New > Mobile Workflow Forms Editor.
  2. Select the MobileWorkflow101 folder and enter travelrequest.xbw as the file name.
  3. Click Next.
  4. In the Starting Points page, select Can be started, on demand, from the client, and click Finish.
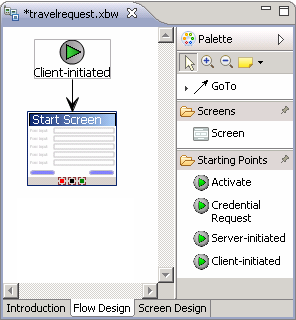
  5. In the Mobile Workflow Forms editor, click the Flow Design tab.
    The new flow diagram contains a Client-initiated screen, connected to a Start Screen.
    TravelRequest initial flow diagram
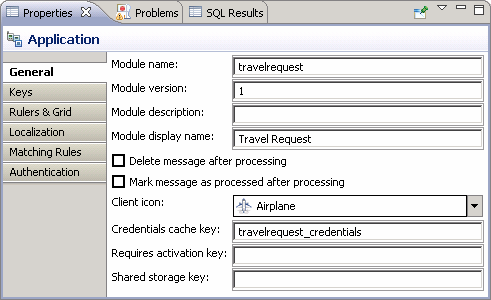
  6. Customize the workflow's display name and icon.
    When deployed, your workflow is identified on the mobile device by a name and a client icon. For this tutorial, change the default display name and icon:
    1. If Properties for the application is not already open, right-click any blank part of the travelrequest Flow Design and choose Show Properties View.
    2. In the Properties view General page, change Module display name from travelrequest to Travel Request.
    3. In Client icon, click the control and choose Airplane.

    TravelRequest initial flow diagram
  7. In Workspace Navigator, expand MobileWorkflow101 > Mobile Business Objects > TravelRequest > Operations.
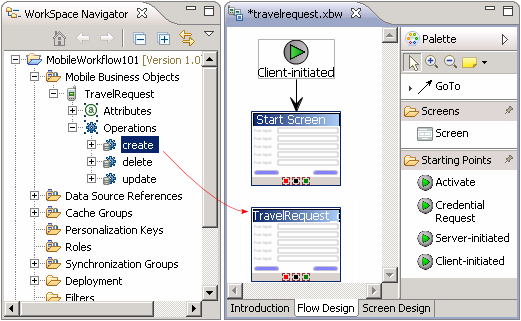
  8. Drag the create operation onto the flow diagram to add the TravelRequestcreate screen.

    Adding a table to the workflow design
  9. Customize the TravelRequest screen title.
    1. In the Flow Design, click the TravelRequest screen to display its properties.
    2. In the Properties view General page, change the name from TravelRequestcreate to Travel Request.
      Changing the name also changes the key, from TravelRequestcreate to Travel_Request.
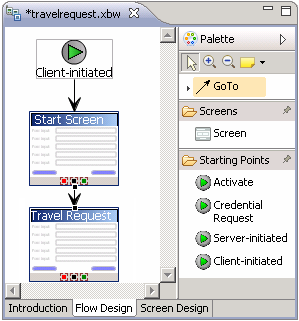
  10. Add a GoTo connection from the Start Screen to the Travel Request screen:
    1. In the Palette, click GoTo.
    2. Click the Start Screen, and while holding the mouse down, drag the connection to the Travel Request screen.
    A line with an arrow connects the two screens.
    TravelRequest screen connections
  11. Double-click the Start screen to open its Screen Design page.
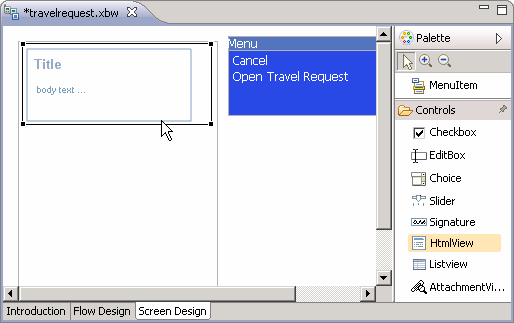
  12. In the Palette, select the HtmlView control and click in the Start screen.
    The HtmlView control is added to the Start screen design.
    Start screen with HtmlView control
  13. Click the Flow Design tab.
  14. In the Flow Design, select the Client-initiated starting point.
    The Properties view shows all of the keys that were automatically created for each parameter in the create method of the TravelRequest mobile business object. If the Properties view does not open, right-click the Client-initiated screen and select Show Properties View.
    Client-initiated screen properties
  15. Create a new key:
    1. In the Client-initiated Properties view, click New.
    2. Enter these values:
      • NameIntroKey
      • Typestring
      Note: In the tutorial this key doesn't do anything, and the name and type are not important; we are simply demonstrating how to add a new key.
    3. Click OK.
      The new key, IntroKey, is added to the list of keys in the Properties view.
      Introkey properties
  16. Define the default value for the new key:
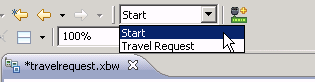
    1. In the Mobile Workflow Forms editor, click the Screen Design tab.
    2. If the Start Screen is not selected, select Start in the screen selection control above the Screen Design.

      Select Start screen
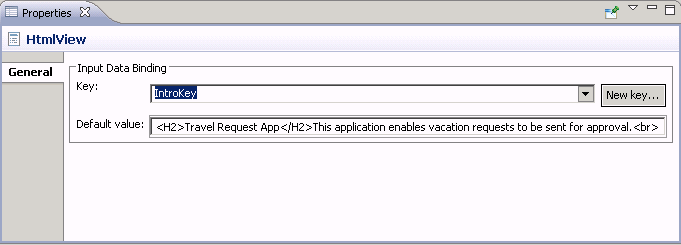
    3. In the Start Screen, select the HtmlView control to display its properties.
    4. In HTMLView Properties, click the Key control and select IntroKey.
    5. In Default value, enter the message code:
      <H2>Travel Request App</H2>This application enables vacation requests to be sent for approval<br>.

      Introkey data binding
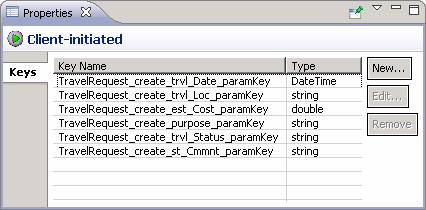
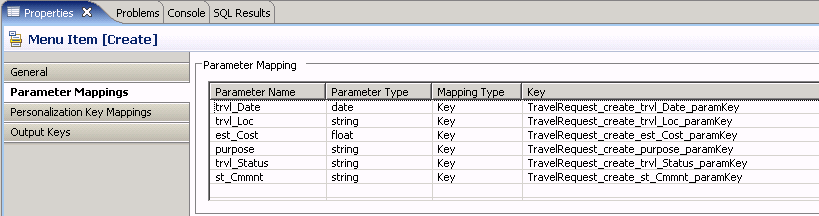
  17. View the current parameter settings of the TravelRequest screen:
    1. In the screen selection control above the Screen Design page, change the screen to Travel Request.

      Select Travel screen
    2. In the menu, select the Create operation to display its properties.
    3. In Properties, click Parameter Mappings.
      The parameter mapping table shows the mobile business object parameters for the operation and their keys.
      TravelRequest_create parameters
  18. Save the travelrequest workflow form.