Enhance the report

Note

You can enhance reports in many ways. In this exercise you:

Rearrange controls

To rearrange controls, you:

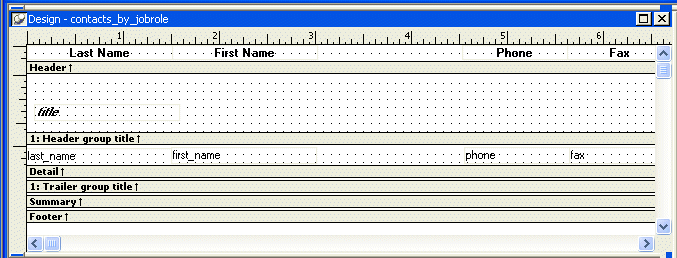
This is what the Design view looks like when you have finished rearranging the controls.
Shown is the  Design view for contacts _ by _ job role.  The text for the column headers is displayed across the top in the Header band in the order Last Name, First Name, Phone, and Fax. Next is the Header group title with a rectangle at left labeled title, then the Detail band with the columns last _ name, first _ name, phone, and fax in the positions where the data values will be displayed. Below this are unexpanded bands for Trailer group title, Summary, and Footer.

NoteAbout report bands The design version of the report that you see in the Design view divides the report into bands of information.

The header band contains heading information and is located at the top of each page.

The detail band contains the retrieved data.

The summary band contains summary information that applies to the entire report and is located at the end of the report.

The footer band contains information to be located at the bottom of every page, such as a page number.

For groups, the group header band and group trailer band contain information for the group.

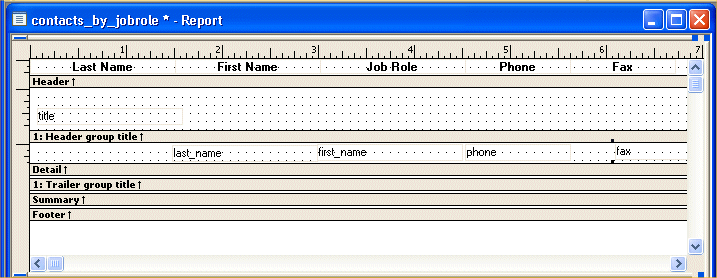
  1. Move the pointer to the gray bar entitled 1: Header group title (where the black dot is) until you see a double-pointed arrow
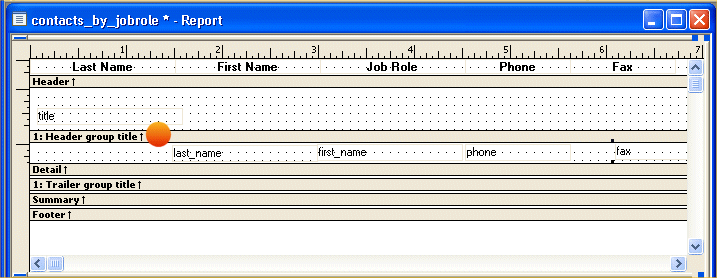
    Shown is the  Design view for contacts _ by _ job role.  The text for the column headers is displayed across the top in the Header band. Below them is the Header group title band with a large black dot left of center.
  2. Drag the band down about 4 to 6 grid dots.

    (To drag, press and hold the left mouse button, move the mouse, then release the mouse button.)
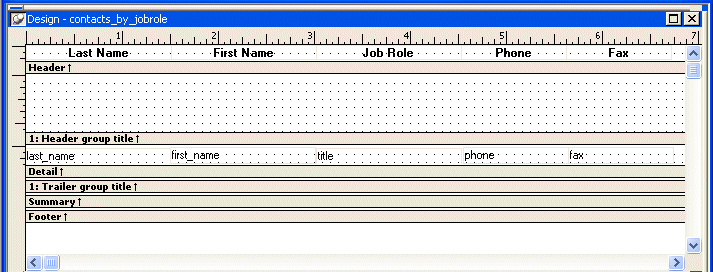
    Shown is the  Design view for contacts _ by _ job role.  The text for the column headers is displayed across the top in the Header band. Below them is the Header group title band, which has been expanded to show a grid of five rows of dots.
  3. Move the pointer to the title column and drag it into the band for the group header.

    Put it near the bottom of the band and on the left as shown.
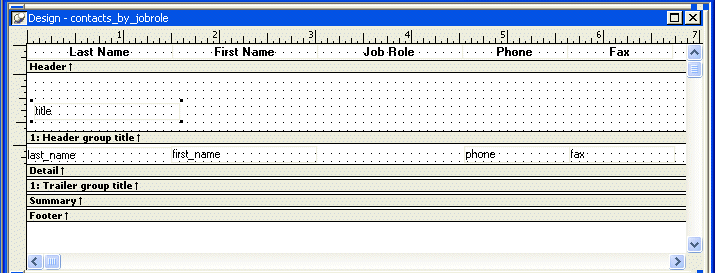
    Shown is the  Design view for contacts _ by _ job role.  The text for the column headers is displayed across the top in the Header band. Below them is the Header group title band, which has been expanded to show a grid of five rows of dots. A rectangle at the left of the grid surrounds the word title.
  4. With the title column still selected, select the bold check box and the italic check box on the Font tab of the Properties view.
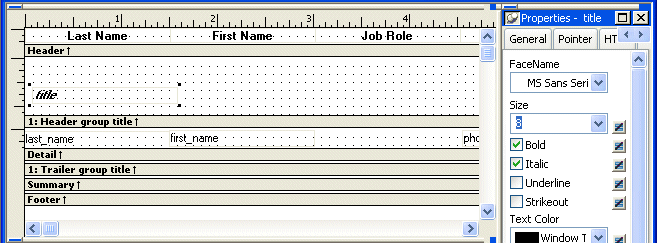
    Shown is the  Design view for contacts _ by _ job role.  The text for the column headers is displayed across the top in the Header band. Below them is the Header group title band, which has been expanded to show a grid of five rows of dots. A rectangle at the left of the grid surrounds the word title, which displays in bold and italic type.

    This makes the job role (title) stand out in the report.

  5. Look at the Preview view.

    You see the report and its data.
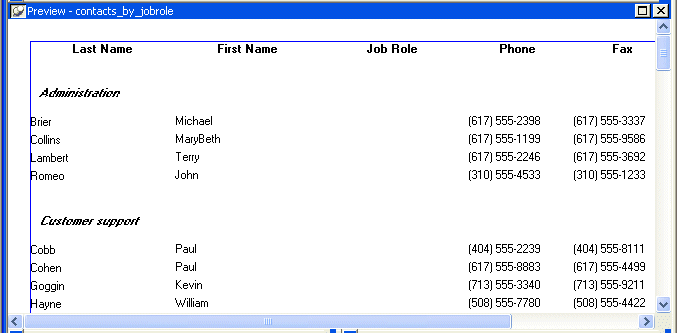
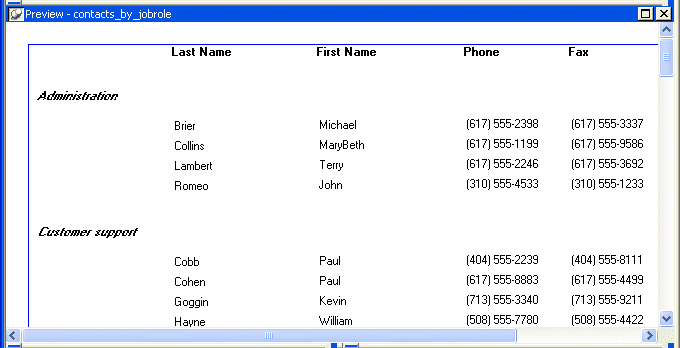
    Shown is the Preview view of the contacts _ by _ job role report. Under its columns for Last Name, First Name, Job Role, Phone and Fax are rows of data grouped under the titles Administration and then Customer support. The titles appear in bold and italic type.

    Notice that the value of the title column appears only once for each group. This is because the title column is now located in the group header band.

    The Preview view is helpful for identifying problems. Notice that the header Job Role is still present even though there is no longer a column in the detail band. Next you delete the header.

  6. Click the text Job Role in the header band.
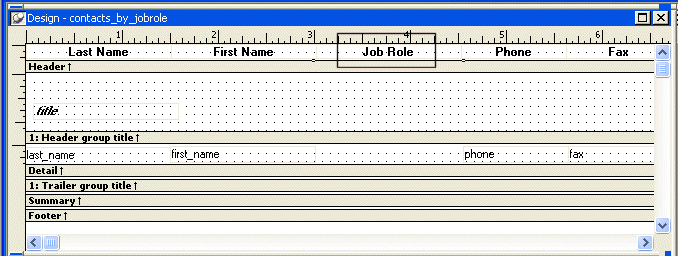
    Shown is the  Design view for contacts _ by _ job role.  The text for the column headers is displayed across the top in the Header band. The Job Role text box is circled.
  7. Press the Delete key.

    Shown is the  Design view for contacts _ by _ job role.  The text for the column headers is displayed across the top in the Header band. A blank area appears where the Job Role text box had been.
  8. Drag the First Name and Last Name text boxes in the header band to the right to fill the empty space.
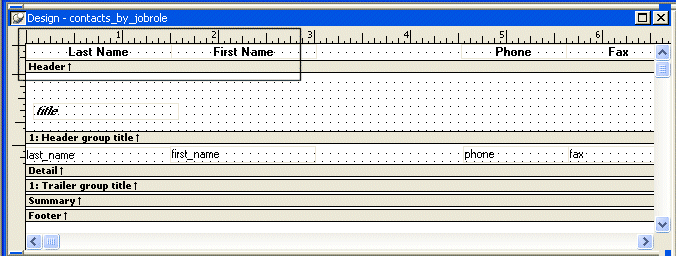
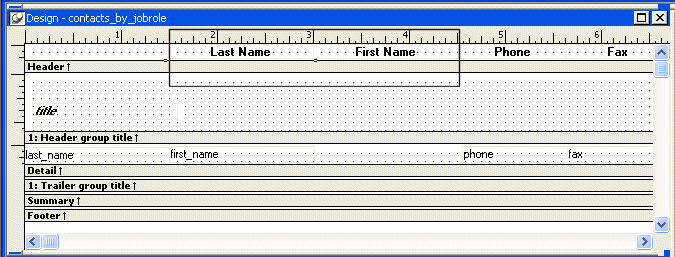
    Shown is the  Design view for contacts _ by _ job role.  The text for the column headers is displayed across the top in the Header band. The Last Name and First Name text boxes are circled. Next to them is the blank area where Job Role had been, and then Phone and Fax.Shown is the Design view for contacts _ by _ job role.  The text for the column headers is displayed across the top in the Header band. The Last Name and First Name text boxes have shifted to the right, next to Phone and Fax.
  9. Drag the first_name and last_name columns in the detail band to the right to fill the empty space.
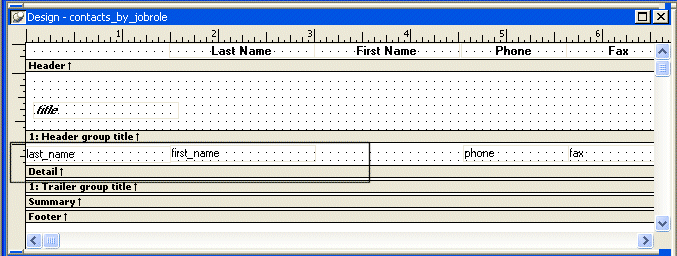
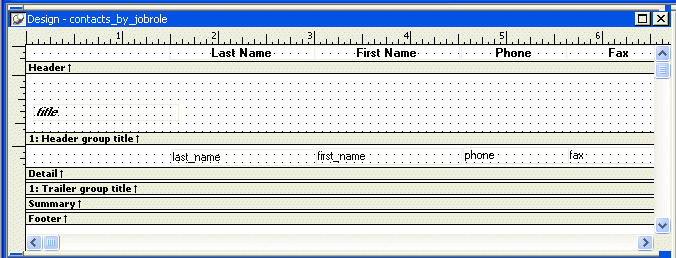
    Shown is the  Design view for contacts _ by _ job role.  The text for the column headers is displayed across the top in the Header band. Below them are the columns in the detail band. The last _ name and first _ name columns are circled. Next to them is a blank area, then phone and fax.Shown is the  Design view for contacts _ by _ job role.  The text for the column headers is displayed across the top in the Header band. Below them are the columns in the detail band. The last _ name and first _ name columns are circled. They have been moved right to fill the blank area. Phone and fax are to their right.

    You make one final visual improvement now by left-aligning the text in the column headers.

  10. Choose Edit>Select>Select Text from the menu bar.

    This selects all the headers. It might be difficult to see that they are selected because the band is so narrow.

  11. Click the left justification button on the StyleBar.

    If your headers are not already bold, click the Bold button.

    All the headers become left justified (and bold).
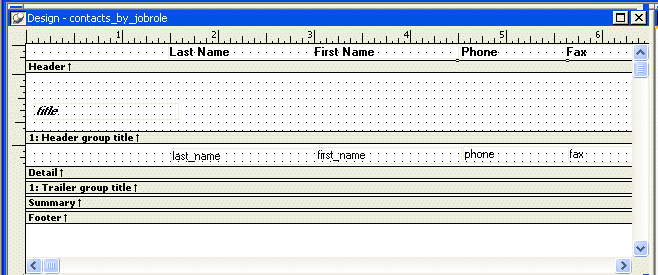
    Shown is the  Design view for contacts _ by _ job role.  The text for the column headers is displayed across the top in the Header band. It is now left justified and bold.
  12. Look at the Preview view.

    The Preview view shows the contacts _ by _ job role report with the changes that you made in the previous steps. The Job Role column is gone, the titles of the columns are bold and left justified, and they are aligned properly with the data in the rows.

Add a title and date

Now you add a title and date to the header band. They will be at the top of each page.

  1. Move the pointer to the gray bar marked Header and drag it down about 10 grid dots.
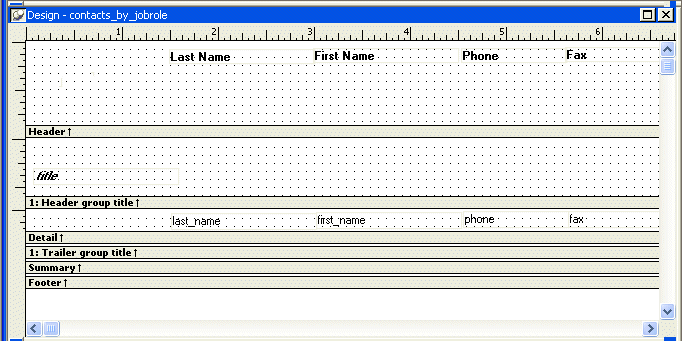
    Shown is the  Design view for contacts _ by _ job role.  The text for the column headers is displayed across the top in the Header band, which has been expanded to show a grid of about ten rows of dots.
  2. Choose Edit>Select>Select Text from the menu bar (or use lasso selection).

    This selects all the headers.

  3. Drag all the headers down close to the gray band.

    This leaves room for the title.
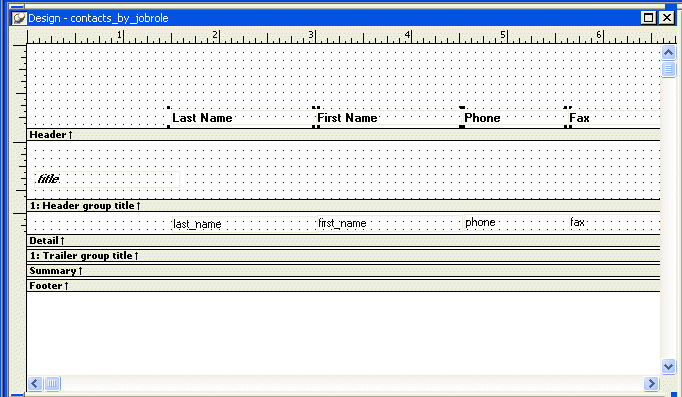
    Shown is the  Design view for contacts _ by _ job role.  The text for the column headers is now displayed across the bottom of the Header band, which has been expanded to show a grid of about ten rows of dots.
  4. Click the Text button in the Objects drop-down toolbar in the PainterBar (or select Insert>Control>Text from the menu bar).

    Move the point of the pointer above the First Name box and down one grid dot from the top of the page.

    Click the left mouse button.

    Text button

    This positions the text box for the title.
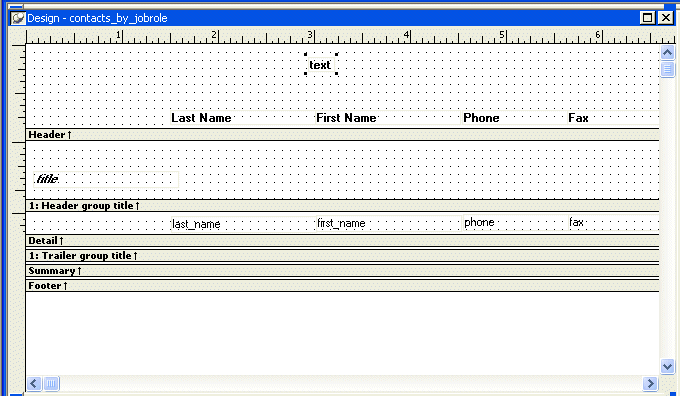
    Shown is the  Design view for contacts _ by _ job role.  The text for the column headers is displayed across the bottom of the Header band. Above the First Name header, a rectangle with the word text is selected and circled. It is positioned one grid dot down from the top of the page.
  5. Type My Contacts.

    Select 14 from the Size drop-down list on the Font tab in the Properties view to make the title bigger (enlarge the text box if necessary).
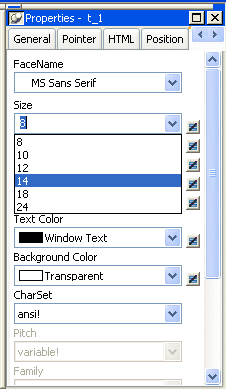
    Shown is the Font tab page of the Properties view. At top is the Face Name drop down with M S Sans Serif selected. Next is the Size drop down with size 14 selected.

    The title is now enlarged.

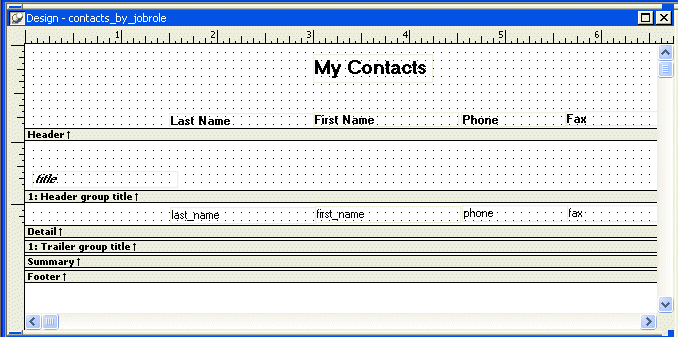
    Shown is the  Design view for contacts _ by _ job role.  The text for the column headers is displayed across the bottom of the Header band. Above the First Name header, a rectangle with the title My Contacts is displayed in 14 point type.
  6. Select Insert>Control>Today( ) from the menu bar.

    Move the point of the pointer to the upper-left corner.

    Click.

    This places a computed field in the report. The computed field is for today’s date.
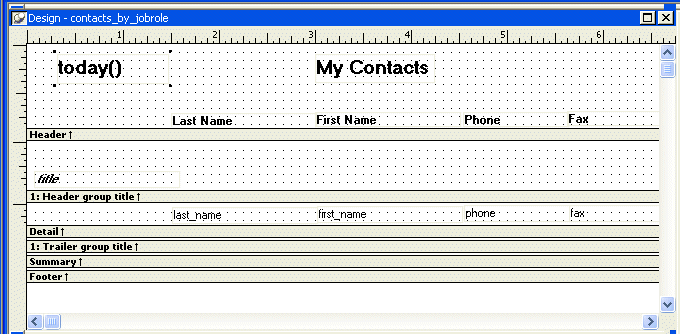
    Shown is the  Design view for contacts _ by _ job role.  The text for the column headers is displayed across the bottom of the Header band. Above the First Name header, a rectangle with the title My Contacts is displayed in 14 point type. At far left is a rectangle around the text today ( ).
  7. Look at the Preview view.

    Your report now has a title and today’s date.
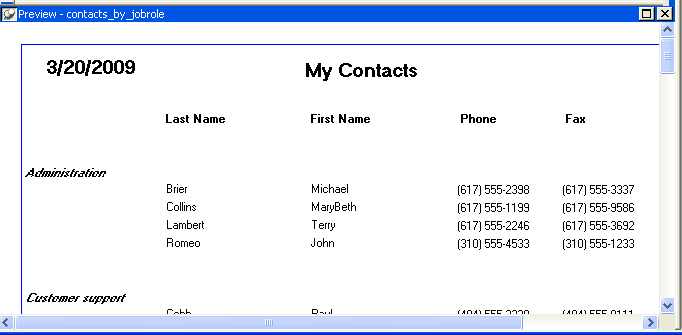
    Shown is the Preview view of the report. At top left is the date 2 / 11/ 99 and at center is the title My Contacts.

Add page numbers

Now you put page numbers in the footer band.

  1. Move the pointer to the gray bar marked Footer and drag it down about 4 grid dots.

    If necessary, use the scroll bar to make room at the bottom of the Design view. Dragging down the footer bar makes space for the page number in the footer band. The page number is another computed field.
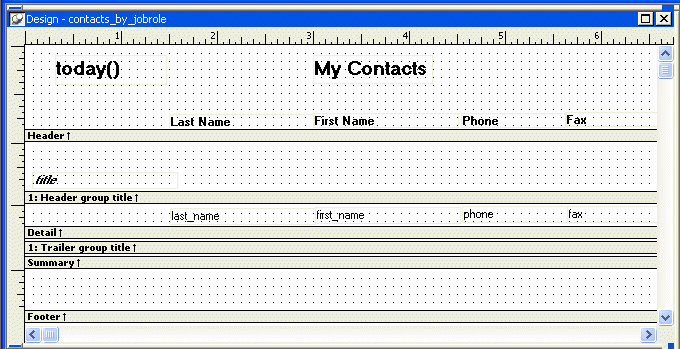
    Shown is the  Design view for contacts _ by _ job role.  The date, title, and text for the column headers is displayed in the Header band. Next is a Header group title band, then the Detail band, where the names of the columns appear in the positions where the data values will be displayed. Below this are a Trailer group title band and Summary and Footer bands. The Footer band has been expanded to show a grid of four rows of dots.
  2. Select Insert>Control>Page n of n from the menu bar.

    In the footer band, move the pointer to the center and down 2 grid dots. Click.

    Select a different font size (10) in the Properties view, Font page.

    This places a computed field for page numbers.
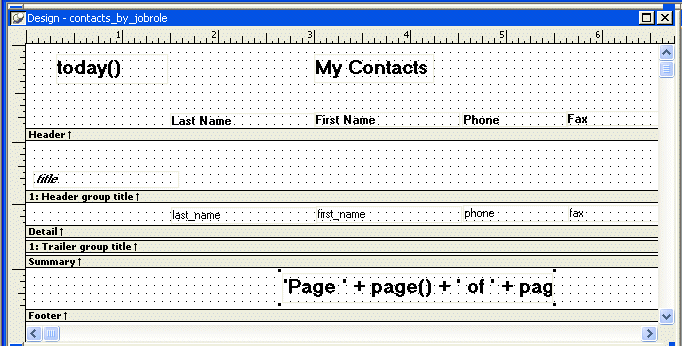
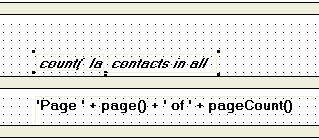
    Shown is the  Design view for contacts _ by _ job role.  The Footer band has been expanded and it contains the computed filed ’ Page ’ + page ( )  + ’  of ’ _ page Count ( ) .
  3. Look at the Preview view.

    Click the scroll bar until you move to the bottom of the page.

    You now have a page number on your report.
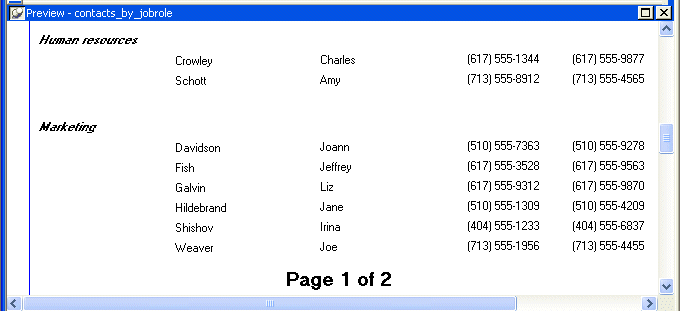
    Shown is the bottom of the first page of the report in Preview view. It displays the text Page 1 of 2.

Add a count of the total number of contacts

Now you add a count of the total number of contacts you have to the end of the report. You put the information in the Summary band, which means it prints at the end of the report.

Like the date and page number, the count is a computed field, only this time, you create it yourself.

  1. Move the pointer to the gray strip marked Summary for the summary band and drag it down about 6 grid dots.

    This makes space for the total number of contacts, which is a computed field.
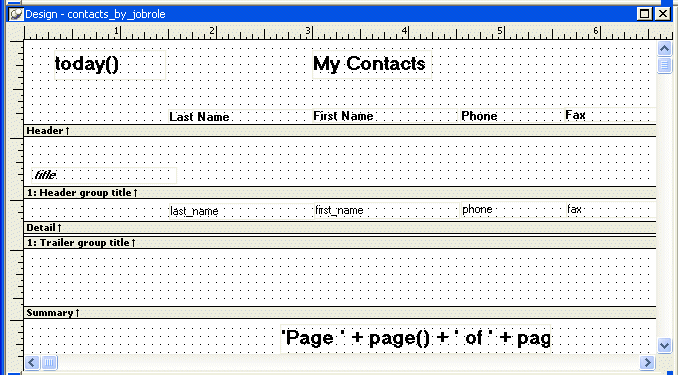
    Above the Footer band at the bottom of the Design view is the Summary band, which has been expanded to show a grid of 6 rows of dots.
  2. Select Insert>Control>Computed Field from the menu bar.

    In the summary band, move the point of the pointer to the center and down 4 grid dots.

    Click.
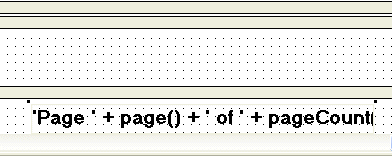
    Shown above a section of the Footer band at the bottom of the Design view is the grid of the Summary band, with a large black dot at center and four dots down.

    This sets the position for a computed field that you use for the total number of contacts. The Modify Expression dialog box displays.

  3. In the Functions box, click count(#x for all).

    Your dialog box should look like this. The placeholder for what to count is highlighted.
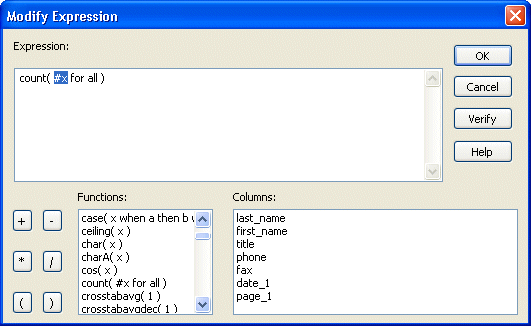
    Shown is the Modify Expression dialog box with an Expression box at top that displays the expression count ( # x for all ). Below it are boxes listing Functions and Columns.
  4. In the Columns box, click last_name.

    This selects the last_name column to apply the count function to. You are going to count all the last names to find out how many contacts you have in the report.
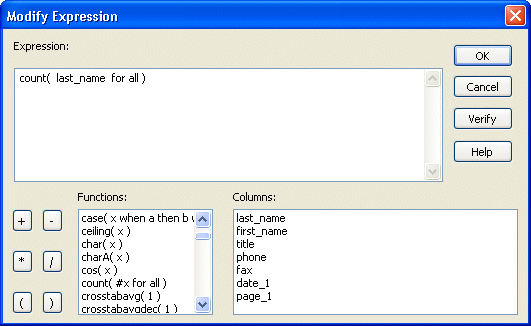
    Shown is the Modify Expression dialog box with the Expression box at top displaying the expression count ( last _ name for all ).
  5. Click Verify.

    You should get the message box stating that your expression is valid.

    Shown is a message box titled Report with an exclamation point icon and the text "Expression is OK."
  6. Click OK to close the message box.

    Click OK to complete the definition of the expression for the computed field.

    The computed field is in place.
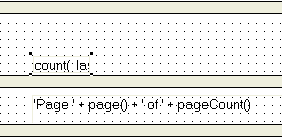
    Shown is a section of the Footer band from the bottom of the Design view and above it is the grid of the Summary band. The computed field count ( last _ name for all ) is partially visible in the Summary band where the large black dot was positioned earlier in the lesson.
  7. Select Insert>Control>Text from the menu bar.

    Position the pointer to the right of the computed field and click.

    Type contacts in all.

    Drag the text box to line it up with the computed field.
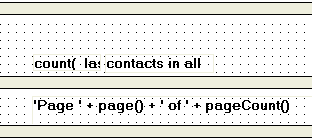
    Shown is a section of the Footer band from the bottom of the Design view and above it is the grid of the Summary band. The computed field count ( last _ name for all ) is partially visible in the Summary band and to its right is the text " contacts in all ".
  8. Select the computed field and the text using lasso selection.

    On the Font page of the Properties view, select 10 for the font size and select the Bold check box and the Italic check box.

    Shown is a section of the Footer band from the bottom of the Design view and above it is the grid of the Summary band. The computed field count ( last _ name for all ) is partially visible in the Summary band and the text contacts in all appears to its right. Both are in 10 point bold and italic type.
  9. Look at the Preview view.

    Use the scroll bar until you see the end of your report.

    The summary band of your report now shows the total number of contacts in the report. The number you see may not be 60. The number depends on the contacts currently in your database.
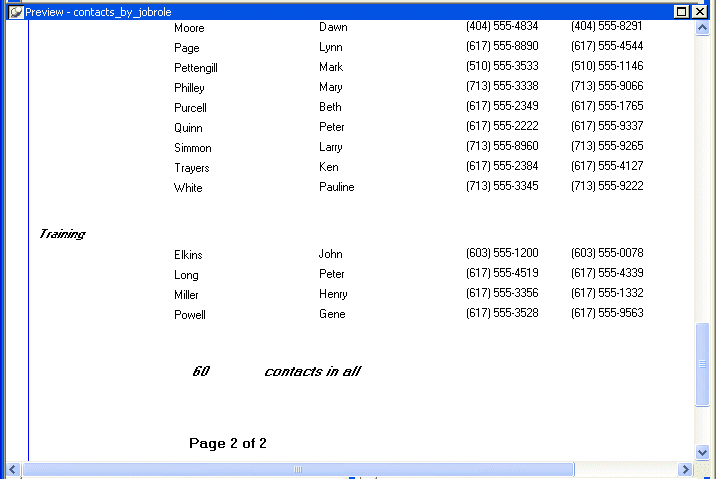
    Shown is the Preview view. At the bottom of the page shown is the sample text "61 contacts in all" in 10 point bold and italic text.