![]()
Run the tutorial in PowerBuilder
Make changes for a .NET Web Forms application
Create a .NET Web Forms target and project
> Deploy a .NET Web Forms project
Run the application from a Web browser
After you create a Web Forms project, you must deploy it to an IIS server before you can run or debug the Web Forms application. However, before you deploy a Web Forms application, you can modify the runtime global properties for the application. In this lesson you change a global property for page navigation in the application’s DataWindow controls before you deploy the application.
In the System Tree, expand the PBTutor_WebForm target and the pbtutor.pbl under that target.
Note that the pbtutor.pbl and tutor_pb.pbl libraries are listed under both the PBTutor target and the PBTutor_WebForm target. In the PBTutor_WebForm target, the only project that displays in pbtutor.pbl is the .NET Web Forms project that you just created.
Although this library is shared with the PBTutor target listed in the current workspace, the new project (p_pbtutor_webform) does not display under PBTutor in the System Tree. In the PBTutor target, you still see the projects for creating a standard executable file and a Web DataWindow container.
Right-click the p_pbtutor_webform project in the System Tree and select Edit from the pop-up menu.
The .NET Web Forms project opens in the Project painter.
Click the Configuration tab and make sure the “System defined configuration settings” radio button is selected.
Select the PBDataWindowPageNavigatorType global property in the Key column of the Configuration tab list view, and click Edit.
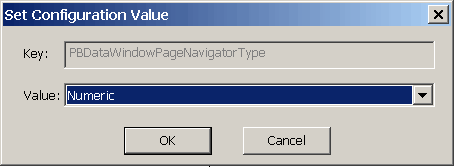
The Set Configuration Value dialog box displays.
In the Set Configuration Value dialog box, change the Value drop-down list entry to Numeric and click OK.
You change the navigator control type from NextPrev to Numeric.

For a description of page navigation types, see the chapter on best practices in the Deploying Applications and Components to .NET book.
Click the project’s Run tab and note the default values in the Application and Arguments field.
The default application should be the Internet Explorer browser and the default argument should be the URL for the Web Forms application after deployment.

Note the selections on the other tab pages of the project.
You selected most of the properties for the project in the target wizard. The project properties sheet also has default selections for other properties that you did not set in the wizard. For this tutorial, you do not need to modify these default settings. These settings are described in Chapter 2 of the Deploying Applications and Components to .NET book. You can also right-click on a Project painter tab page and select Help from the pop-up menu for additional property descriptions.
Select Design>Deploy Project from the Project painter menu or click the deploy icon in the PainterBar.
You build and deploy the project to the local IIS server. A success message displays on the Default tab of the Output window. The Unsupported Features tab contains a list of properties that are not supported in the .NET Web Forms environment. The unsupported features listed for this tutorial application mostly have to do with toolbar and menu styles and do not affect the main functionality of the application.
Close all open painters.