![]()
![]()
![]()
![]()
![]()
Run the tutorial in PowerBuilder
Make changes for a .NET Web Forms application
> Create a .NET Web Forms target and project
Deploy a .NET Web Forms project
Run the application from a Web browser
You can use the PowerBuilder .NET Web Forms target wizard to create a .NET Web Forms target based on an existing PowerBuilder application target. In this tutorial, you create a .NET Web Forms target based on the PowerBuilder tutorial target. You also create a .NET Web Forms project that you will use to deploy the Web Forms application.
Select File>New from the PowerBuilder menu, and click the Target tab.
The Target page of the New dialog box displays.
Select the .NET Web Forms Application icon and click OK.
The first page of the wizard tells you what the wizard can do.
Click Next to display the second wizard page, then select the radio button to “use the library list and application object from an existing target” and click Next again.
The Choose a Target page of the wizard displays. It contains a list box for targets of the current workspace. The PBTutor target is the only target in the tutorial workspace at this time.
Make sure PBTutor is selected, and click Next.
The Specify Target File page displays. It lists a default name for the new Web Forms target based on the name of the existing target file that you selected. The default target file name is pbtutor_webform.pbt.
Click Next to use the default target name.
The Specify Project Information page displays. It lists a default name for the new Web Forms project. The default project name is p_pbtutor_webform. The wizard page also lets you select the target library where you save the new project object. By default, the project object is saved in the main library of the new target—in this case, pbtutor.pbl.
Click Next again to accept the default values for project name and library.
The Specify Settings for .NET Web Forms Application page displays default values for the following fields:
.NET Web Forms parameter |
Default value |
|---|---|
Web application name |
pbtutor |
Application URL preview |
http://<ServerName>/pbtutor, where <ServerName> is a placeholder for the name of the IIS server |
Accept the default values by clicking Next.
The Specify Resource Files / Directories page of the wizard displays.
Click the Add Files button.
The PowerBuilder Tutorial application uses some image files that must be selected for deployment with the Web Forms application.
The Choose Resource Files dialog box displays.
Select All Files from
the Files of Type drop-down list and navigate to the Tutorial directory.
The Tutorial directory is a sibling of the Web Forms directory under Sybase\PowerBuilder 12.5.
Hold down the Ctrl key and select the tshirtw.jpg, tutsport.bmp, and tutorial.ico files,
and click Open.
The selected resources are added to the page as shown below:
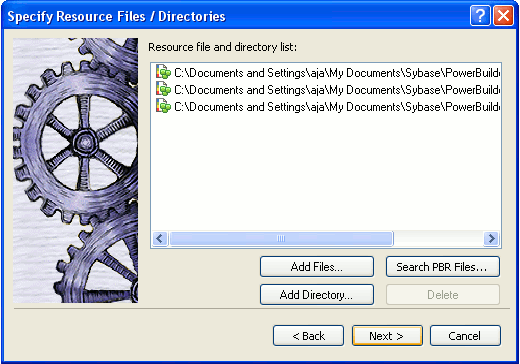
Click Next to include the selected resource files for deployment with the tutorial Web Forms application.
The Specify Win32 Dynamic Library Files page of the wizard displays. The tutorial application does not use any external DLLs.
Click Next twice to display the Specify Deployment Options page of the wizard.
You do not include any extra JavaScript files on the Specify JavaScript Files page of the wizard, because none are needed for the tutorial application.
The Specify Deployment Options page displays:
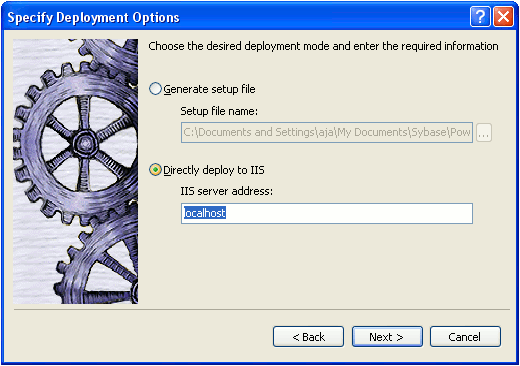
Accept localhost for the IIS server address or change this to the formal name for the local IIS server, then click Next.
In this tutorial, you deploy the Web Forms project directly to the local IIS server. After you click Next, the Summary page of the wizard displays.
Click the Finish button.
The .NET Web Forms Application wizard creates a .NET Web Forms target named PBTutor_WebForm that uses the library list from the pbtutor.pbl library. It also creates a .NET Web Forms project named p_pbtutor_webform.
