Attaching Extensions to a Model

You can attach an extension file (.xem) to your model at the creation of the model by clicking the Select Extensions button on the New Model dialog. You can subsequently attach an extension file to your model at any time from the List of Extensions.

Note:

You should never modify the original extensions shipped with PowerDesigner. To create a copy of the file to modify, open the List of Extensions, click the New tool, specify a name for the new file, and then select the .xem that you want to modify in the Copy from field.
  1. Select Model > Extensions to open the List of Extensions.
  2. Click the Import tool to open the Select Extensions dialog.
  3. Review the different sorts of extensions available by clicking the sub-tabs and select one or more to attach to your model.

    By default, PowerDesigner creates a link in the model to the specified file. To copy the contents of the extension file and save it in your model file, click the Embed Resource in Model button in the toolbar. Embedding a file in this way enables you to make changes specific to your model without affecting any other models that reference the shared resource.

  4. Click OK to return to the List of Extensions.

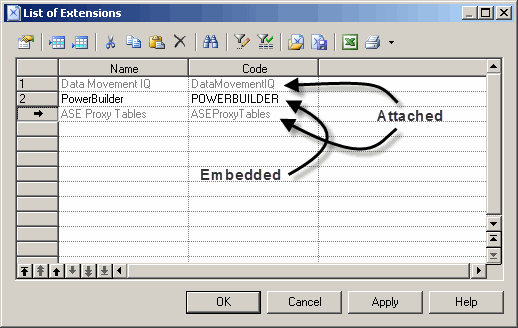
    Extensions - Attached Embedded

    Extension files listed in grey are attached to the model, while those in black are embedded in the model.

    Note:

    If you import an extension file and embed it in the model, the name and code of the extension may be modified in order to make it respect the naming conventions of the Other Objects category in the Model Options dialog.