Use the mouse with controls

Note

Now you move some of the controls in the report. Be sure not to save the changed report, because you will use the original report later. When you leave the Report painter, you are prompted to save changes. The instructions remind you to say no.

  1. Select Design>Options from the menu bar.

    The Report Options dialog box displays.
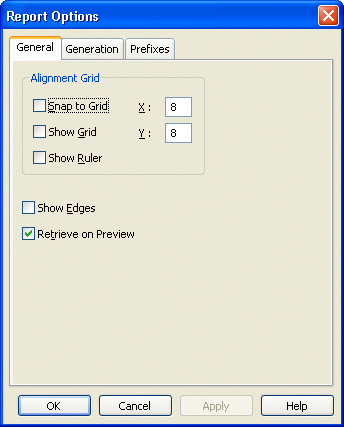
    Shown is the General tab page of the Report Options property sheet. At top is a group box labeled Alignment Grid with cleared check boxes for Snap to Grid, Show Grid, and Show Ruler, and text boxes labeled  X and Y with the entry 8 displayed in each. Next are a cleared check box labeled Show Edges and a selected check box labeled Retrieve on Preview.

    In this dialog box, you turn on some design options that make it easier to work with controls in reports.

  2. Select the Show Grid check box.

    Select the Show Ruler check box.

    Select the Show Edges check box.
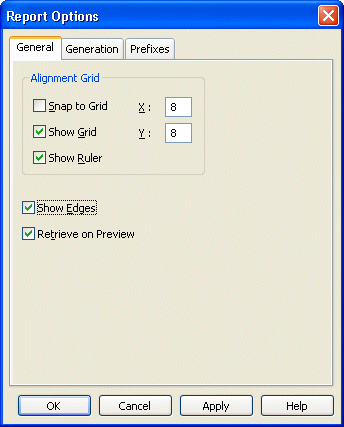
    Shown is the General tab page of the Report Options property sheet. At top is a group box labeled Alignment Grid with a cleared check box for Snap to Grid, selected check boxes for Show Grid and Show Ruler, and text boxes labeled  X and Y with the entry 8 displayed in each. Next are selected check boxes labeled Show Edges and Retrieve on Preview.
  3. Click OK.

    Now edges display around the controls, and a grid and ruler display in the Report painter Design view.
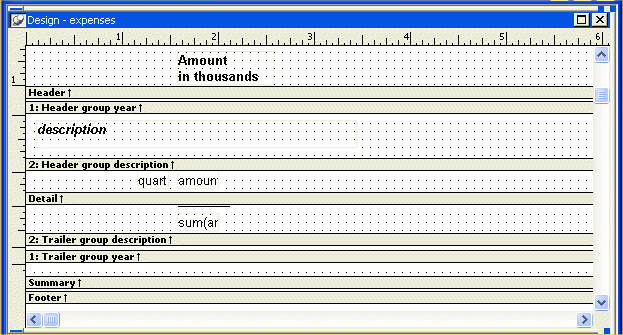
    Shown is the Report painter Design view with rectangular edges around the controls, a grid of dots behind them, and rulers along the left and top edges.
  4. Click the text control with the text Expenses for.

    Black boxes in the corners mean the control is selected.

    Shown is the control called Expenses for with a rectangle drawn around it and black boxes in the corners of the rectangle.
  5. Press and hold the Ctrl key.

    Click the year box and the Amount in thousands box.

    Release the Ctrl key.

    Now you have selected all three controls.

    Shown are black boxes in the corners of the rectangles  that surround the text controls Expenses for, year, and Amount in thousands.
  6. Press and hold the Left Arrow key until the controls are on the far left of your screen.

    Release the key.

    Shown are black boxes in the corners of the rectangles  that surround the text controls Expenses for, year, and Amount in thousands. All the controls have shifted to the left side of the screen but have kept the same position relative to one another.
  7. Move the pointer to the word Expenses.

    Make sure the controls are still selected.

    Press and hold the left mouse button.

    Drag all the controls to the right.

    Release the mouse button.

    While you are dragging, gray boxes show the current position of the controls.

    The controls appear as they did in the previous illustration, but also shown are gray outlines of boxes that indicate the positions to which you have currently dragged them.

    When you release the mouse button, you drop the controls where the pointer is currently positioned. Notice that the controls are still selected as indicated by the little black boxes.

    The controls have shifted to the positions indicated by the gray outlines of the previous illustration. They still have black boxes in the corners of their rectangles.
  8. Click in an unused area to deselect the controls.

    The controls are no longer selected (the black boxes are gone).

    The controls are shown in their new positions on the right, and they no longer  have black boxes in the corners of their rectangles.
  9. Move the pointer to the position shown here by the big black dot.

    The controls appear in their previous positions on the right, and a large black dot is shown at the top of the grid and to the  left of middle.
  10. Press and hold the left mouse button.

    Drag the mouse diagonally down and to the right until the box surrounds or touches all three controls.

    The controls are surrounded by a large gray rectangle that extends from the position of the large dot in the previous illutration down to the rightmost corner of the grid.
  11. Release the mouse button.

    All the controls are selected. This is called lasso selection. You can use this lasso technique to select many controls quickly. Then you can move them all together or change something about them all at once.

    All three contols have black boxes at the corners of their individual rectangles.
  12. Press the Delete key.

    The three selected controls are deleted, but you really did not mean to delete them.

    The controls have disappeared and the grid is empty.
  13. Select Edit>Undo Control Delete from the menu bar.

    The deletion is reversed.

    The controls are shown in the grid in the positions where they had appeared before the deletion.
  14. Select File>Close from the menu bar.

    InfoMaker displays a message box to see whether you want to save the changes you have made to the expenses report. You do not want to save changes. You use this report later in the Graph tutorial.

    Shown is a message box titled Report. It has a question mark icon at top left and the text "Save changes to" followed by the path of the library tutor _ i m dot pibble ( expenses ).
  15. Click No.

The Report painter closes. Now you are ready to learn how to create a form.