Create a new Android project in SAP Mobile WorkSpace. Add library resources to the project and set other application properties.
- In the Creates a new Android Application page of the New Android
Application wizard, use these values and then click Next.
- Application Name – enter SMP101Android.
- Project Name – enter SMP101Android.
- Package Name – enter com.mycorp.smp101.android.app.
- Minimum Required SDK – accept the default.
- Target SDK – select the Android SDK used for the tutorial.
- Compile With – select the Android SDK used for the tutorial.
- Theme – accept the default.
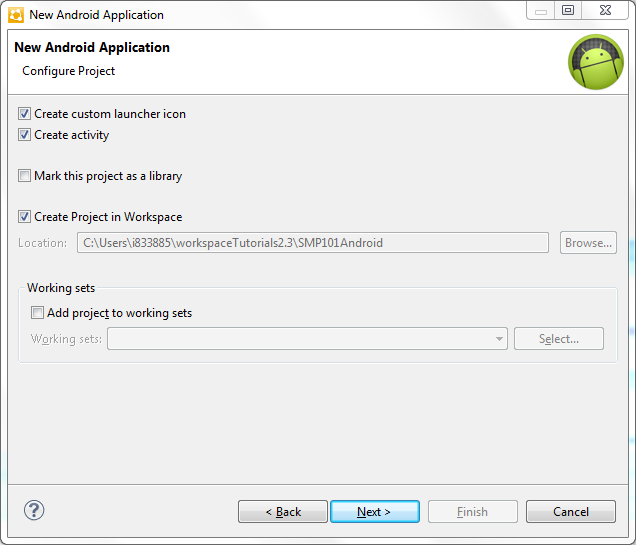
- In the Configure Project page, use these values and click then
Next.
Option Description Create custom launcher icon Select this option to specify an icon. Create activity Select this option to choose a template to use as the basis for the project. Create Project in Workspace Select this option to create the project in the default workspace. You can unselect the option to create the project in another location that you specify.
Mark this project as a library Unselect this option. You are not creating a library project.
Add project to working sets Unselect this option. Working sets limit the resources shown in the WorkSpace Navigator and Enterprise Explorer. This project is small and so working sets are not needed. See SAP Mobile WorkSpace: Mobile Business Object Development to learn more about working sets.
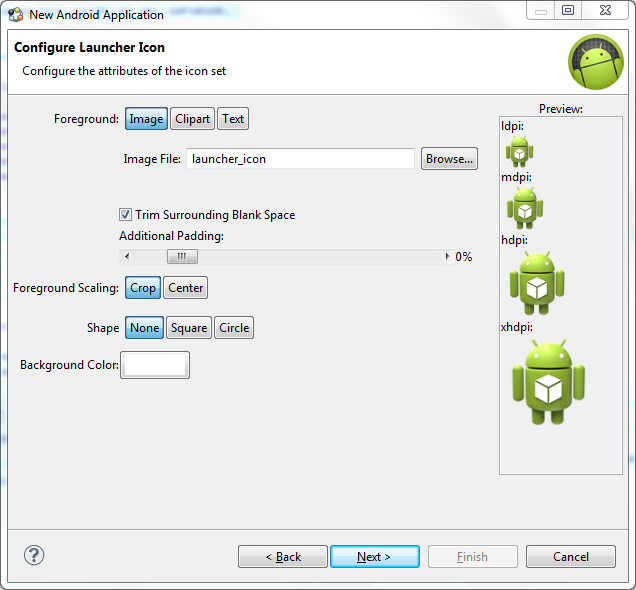
- In the Configure Launcher Icon page you can define a custom image
file to use as the launcher icon for the application. Accept the default settings and
click Next.
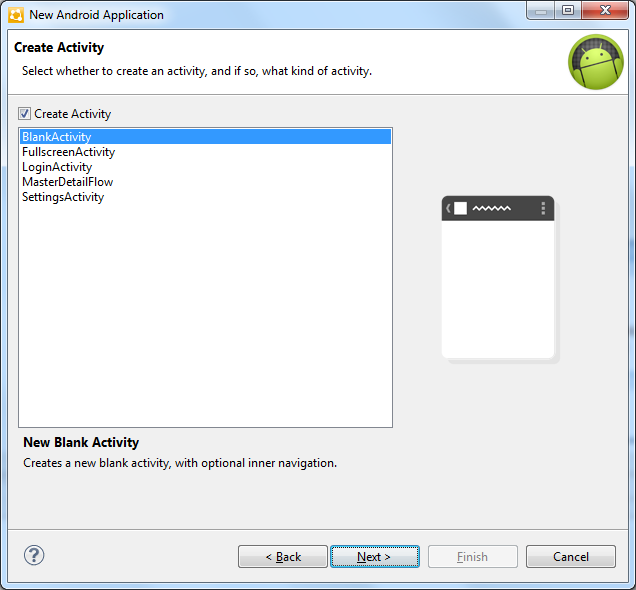
- In the Create Activity window select Create Activity, then select BlankActivity, and click Next.
Choosing a template creates a simple Android application that you can use for your project.
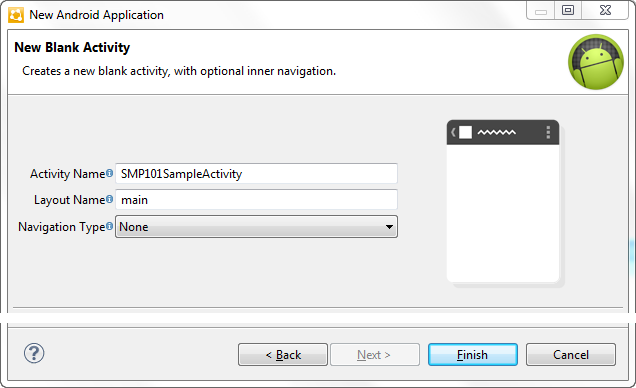
- In the New Blank Activity window, use these values and click Finish.
Option Description Activity Name Enter SMP101SampleActivity. Layout Name Enter main. Navigation Type Accept the default of None.
The BlankActivity template with Navigation Type of None creates an application that follows the Android Design guidelines. It includes a title bar, an options menu, and a basic layout.