Importing Objects from Excel Files

The Excel Import extension allows you to launch a wizard that guides you through mapping tables of objects to be modeled from Excel files (v2003 and higher) to PowerDesigner objects and properties, and to import the contents of the files to your model. For example, you could create a list of database tables in an Excel file, specifying any appropriate properties, and then import them into a PDM.

You can import any number of different types of objects from a single Excel file, so long as they can all be imported to a single type of model. Each type of object should be listed in its own table on a separate worksheet of the Excel file. Each row in a table represents one object to import, and each column represents one property (an attribute or list of associated objects) of the object.

In the following example, the Excel file contains separate tables of objects containing tables, keys, references, and reference joins. The Table sheet, contains a list of three table to import. The columns Name, Owner, and Columns will be imported as the corresponding table properties:


Excel Import Example Table

For detailed information about how to organise the file, see Preparing Your Excel File for Import. An example Excel file for importing into a PDM is provided at install_dir\Examples\excel_import.xls.

You can create a new model by importing objects from an Excel file or import your objects into an existing model.

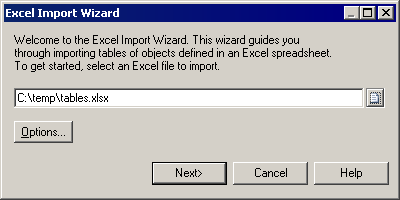
  1. Open the Excel Import Wizard:
    • To a create a new model, select File > Import > Excel File. Specify the kind of model you want to create in the New Model dialog (see Creating a Model), and then click OK.
    • To import objects into an existing model, attach the Excel Import extension (available for all model types on the Import subtab of the Select Extensions dialog) to your model (see Attaching Extensions to a Model), then right-click the model in the Browser, and select Import Excel File.

    excel-import-file
  2. Click the Select File tool, browse to and select the Excel file to import, and click Open to return to the wizard.
  3. [optional] Click the Options button to open the Import Options dialog (see Excel Import Options), specify any appropriate options and then click Close to return to the wizard.
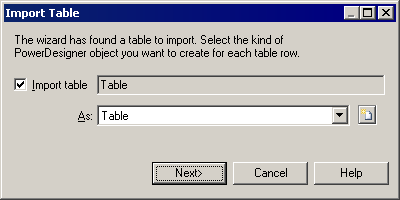
  4. Click Next to go to the Import Table page:

    excel-import-table
    On this page, you must either:
    • Select a PowerDesigner object type to import the table lines As from the list.
    • Select to import the table lines as a new object type by clicking the New tool to the right of the list to open the New Object Type dialog.
    • Deselect the check box to not import this table. When you click Next, PowerDesigner will search the Excel file for another table of objects to import.
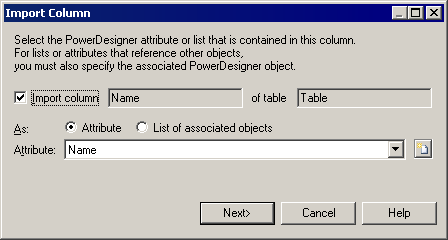
  5. Click Next to go to the Import Column page:

    excel-import-column
    On this page, you must either:
    • Select a PowerDesigner attribute to import the table column as from the Attribute list. To create a new attribute, click the New tool to the right of the list.
    • Select the List of associated objects radio button to import the column as a list, selecting the List to use and (if the list can contain multiple types of objects), the appropriate Object. To create a new list, click the New tool to the right of the list.
    • Deselect the check box to not import this table column.
  6. Click Next. The wizard will search for the next column in the table and if there is none (or if you have selected to skip importing the table), will search for the next sheet containing a table of objects.
    When all the sheets and all the columns have been processed, the import will begin. You can stop the import at any time by clicking the Cancel button in the bottom-right corner. When it is complete, a dialog will appear showing how many objects have been created. Click OK to return to your model.
In addition to the objects that you have created, PowerDesigner creates an Excel Import object that contains your import parameters, along with a Table Mapping object for each of the imported tables, which lists the column mappings used. Right-click the Excel Import Object to access the following commands:
  • Import - to re-import your file based on the options and mappings you have already defined. All the objects will be reimported, overwriting any existing objects based on their names. If you have added new objects to your worksheet tables they will be added to the model, but any objects that you have deleted from your worksheet will not be deleted from the model.
  • Change Mappings - to re-import your file via the Excel Import Wizard in order to modify your table or column mappings.
  • Change Options - to change the import options preparatory to re-importing with the command Import
  • Properties - to open the Excel Import properties sheet.
Note: Advanced users may want to modify the Excel Import XEM to enable the import of data from other external file types. For detailed documentation about its implementation, open the XEM (which is located at install_dir\Resource Files\Extended Model Definitions\ExcelImport.xem in the Resource Editor and read the detailed commentary on the root element.