Connecting to a Repository

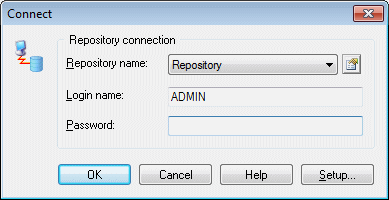
Before you can connect to a repository, an administrator must install and configure it and provide you with a user name and password, and you must have created a repository definition.

For information about creating a repository definition, see Accessing the Repository.

  1. Select Repository > Connect (or double-click the root in the Browser Repository tab) to open the Connect dialog.

    Repository - Connect
  2. Select a repository to connect to and enter your login name and password. To review the repository definition, click the Properties tool.
  3. Click OK to connect.

    The contents of the repository are displayed in the Repository tab of the Browser. The root node displays the name of the repository and your login.

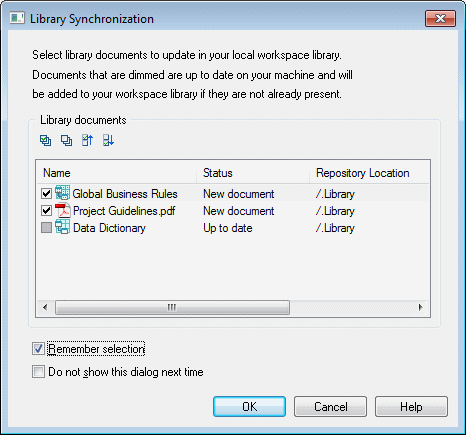
    If any of the local copies of Library files (see The Library) are not up to date, the Library Synchronization dialog will open to invite you to update them:


    Library - Synchronization Dialog
  4. Select documents to update in your local library folder. Select Remember selection to retain the same selection next time you connect to the repository and select Do not show this dialog next time to have the library silently update from now on.
    Note: You can display the Library Synchronization dialog and change your settings at any time by selecting Repository > Synchronize Library.
  5. Click OK to perform any requested updates and begin modeling.
    Note: To disconnect from the repository, select Repository > Disconnect (or right-click the root in the Browser Repository tab and select Disconnect).