![]()
![]()
![]()
![]()
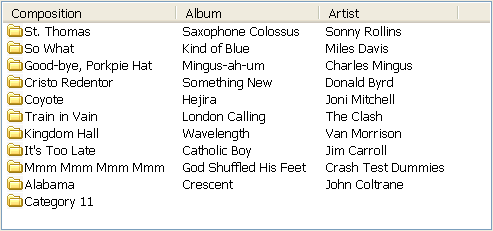
A ListView control allows you to display items and icons in a variety of arrangements. You can display large icon or small icon freeform lists, or you can display a vertical static list. You can also display additional information about each list item by associating additional columns with each list item:
ListView controls consist of ListView items, which are stored in an array. Each ListView item consists of a:
Picture index The number that associates the ListView item with an image
Depending on the style of the presentation, an item could be associated with a large picture index and a small picture index.
Overlay picture index The number that associates the ListView item with an overlay picture
State picture index The number that associates the ListView item with a state picture
For more information about ListView items, picture indexes, and presentation style, see the PowerBuilder Users Guide.
You add ListView controls to windows in the same way you add other controls: select ListView from the Insert>Control menu and click the window.
In the painter Use the Items property page for the control to add items.
Select the Items tab in the Properties view for the control.
Enter a name and a picture index number for each of the items you want to add to the ListView.
![]() Clearing all entries on the Items tab page
Setting the picture index for the first item to zero clears
all the settings on the tab page.
Clearing all entries on the Items tab page
Setting the picture index for the first item to zero clears
all the settings on the tab page.
For more information about adding pictures to a ListView control, see “Adding pictures to ListView controls”.
In a script Use the AddItem and InsertItem functions to add items to a ListView dynamically at runtime. There are two levels of information you supply when you add items to a ListView using AddItem or InsertItem.
You can add an item by supplying the picture index and label, as this example shows:
lv_1.AddItem ("Item 1", 1)
or you can insert an item by supplying the item’s position in the ListView, label, and picture index:
lv_1.InsertItem (1,"Item 2", 2)
You can add items by supplying the ListView item itself. This example in the ListView’s DragDrop event inserts the dragged object into the ListView:
listviewitem lvi
This.GetItem(index, lvi)
lvi.label = "Test"
lvi.pictureindex = 1
This.AddItem (lvi)
You can insert an item by supplying the ListView position and ListView item:
listviewitem l_lvi
//Obtain the information for the
//second listviewitem
lv_list.GetItem(2, l_lvi)
//Change the item label to Entropy
//Insert the second item into the fifth position
lv_list.InsertItem (5, l_lvi)
lv_list.DeleteItem(2)
PowerBuilder stores ListView images in four image lists:
Small picture index
Large picture index
State picture index
Overlay picture index
You can associate a ListView item with these images when you create a ListView in the painter or use the AddItem and InsertItem at runtime.
However, before you can associate pictures with ListView items, they must be added to the ListView control.
In the painter Use the Pictures and Items property pages for the control to add pictures.
![]() To add pictures to a ListView control:
To add pictures to a ListView control:
Select the Large Picture, Small Picture, or State tab in the Properties view for the control.
Select an image from the stock image list, or use the Browse button to select a bitmap, cursor, or icon image.
Select a color from the PictureMaskColor drop-down menu for the image.
The color selected for the picture mask appears transparent in the ListView.
Select a picture height and width for your image.
This controls the size of the image in the ListView.
Repeat the procedure for the:
Number of image types (large, small, and state) you plan to use in your ListView
Number of images for each type you plan to use in your ListView
In a script Use the functions in Table 9-3 to add pictures to a ListView image.
Function |
Adds a picture to this list |
|---|---|
AddLargePicture |
Large image |
AddSmallPicture |
Small image |
AddStatePicture |
State image |
Adding large and small pictures This example sets the height and width for large and small pictures and adds three images to the large picture image list and the small picture image list:
//Set large picture height and width
lv_1.LargePictureHeight=32
lv_1.LargePictureWidth=32

//Add large pictures
lv_1.AddLargePicture("c:\ArtGal\bmps\celtic.bmp")
lv_1.AddLargePicture("c:\ArtGal\bmps\list.ico")
lv_1.AddLargePicture("Custom044!")

//Set small picture height and width
lv_1.SmallPictureHeight=16
lv_1.SmallPictureWidth=16

//Add small pictures
lv_1.AddSmallPicture("c:\ArtGal\bmps\celtic.bmp")
lv_1.AddSmallPicture("c:\ArtGal\bmps\list.ico")
lv_1.AddSmallPicture("Custom044!")

//Add items to the ListView
lv_1.AddItem("Item 1", 1)
lv_1.AddItem("Item 2", 1)
lv_1.AddItem("Item 3", 1)
Adding overlay pictures Use the SetOverLayPicture function to use a large picture or small picture as an overlay for an item. This example adds a large picture to a ListView, and then uses it for an overlay picture for a ListView item:
listviewitem lvi_1
int li_index

//Add a large picture to a ListView
li_index = lv_list.AddLargePicture &
   ("c:\ArtGal\bmps\dil2.ico")

//Set the overlay picture to the
//large picture just added
lv_list.SetOverlayPicture (3, li_index)

//Use the overlay picture with a ListViewItem
lv_list.GetItem(lv_list.SelectedIndex (), lvi_1)
lvi_1.OverlayPictureIndex = 3
lv_list.SetItem(lv_list.SelectedIndex (), lvi_1)
Adding state pictures This example uses an item’s state picture index property to set the state picture for the selected ListView item:
listviewitem lvi_1

lv_list.GetItem(lv_list.SelectedIndex (), lvi_1)
lvi_1.StatePictureIndex = 2
lv_list.SetItem(lv_list.SelectedIndex (), lvi_1)
You can delete items from a ListView one at a time with the DeleteItem function, or you can use the DeleteItems function to purge all the items in a ListView. Similarly, you can delete pictures one at a time with the DeleteLargePicture, DeleteSmallPicture, and DeleteStatePicture functions, or purge all pictures of a specific type by using the DeleteLargePictures, DeleteSmallPictures, and DeleteStatePictures functions.
This example deletes one item and all the small pictures from a ListView:
int li_index
li_index = This.SelectedIndex()
This.DeleteItem (li_index)
This.DeleteSmallPictures ()
Hot tracking changes the appearance of items in the Listview control as the mouse moves over them and, if the mouse pauses, selects the item under the cursor automatically. You can enable hot tracking by setting the TrackSelect property to TRUE.
Setting either OneClickActivate or TwoClickActivate to TRUE also enables hot tracking. When OneClickActivate is TRUE, you can specify that either selected or unselected items are underlined by setting the UnderlineHot or UnderlineCold properties. All these properties can be set on the control’s general properties page or in a script.
The settings for OneClickActivate and TwoClickActivate shown in Table 9-4 affect when the ItemActivate event is fired.
OneClickActivate |
TwoClickActivate |
ItemActivate is fired when you |
|---|---|---|
TRUE |
TRUE or FALSE |
Click any item |
FALSE |
TRUE |
Click a selected item |
FALSE |
FALSE |
Double-click any item |
In PowerBuilder 7 and later releases, PowerBuilder uses Microsoft controls for ListView and Treeview controls, and the events that fire when the right mouse button is clicked are different than in earlier releases. These are the events that fire when the right mouse button is clicked in a ListView control:
Location |
Action |
Events fired |
|---|---|---|
On an item in the ListView |
Press right mouse button |
pbm_rbuttondown |
Release right mouse button |
pbm_lvnrclicked (stock RightClicked! event) pbm_contextmenu |
|
On white space in the ListView |
Press right mouse button |
pbm_rbuttondown pbm_lvnrclicked (stock RightClicked! event) pbm_contextmenu |
Release right mouse button |
pbm_rbuttonup pbm_contextmenu |
