Adding the Travel Request Screen

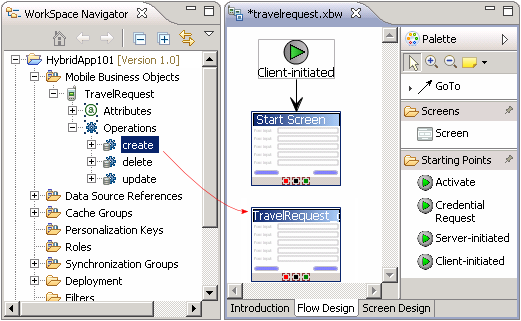
Add a screen for Travel Request input.

  1. In Workspace Navigator, open HybridApp101\Mobile Business Objects\TravelRequest\Operations.
  2. To add the TravelRequest_create screen, drag a create operation from the Navigator onto the Flow Design.

    Adding a table to the Hybrid App design
  3. Change the TravelRequest screen title to make it more readable.
    1. In the Flow Design, click the TravelRequest screen to display its properties.
    2. In the Properties view General page, change the Name property from TravelRequest_create to Travel Request.
      The key name automatically changes to Travel_Request.
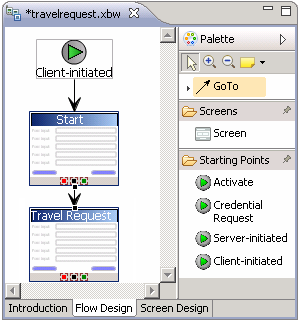
  4. Add a GoTo connection from the Start Screen to the Travel Request screen:
    1. In the Palette, click GoTo.
    2. Click the Start Screen, and while holding the mouse down, drag the connection to the Travel Request screen.
    A line with an arrow connects the two screens.
    TravelRequest screen connections
  5. Double-click the Travel Request screen to open its screen design.
  6. In the Screen Design page, modify the label of the Trvl Status edit box to make it more readable:
    1. In the Travel Request screen, select Trvl Status.
    2. In the Properties view, change the Label to Status:.
    3. In the Travel Request screen, select the St Cmmnt edit box.
    4. In the Properties view, change the Label to Comment:.
  7. Press Ctrl+S to save your screen design.
Related tasks
Creating a New Screenflow
Customizing the Module Display Name and Client Icon
Modifying Menu Text and Adding a Key
Making Screen Content Collapsible