Create a new Android SUP101Sample project in Unwired WorkSpace. Add library resources and set other application properties.
Prerequisites
Obtain text files from the
SUP_Android_Custom_Dev_Tutorial_code.zip file to help create the
project and, in a subsequent topic, build the user interface. - If you are viewing this guide online from the Sybase Product Documention Web site, click SUP_Android_Custom_Dev_Tutorial_code.zip to access the ZIP archive containing the text files.
- If you are viewing this guide as a PDF, go to the Sybase Product Documentation Web site at http://sybooks.sybase.com/sybooks/sybooks.xhtml . Click the link for the appropriate Sybase Unwired Platform version. Navigate to this topic in the tutorial, and click the link for the ZIP file to access the text files.
Task
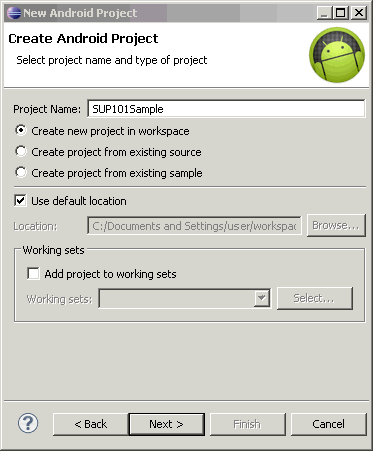
- In the New Android Project wizard, use these values and click
Next.
- Project Name – enter SUP101Sample.
- Select Create new project in workspace.
- Change Use default location if it does not display the appropriate workspace location.
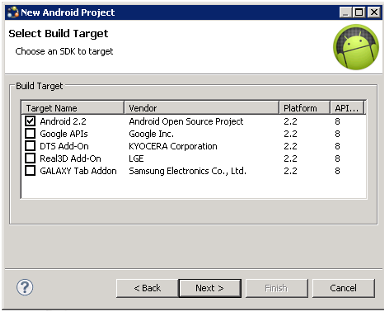
- In the Select Build Target window, click an Android version 2.2 or later and
Next.
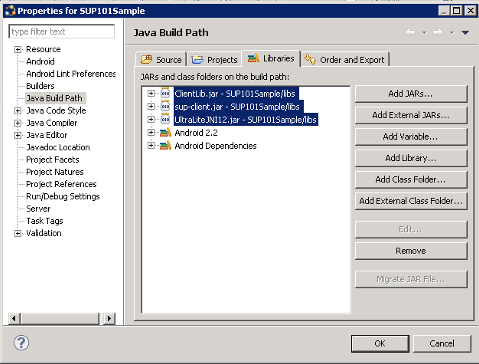
- In Package Explorer, modify the build path to point to the correct location for
the ClientLib.jar,
sup-client.jar, and UltraLiteJNI12.jar
files for the project:
- Select the SUP101Sample project.
- Select .
- Select the Libraries tab.
- Click Add JARs.
- In JAR Selection, expand the SUP101Sample\libs folder.
- Select the JAR files, then click OK.
- Click OK again.