You can reverse engineer files that contain Java classes into an OOM. For each existing class in a Java file, a corresponding class is created in the OOM, with the same name and containing the same information.
When you reverse engineer a Java class that already exists in a model, a Merge Model window will open, allowing you to specify whether to replace existing classes, or to retain the existing class definitions in the model.
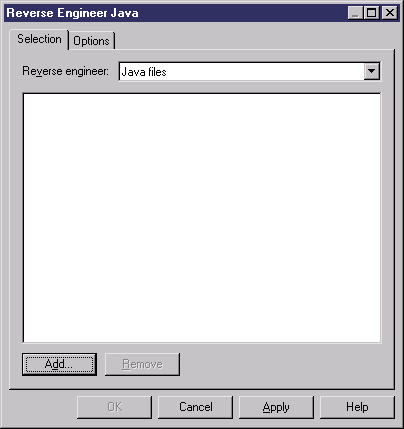
- Select Language > Reverse Engineer Java. to open the Reverse Engineer Java dialog box:
- Select one of the following file formats from the Reverse engineer list:
-
Java files (.java) - Files contains one or several class definitions.
-
Java directories - Folders containing Java files. All the .java files, including those contained in sub-directories will be reverse engineered. Each sub-directory becomes a package within the model. As Java files in the same directory are often interdependent, if you do not reverse engineer all the files in the directory, your model may be incomplete.
-
Class files (.class) – Compiled files containing the definition of a single class with the same name as the file. Each sub-directory becomes a package within the model.
-
Class directories – Folders containing class files. All the .class files, including those contained in sub-directories will be reverse engineered.
-
Archives (.zip, .jar) - Compressed files containing definitions of one or several classes. PowerDesigner creates a class for each class definition in the .jar or .zip file. The following files are not reverse engineered: manifest.mf, web.xml, ejb-jar.xml, and *.jsp. Other files are reverse engineered as files with the Artifact property set to true so that they can be generated later. Files are reverse engineered in packages corresponding to the directory structure found in the archive.
-
- Click the Add button to browse to and select the files or directories to reverse, and then click Open to return to the Reverse Java dialog box, which now displays the selected files.
You can repeat this step as many times as necessary to select files or directories from different locations.
You can right-click any of the files and select Edit from the contextual menu to view its contents in an editor.
- [optional] Click the Options tab and specify any appropriate reverse engineering options. For more information about these options, see Reverse Engineer Java Options tab
Note:
You can choose to reverse .java source files without their code body for visualization or comparison purposes, or to limit the size of your model if you have a very large number of classes to reverse engineer. To do this, select the Ignore operation body option.
- Click OK to begin the reverse engineering process. If the model in which you are reverse engineering already contains data, the Merge Models dialog box will open to allow you to specify whether to control whether existing objects will be overwritten.
For more information on merging models, see Core Features Guide > The PowerDesigner Interface > Comparing and Merging Models.
PowerDesigner creates a class in the model for each class definition in the reversed files. The classes are visible in the Browser and, by default, symbols are created in one or more diagrams
