To define a new rule definition within the Editor, the Rule Wizard and Rule Editor are used. The Rule Wizard is displayed to capture the attributes for the new rule definition, including the name and group. The Rule Editor is displayed next to allow for the definition of the rule’s structure. This procedure uses an initial value rule for a transaction property as an example. The same process is followed to define a rule regardless of where it is to be used within the application.
- Start the Add Rule Wizard by selecting the Add
Rule menu item in the menu displayed for the attribute to reference
the rule definition. This is normally an ellipses button to the
right of the attribute field.
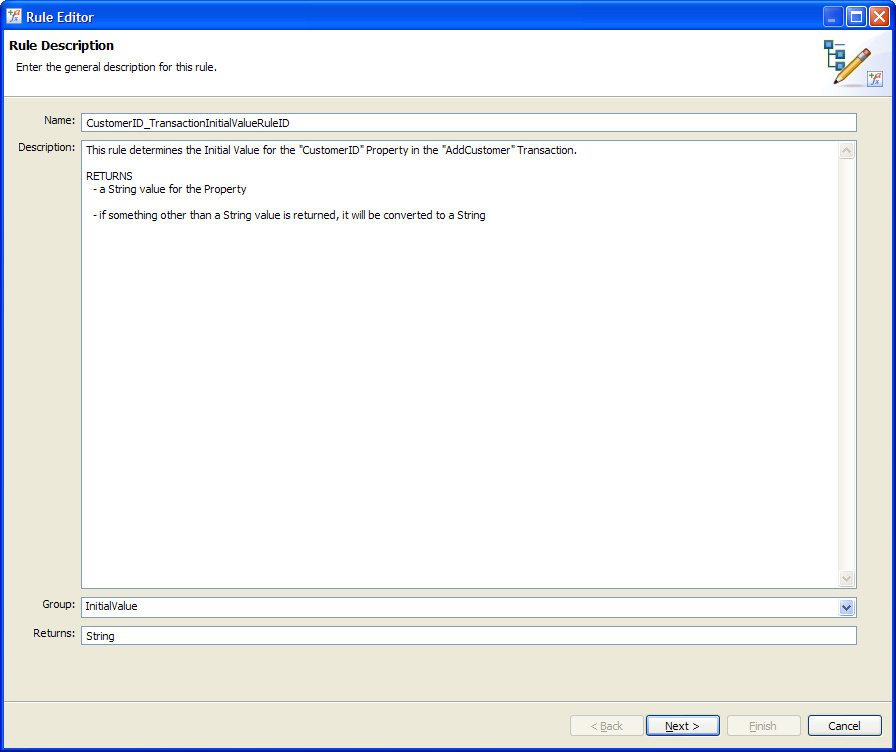
The first screen of the wizard is displayed with a default name and group, based on the definition referencing the new rule definition:
- Set the Name and Group attributes as desired for the
new rule definition. The Description field may also be edited. The
default text display is based on how the rule is to be used. The
Returns field is read-only and specifies the data type of the value
to be returned by the rule when it is evaluated. Click the [Next
>] button to advance to the Rule Editor.
The second screen of the Rule Editor is displayed with the Rule Entry Point selected:
- If any term is selected other than a function, the rule’s
definition is complete, as no other terms can be added below a data
term within the rule’s Structure. If a function is selected from
the list, the editor will display that function in the center of
the screen, with fields listing the function’s parameters. The function
name followed by its short description is shown at the top-center
of the screen. Clicking the name of the function, or the arrows
to its right will display the function’s long description.
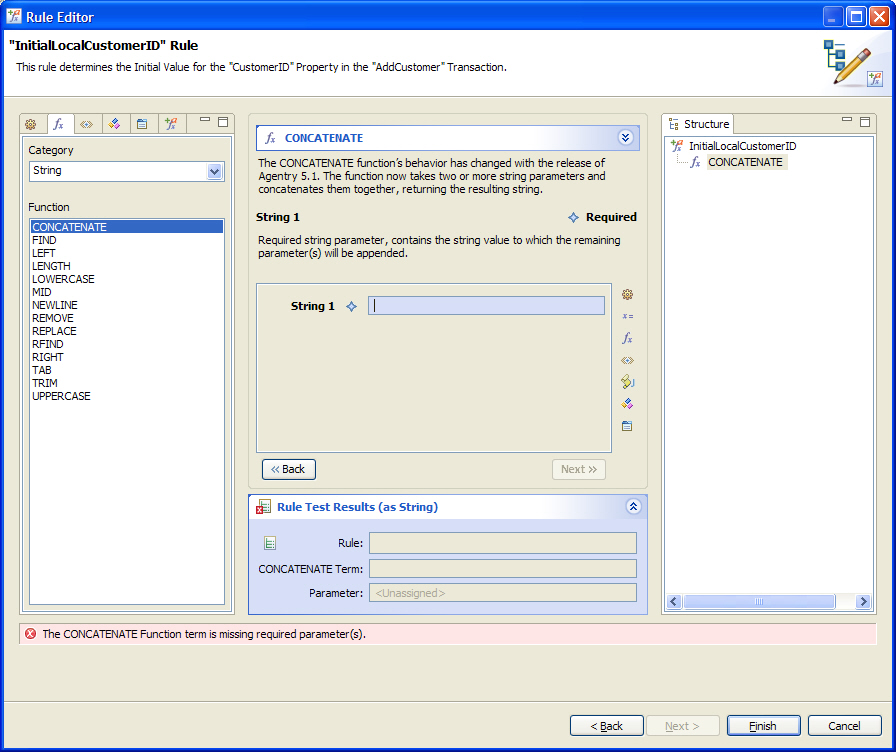
- When a parameter field is selected in the Rule Editor
the description of that parameter is displayed. Selecting a field
will display the list of terms on the left. Any term that supports
the return type for the parameter may be selected:
- To add a constant value as a parameter to the function
simply type that value in the parameter field.
- To add any other term type, select it in one of the lists
on the left side by double-clicking it. If a function is added as
a parameter to the current function, that function will then be
displayed in the middle portion of the screen, along with its short
description and list of parameter fields.
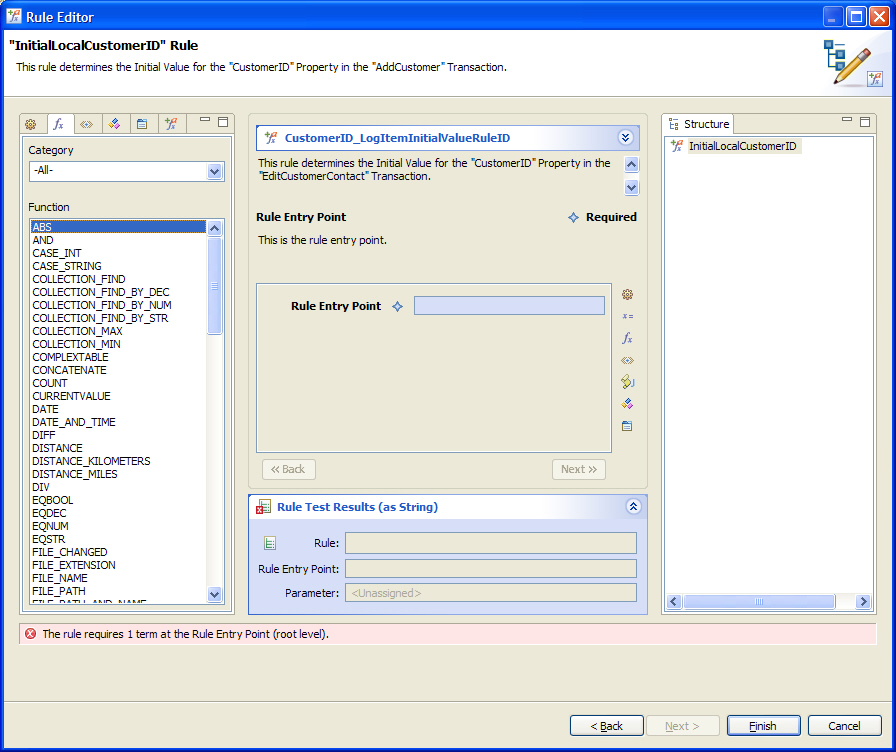

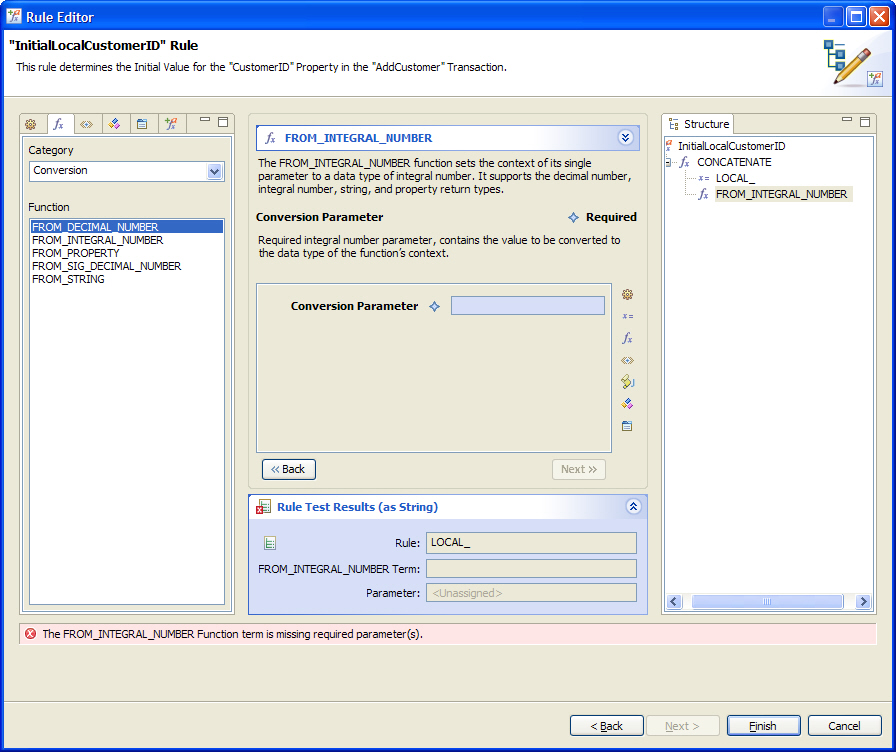
Note the structure view to the right of the rule editor. As functions are added, their position within the overall rule structure is represented. This structure view can be used in the definition of the rule as well. Right-clicking on any function in the rule structure displays a popup menu allowing for the addition of parameters to this functions. The menu also provides options to replace terms and delete them. Additionally, terms may be dragged and dropped to different locations within the structure if it is desired to modify the rule in this manner.
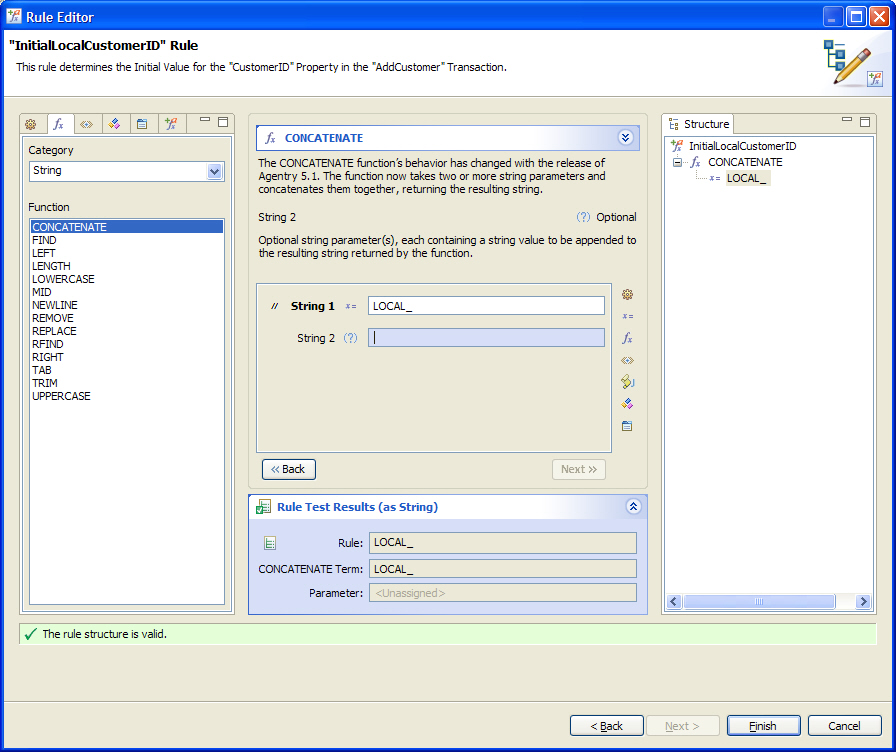
Once the rule has been defined it can be tested within the Rule Editor. This can be done before finishing the Rule Editor, or the developer can return to the definition later and perform any testing.