The following items must be addressed prior to performing this procedure:
- The Agentry Perspective must be open in Eclipse.
- The developer performing the check out must have read-write privileges to the share location.
This procedure describes the steps to check out the tip revision of a share repository, creating a local Agentry application project in the current Eclipse workspace. When this procedure is completed, a new Agentry application project will exist in the workspace and will be connected to the share from which it was checked out. This procedure is similar to an import performed with a non-share source, such as an export file or published application on an Agentry Server. However, the import source for this procedure is an existing share repository.
- Right click anywhere in the Project Explorer View within
the Agentry Perspective. Select the menu item Import...
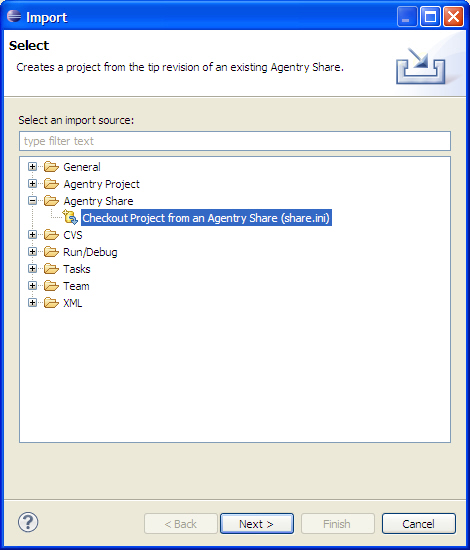
This displays the first screen of the Import Wizard:
- Within this wizard screen the import source is selected.
To check out from a share, select the item Agentry Share | Checkout
Project from an Agentry Share (share.ini). Click the [Next
>] button.
This displays the second screen of the wizard:
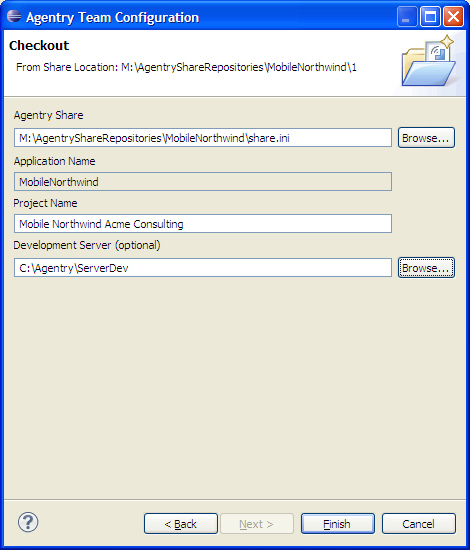
When this procedure is complete a new project is created in the current Eclipse workspace. This project contains the definitions matching the selected share’s tip revision. The project is automatically connected to the share from which it was imported.
The new project can now be modified by the developer. Changes made can be committed to the connected share and updates retrieved from it.