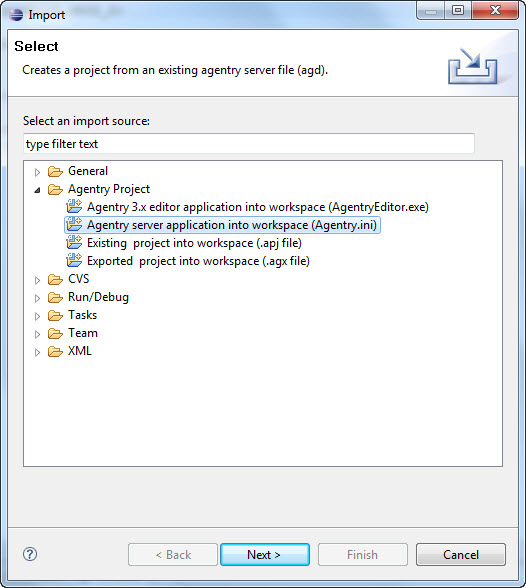
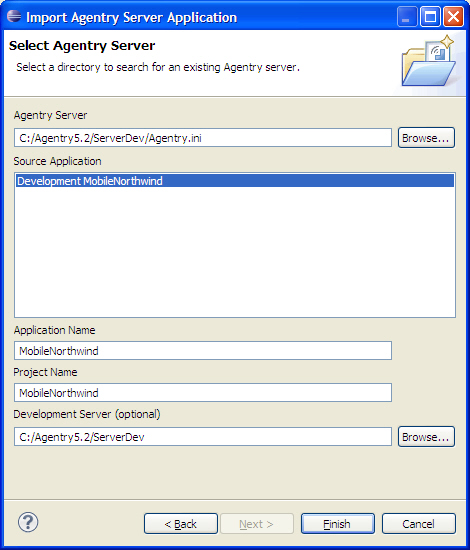
- Determine the source of the application project you are importing in this procedure and that you have access to that source.
- Verify that the application project source was created with the same or earlier version of the Agentry Mobile Platform. You cannot import projects, export files, or published applications created with a later version into an earlier version.
- Verify the workspace in which you are importing the project is the currently opened workspace in Eclipse.
- Determine a name for the project as it will be listed in the Eclipse workspace, as this is required information entered in the import process.
- Determine a value for the Name attribute of the application definition. This is information required during the import process.
- Though not required, it is strongly recommended that the Agentry Development Server to which development publishes are performed is installed. While the location of this Server instance is optional during the import, it is necessary information when defining any of the synchronization logic within the project after it is created.
This procedure describes the steps involved in importing an application project into the current Eclipse workspace. When this procedure is complete, a new Agentry application project is created in the current Eclipse workspace. This project contains the definitions and application components found in the import source.
Note that this process excludes any related projects for the source application that may reside in that source project’s workspace, such as Java development projects and related packages. Import these related projects and components according to the process that matches that project type, using tools found in Eclipse. Whether the Agentry application project is imported before or after other related projects is unimportant. However, all items must be imported and/or configured before modifications are made.
- Checks out an Agentry application project from an Agentry share repository and creates a new local project based on the top revision within that repository.
- Migrates an application project from one workspace to another.
- Upgrades an application project or application export file created in a previous release of the Agentry Mobile Platform.
- Restores or recovers an application project from an archived project or export file.
- Creates, restores, or recovers an application project from a mobile application published to the Agentry Server.
After this process is complete, the new project is added to the Eclipse workspace. The project is opened and displayed in the Agentry Perspective within Eclipse. The application name and project name match those values entered in the Import wizard. If the application project source was created using a previous version of the Agentry Mobile Platform, the new project was upgraded during the import to the version of the current Agentry Editor.
If the selected import source was an Agentry share repository, the new project contains the definitions found in the top revision of that repository. The revision is checked out to the current user. Subsequent changes made to the application project are tagged with that user ID. The project is connected to the selected share repository and you can update from it. Commit changes made locally to this repository.

