Add MAF libraries to your view based application project.
MAF contains statically linked libraries accompanied by resource bundles. The libraries are located in the installation a folder created by the SAP Mobile Platform SDK installer.
to add MAF libraries to your project:
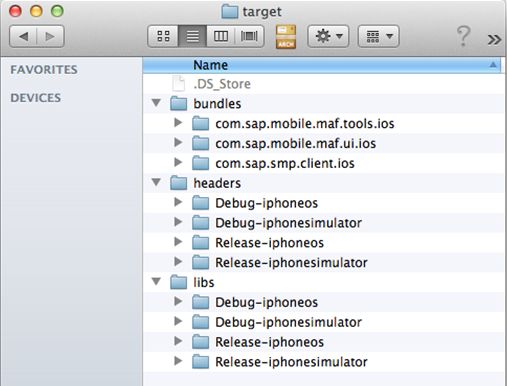
- Locate MAF libraries on your disk. During the installation of SAP Mobile
Platform SDK, the installer created a folder on your hard drive:
- Add all libraries from the libs folder to you Xcode project. There are four
distinct versions of the libraries, because they are built for two platforms
(iphoneos and iphonesimulator) and both for debug and release. Add only one
set of these libraries, and Xcode searches for the correct version for your
current build setup. Add the Debug-iphoneos version. Copy all of the client
side SAP Mobile Platform libraries into the
dependencies folder in the root of your peoject. To
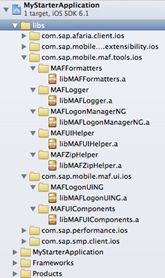
add the libraries, drag and drop them into your Xcode windows Project
Navigator view, which results in a similar structure:
- Repeat steps 1 and 2 to add all necessary dependencies for SAP Mobile
Platform iOS libraries HTTP REST setup:
- libAfariaSLL.a
- libConnectivity.a
- libCoreServices.a
- libDatavault.a
- libPerformanceLib.a
- libRequest.a
- libE2ETrace.a
- libParser.a
- libLogger.a
- libCache.a
- libsqlcipher.a
- libClientHubSLL.a
- Adjust the library and header search paths to point to the folder where your libraries and headers are located. In this example, all libraries are copied to a folder called dependencies/libs and all headers to a folder called dependencies/headers. The dependency folder is located in your Xcode project dir. In the headers and libs subfolders, maintain the “$(BUILD_STYLE)-$(PLATFORM_NAME)/” structure, and copy corresponding libraries, and headers to the appropriate folder. To adjust the search paths of your Xcode project, select your project in the Project Navigator view, then select the build settings tab in the main area of Xcode. Make sure that you have all settings selected and not filtered to only basic settings. Use the search field and enter “Search Paths”.
- Specify this string as the header search path:
“$(PROJECT_DIR)/dependencies/headers/$(BUILD_STYLE)-$(PLATFORM_NAME)/**”
- Specify this string as the library search path:
“$(PROJECT_DIR)/dependencies/libs/$(BUILD_STYLE)-$(PLATFORM_NAME)/**”
- Set other linker flags to “-all_load -ObjC”. You can locate it in the build settings of your project, similarly to the search paths.
- To build your project, add these ObjC frameworks:
- MessagUI.framework
- SystemConfiguration.framework
- Security.framework
- QuartzCore.framework
- MobileCoreServices.framework
- Libz.dylib
- Libstdc++.dylib
- CFNetwork.framework
- UIKit.framework
- Foundation.framework
- CoreGraphics.framework