Share Operation: Reverting to a Previous Share Revision
Prior to performing this procedure the following items must be addressed:
- The current Agentry application project must be connected to a share repository.
- It must be determined if the revision to be reverted to should
replace the current project, or if a new project should be created
with the previous share revision to be selected.Note: Selecting to replace the current project with a previous revision can lead to undesirable results, including the loss of all local, non-committed changes in the local project. Replacing the existing project should only be performed after a back-up of the local project has been made. This can be accomplished by either committing the project to the share, or exporting the project to an Agentry export file by executing he Export Operation.
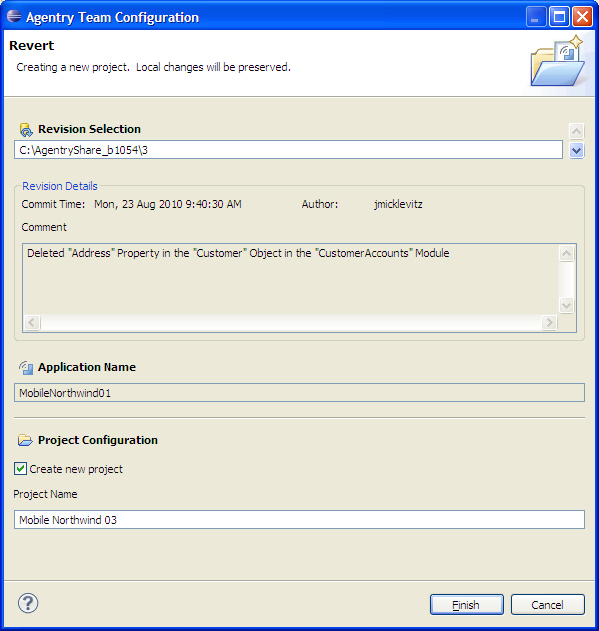
This procedure provides the steps necessary to revert the local project to a previous revision within the share repository; or, alternately, to create a new local project in the current Eclipse workspace based on a revision of the share prior to the tip revision. When this procedure is complete, and depending on the options selected, either the current local project will be replaced with the revision selected in the share repository, or a new local project will exist containing the definitions as they existed in the selected revision.
Note that this procedure can also be performed to revert the local project to the tip revision in the share repository. This differs from an update in that the current local project will be reverted to the tip revision and any local changes will be lost. None of the conflict detection or resolution functionality that is a part of an update operation is performed in a revert operation.
When this procedure is complete, either the local Agentry project is reverted to the selected revision, or a new local project is created in the Eclipse workspace matching the selected revision. If a new project has been created it is connected to the share repository.
The resulting project from this operation now matches the selected revision within the share. This project cannot be committed to the same share. Either the local project must be updated or reverted to the tip revision, or it must be disconnected from the current share and new one created for the local project using the Share Project operation.
