Testing the Device Application on the BlackBerry Simulator

Goal: Run and test the custinfo device application on the BlackBerry 8800 Simulator.

This tutorial shows the device application running on the BlackBerry 8800 Simulator. The navigation features of the BlackBerry 8800 Simulator include:

  • The trackball functions as an Enter button. Use the scroll button to simulate rolling the trackwheel. If you do not have a scroll button, use the up and down arrow keys on your keyboard to scroll.
  • Click the menu key to access the applications screen.
  • The simulator automatically turns the LCD display off after a certain length of time. Keep the LCD display on by selecting View > Keep LCD On.

  1. In the Java perspective, select Run > sup101_launch.
    bob_bb_java_sup101_launch
  2. When the simulator launches, you can run the Setup Wizard, or scroll to Don't Ask Me Again, and click the trackball.
  3. Click the menu key to access the applications screen.
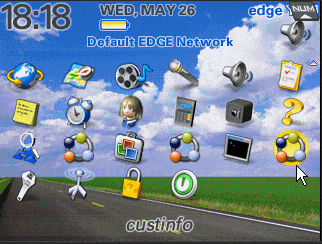
  4. Scroll to locate the custinfo device application, and click the trackball to open it.

    bob_bb_simulator_custinfo

  5. In the Login screen, enter:
    • Login – supAdmin
    • Password – s3pAdmin
  6. Click Login.
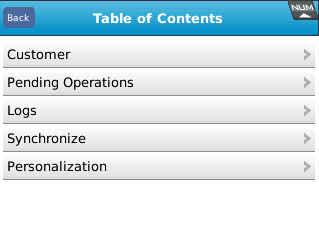
    The table of contents appears.

    bob_bb_simulator_toc
  7. Scroll to Synchronize and click the trackball to open the Synchronize screen.
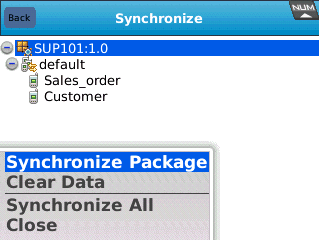
  8. In the Synchronize screen, select the SUP101 package, click the simulator menu key, and select Synchronize Package.
    bob_bb_simulator_syncpackage
  9. Click the Escape key on the simulator to return to the table of contents.
  10. From the table of contents, select Customer and click the trackball.
  11. Select a row in the Customer table, and click the simulator menu key.
    The application menu shows the menu items that were shown when designing the device application in the Device Application Designer.
  12. Scroll down the menu items, and select sales_order. Notice how Unwired Platform automatically associates data based on the relationships between mobile business objects, and the screens are automatically created based on those relationships.
  13. Click the Escape key to return to the customer list.
  14. Click the simulator menu key, and from the "Sort on column" menu, select id and click the trackball.
    Now the customer list is arranged to show customers in ID order.
  15. Select a row in the table, click the simulator menu key and scroll down to select Create Customer and click the trackball.
  16. In the Create Customer screen, enter:
    • id: 999915
    • fname: Benny
    • lname: Olsson
    • Enter an address, city, state, and zip.
    • phone: abc
  17. Leave the cursor in the phone edit box, and use the arrow keys on your keyboard to scroll down the customer record.
    You receive an error that tells you to enter the phone number using a valid value format.
  18. Reenter the phone number in the correct format: 201-555-8966, and scroll down using the arrows on your keyboard.
    There is no error now.
  19. Click the simulator menu key, select Submit, and click the trackball.
    You return to the main customer list screen. The new record is shown at the bottom of the list.
  20. To upload the new record to the back-end database sampledb, click the Menu key, and select Synchronize Customer from the menu.
    The Submit button on the Create Customer screen is mapped to the create operation of the customer mobile business object. When the application is synchronized, any pending operations are uploaded to Unwired Server, which then executes the CREATE query defined for the create operation of the customer mobile business object.
    When the synchronization is complete, you return to the customer screen.