Maintaining State

Perform calculations or comparisons across rows. Replace the CCL statements that filter rows with statements that create a window.

A Sybase CEP window maintains rows in memory to allow you to perform calculations or comparisons across those rows.

In this activity, you will be modifying the StockFilter project you created in the Filtering Data tutorial:

  1. Open the StockFilter project. If you are continuing immediately after completing that tutorial, you can skip these steps:
    1. Start Sybase CEP Studio.
    2. On the File menu, click Load Project.
    3. Navigate to the directory where you stored the StockFilter project for the Filtering Data tutorial and then open the file StockFilter.ccp. You can also find a copy of the completed project in SybaseC8Repository/version/examples/GettingStarted/CompletedProjects/AfterFilteringData.
  2. Replace the query statement in the Queries tab beginning with "INSERT" with the following text:
    -- Create a window
    CREATE WINDOW FilteredTradesWindow
    SCHEMA (Symbol STRING, Price FLOAT,
    	Volume INTEGER)
    KEEP 3 ROWS;
    
    -- Insert rows into the window
    INSERT INTO FilteredTradesWindow
    SELECT *
    FROM StockTrades
    WHERE Symbol = 'EBAY';
    

    Note: You can also copy the text from the file MaintainingStateCCL.txt in the directory SybaseC8Repository/version/examples/GettingStarted/CCLFiles (where version is the version number of Sybase CEP Engine), between the lines "-- Maintaining State Code Block 1" and "-- Maintaining State Code Block 2."

    The following points describe the CCL code:

    • The first statement creates a window named FilteredTradesWindow with a schema identical to that of the StockTrades input stream. Note that you can define a schema directly in CCL, not just through the Sybase CEP user interface as you did for the data streams. The KEEP clause specifies that this window maintain three rows. This code block is a single CCL statement, which ends with a semi-colon.

    • The second statement simply filters the input stream for rows with "EBAY" in the Symbol column and inserts those rows into FilteredTradesWindow.

    • Notice the italicized green text in the Queries tab. These are comments, each beginning with two hyphens (you can also begin a comment with two slashes or enclose comments between /* and */).

  3. Locate the drop-down list in the toolbar and change it from Release to Debug. This allows you to examine the contents of the window, which is not possible when Sybase CEP Studio is running in release mode.
  4. On the Debug menu, click View All Streams in Module 'StockFilter' to see the rows as they are published to the input stream (a viewer opens for the FilteredTrades output stream as well, but the query doesn't use that stream yet).
  5. On the Debug menu, click View All Named Windows in Module 'StockFilter' to view the contents of the window.
  6. Position the viewers in order to see both the StockTrades stream and the FilteredTradesWindow window.
  7. Click the Start button (the green arrowhead on the toolbar) to compile and run the project.
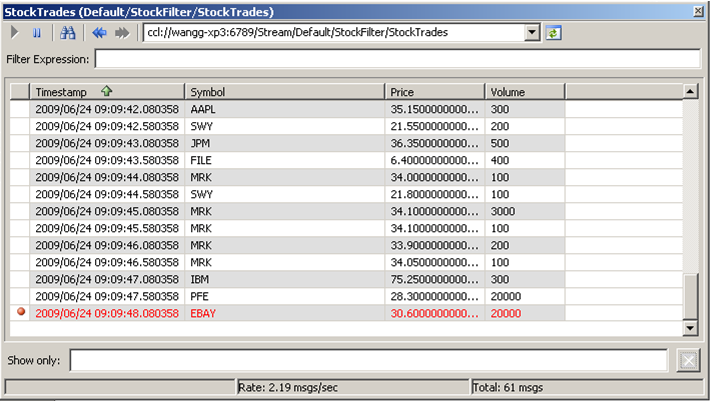
  8. Examine the stream viewer for the input stream (use the Disconnect All Viewers button, marked with two vertical bars, to halt the display of all viewers, and the Reconnect All Viewers button, which appears as a green arrowhead in each viewer window, to start the display again):


    StreamForWindow PNG

    Notice the rows that appear in red. Both the latest row arriving in the stream and a row matching the filter in the Query statement appear in red.

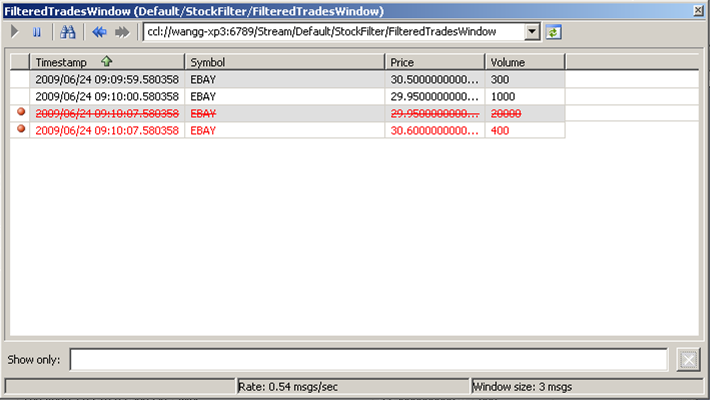
  9. Now examine the window viewer:


    WindowFirstLook2PNG

    In the window viewer, the latest row being added to the window is shown in red. The row being removed is shown in red with a line through it. Notice that the timestamp of the row being removed changes to reflect the time that it is removed.

    This type of window is called a count-based window, because it maintains a specific number of rows. Once that number of rows is reached, a new row arriving on the stream displaces the oldest row in the window.

  10. Make sure that the viewers are actively displaying rows and then click the Stop button to stop the project.

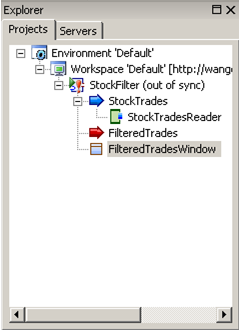
    Notice that the window you created with CCL now appears in the Explorer view:

    WindowInExplorer PNG