Example: Creating a Mapping Table, and Attaching It to a Specific Model Object

You can override the values in the Standard mapping tables for a specific model object by creating a new mapping table, and attaching it to the object.

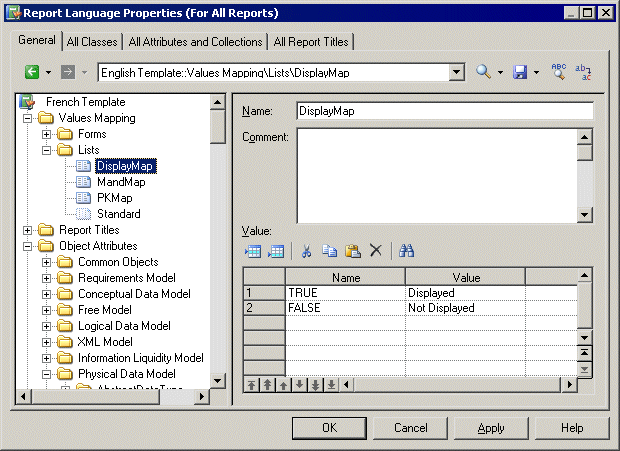
In the following example, the DisplayMap mapping table is used to override the Standard mapping table for PDM columns to provide custom values for the Displayed property, which controls the display of the selected column in the table symbol. This situation can be summarized as follows:

Name

Value

TRUE

Displayed

FALSE

Not Displayed

  1. Open the Values Mapping > Lists category.
  2. Right-click the Lists category, select New > Map Item to create a new list, and open its property sheet.
  3. Enter DisplayMap in the Name field, enter the following values in the Value list, and click Apply:
    • Name: TRUE, Value: Displayed.

    • Name:FALSE, Value: Not Displayed.


  4. Right-click the Lists category, select New > Category, name the category Physical Data Model, and click Apply.
  5. To complete the recreation of the PDM Object Attributes tree, right-click the new Physical Data Model category, select New > Map Item, name the category Column, and click Apply.
  6. Click the Name column to create a value and enter Displayed, which is the name of the PDM column attribute (property).
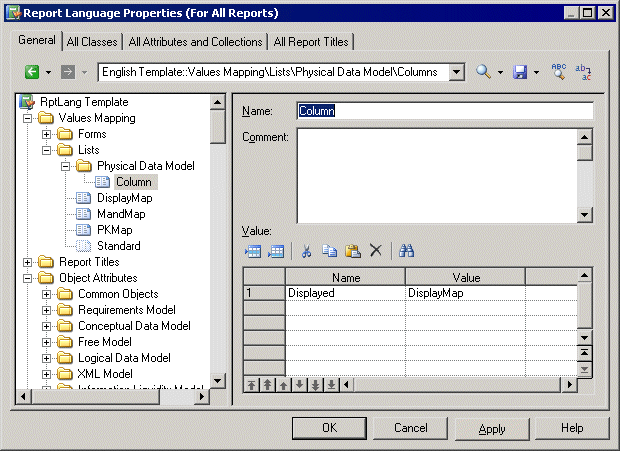
  7. Click the Value column and enter DisplayMap to specify the mapping table to use for that attribute.


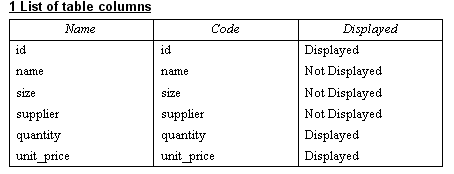
  8. Click Apply to save your changes. When you generate a report, the Displayed property will be shown using the specified values: