Model-Code Synchronization

By using code synchronization with PowerDesigner genlets, you can realize aspects of the model-driven development process to improve productivity through the automation of code generation. The PowerDesigner add-in for Visual Studio provides the capability for instantaneous bidirectional updates of model objects and actual code, including automating the transformations and merging of generated files.

You configure synchronization initially through the Synchronization Wizard, and then continue with development, with changes automatically cascading to the code. Code synchronization is available for all PowerDesigner diagrams and models supporting generic generation, and thus could be used with, for example, a state diagram, or a BPM (Business Process Model).
  1. Create an empty Visual C# or other code project, and then add your model project to the solution.
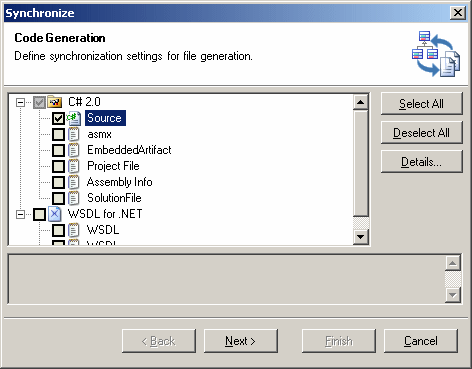
  2. Select the model in the Solution Explorer, and then click the Synchronize tool in the toolbar (or select Synchronize from the contextual menu) to open the Synchronize dialog at the Code Generation page:


    This page allows you to specify file types that will be synchronized for forward generation (i.e. changes made to model objects will be cascaded down immediately to the code files). File types are organized by generation targets (C# 2.0 and WSDL for .NET in the screenshot above), and defined in the resource file or extension for the target.

  3. Select the file types that you want to synchronize for forward generation.
  4. [optional] Select a file type and click the Details button to open the Generation Details dialog (see Custom Generation Post-Processing with Genlets)
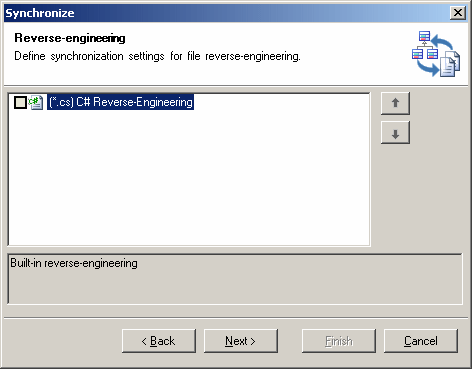
  5. Click Next to move to the Reverse-engineering page of the Synchronization dialog:


    This page, which is available only for C# and Visual Basic projects only) allows you to specify file types that will be synchronized for reverse-engineering (i.e. changes made in the code files will be cascaded up immediately to the model objects).

  6. Select the file types that you want to synchronize for reverse-engineering, and then click Next to move to the Files page of the Synchronization dialog:


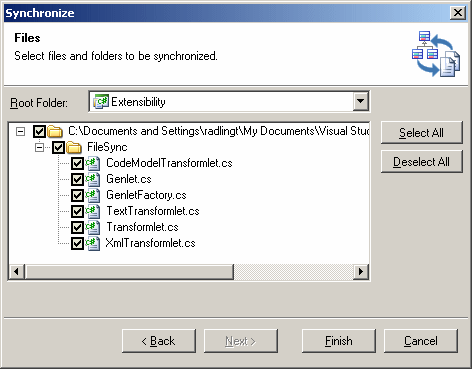
    This page allows you to specify the specific files that will be synchronized, and where they will be generated. By default:
    • If the model is located directly in a solution folder (outside of a project) or in a modeling project, the files are generated at the root of the solution, and project files are added as projects in the Solution Explorer.

    • If the model belongs to any other project type, the files are generated by default at the root of the project, or in another folder within the project specified in the Root Folder field.

    If there is the possibility of a conflict because both model object and file already exist, the file will not be selected to generate by default, and its checkbox will carry a small red cross. To force synchronization and specify who will have priority, click the checkbox and select Overwrite file or Overwrite model from the contextual menu.

  7. Select the files that you want to synchronize and click Finish.

    The wizard generates and marks as synchronized all the specified files, and a record of the synchronization state of all the files in the solution is stored in a file with the name of the project or solution and the extension .pdsync.

    Note: Once you have synchronized your model and files, you can disable or enable synchronization on a file-by-file basis by selecting a file in the Solution Explorer. If the file is currently synchronized, the Synchronize tool is depressed in the Solution Explorer toolbar. Click the tool to change the state of the file. If the file was not previously synchronized, the Merge Model window will open to enable you to review the changes that synchronization will make.