Creating Mappings from an Object's Property Sheet

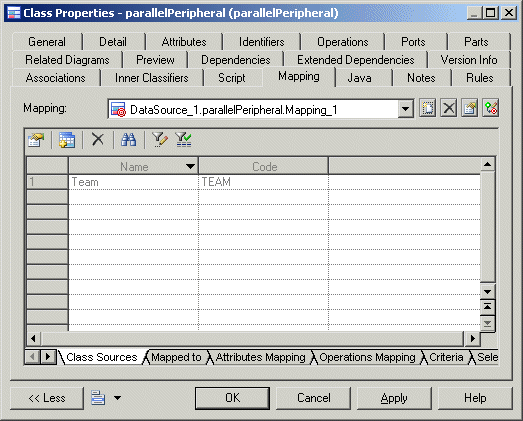
You can create mappings to an individual object on the Mapping tab of its property sheet. Mappings created in this way will be visible the next time you open the Mapping Editor.

  1. Open the property sheet of the object you want to create mappings to and click the Mapping tab.
  2. Click the Create Mapping tool to the right of the Mapping list to create a new mapping for the target object. If:
    • No data source has yet been created in the model you will be prompted to create one (see Creating a Data Source).
    • Several data sources are available, you will be prompted to select one and click OK.
  3. Select the object from the data source to map to the present object and click OK to create the mapping.

    The new mapping is added in the Mapping list and the mapped object is displayed in the Object Sources sub-tab:


  4. [optional] Click the Add Objects tool to select more source objects to map with the object.
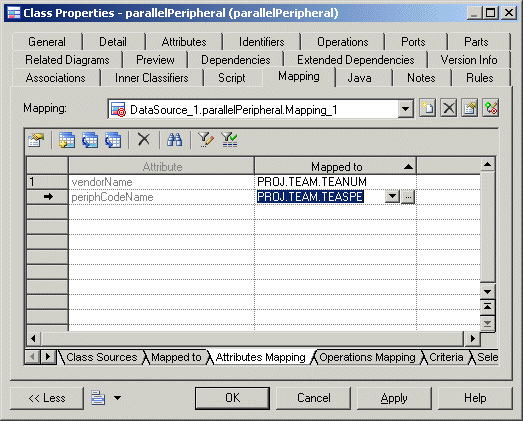
  5. Click the Sub-Object Mapping sub-tab and add or remove mappings between sub-objects (see Object and Sub-Object Mapping Properties)
    To automatically generate mappings for sub-objects that share a name, click the Generate Mapping tool.

  6. [optional] Review the other mapping sub-tabs (which are the same as those available from the mapping's own property sheet (see Object and Sub-Object Mapping Properties) and edit them as appropriate.
  7. [optional] Use the Mapping list and the tools to its right to review and edit the other mappings defined on the object:

    Tool

    Description


    Create Mapping - Creates a new mapping with the object as a target.


    Delete Current Mapping - Deletes the currently selected mapping.


    Properties - Opens the property sheet of the currently selected mapping (see Object and Sub-Object Mapping Properties).


    Launch Mapping Editor - Opens the Mapping Editor (see The Mapping Editor).