The Mapping Editor provides a global view of all the mappings to objects in your model, allowing you to quickly identify mapped and unmapped objects.
To open the Mapping Editor, select . If no data source is defined in your model, you will be prompted to create one with the Data Source Creation Wizard (see Creating a Data Source).
-
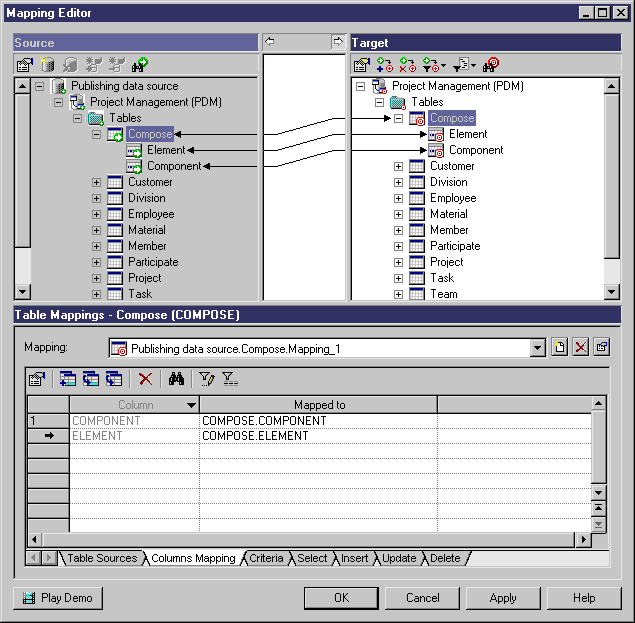
The Source pane – has a gray background and is, by default, on the left of the window. For more information, see Mapping Editor Source pane.
-
The Target pane – has a white background and is, by default, on the right of the window. The model from which you launch the Mapping Editor is displayed in the Target pane, and the mappings are saved in this model. For more information, see Mapping Editor Target pane.
-
The Mappings pane - can contain a mapping list or the same content as the content of the Mappings tab of an object's property sheet. If you define a mapping for an object using the Mapping Editor, the Mappings tab is automatically updated in the object's property sheet. For more information, see Mapping Editor Mappings pane.
Mapping Links and Symbols
When a mapping is created, a non-editable link line is drawn between the mapped objects. The arrow specifies the direction of the data transfer. When an arrow is displayed on both extremities of the link, it means the data can be extracted from the source to target and vice versa.
A link extends from the source pane to the target pane and passes through an area between the two panes. If you click a link:
A small symbol is displayed in the bottom right-hand corner of the icons and also on their respective parent hierarchy icon to ease readability:


When you define a mapping for an object (a table, for example) a mapping is automatically defined for its sub-objects (columns, for example) when their name matches the name of the source sub-objects.