You can create a user profile by copying an existing profile, or by copying values from an open model or from your registry.
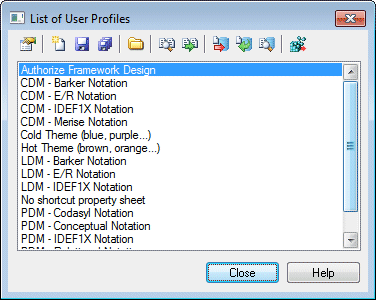
- Select to open the List of User Profiles:
The following tools are available above the list:
Tool
Description
Properties – opens the selected profile in the resource editor.
New – creates a new profile.
Save – saves the selected profile.
Save All – saves all the profiles.
Path – Specifies a directory from which to populate the list.
Compare – Opens the Compare window to compare the structure of two profiles.
Merge – Updates the selected profile by merging preferences from another profile, a model, or the registry (see Updating a User Profile).
Check In - [if the repository is installed] Checks the selected resource file into the repository. For information about storing your resource files in the repository, see Sharing Resource Files via the Library.
Update from Repository - [if the repository is installed] Checks out a version of the selected file from the repository to your local machine.
Compare with Repository - [if the repository is installed] Compares the selected file with a resource file stored in the repository.
Apply to Registry – Applies the selected profile to your registry, overwriting your previous defaults and preferences. This has the same effect as selecting (see Applying a User Profile).
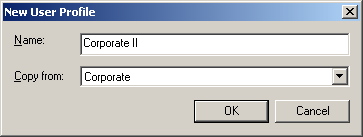
- Click New to open the New User Profile dialog: