The check in modes allow you to check your document into the same branch (update), a new branch (branch), or to merge changes from one branch into another parallel branch (integrate).
Remember that you should always select the correct target branch before check in as you cannot change branch from the Check In dialog.
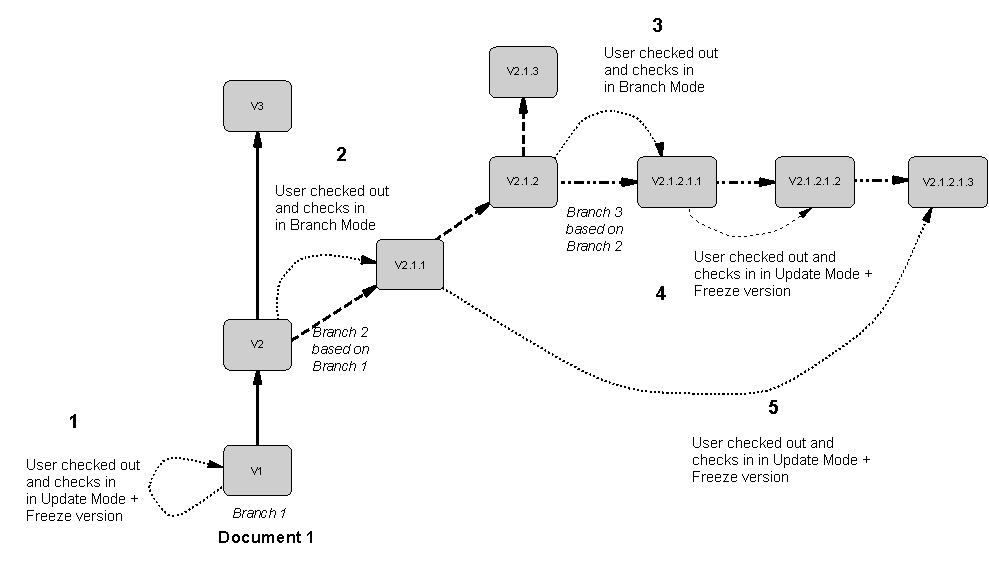
The following example shows several situations involving the Update and Branch check in modes:
|
Case |
Check out branch |
Current branch |
Check in Mode |
|---|---|---|---|
|
1 |
Branch 1 |
Branch 1 |
Update mode to update V1 |
|
2 |
Branch 1 |
Branch 2 |
Branch mode to create the version in the current branch |
|
3 |
Branch 2 |
Branch 3 |
Branch mode to create the version in the current branch |
|
4 |
Branch 3 |
Branch 3 |
Update mode, as the document already exists in the current branch, and freeze previous version. |
|
5 |
Branch 2 |
Branch 3 |
Update mode, as the document already exists in the current branch (V 2.1.1.1), and freeze previous version. |
The repository uses the GUID (Global Unique ID) of documents to identify them during check in and check out. If you use the Save As command to create a copy of the document, the GUID is modified and the new document cannot be checked in in Update mode. However, if you copy or move the file in Windows Explorer, the GUID will not be affected.
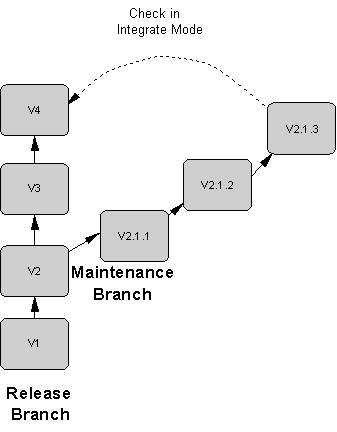
The following example shows a maintenance engineer working on a bug fix in the Maintenance branch wants to integrate this correction to the Release branch: