Example: Creating and Attaching a Constraint Rule

Validate and constraint business rules have their expressions generated as constaints for DBMSs that support them. Validate rules can be reused by multiple objects, but constraint rules can only be used once, and will be generated as a separate constraint for DBMSs that support multiple constraints.

The type of constraint generated depends on the General > EnableCheck and General > EnableMultiCheck items in the DBMS:

DBMS

Generation result

DBMS does not support check constraints

No constraint is generated.

Database does not support multiple check constraints

Constraint and validation rules and any check parameters defined on the table or column (see Setting Data Profiling Constraints) are concatenated into a single constraint expression.

Database supports multiple check constraints

First, the check parameters and validation business rules are generated into a single constraint, then the constraint business rules are generated into separate constraints in the order in which they are attached. Constraints are thus ordered

If you want to enforce code uniqueness for both validate and constraint rules, you must set the General > UniqueConstName item to Yes.

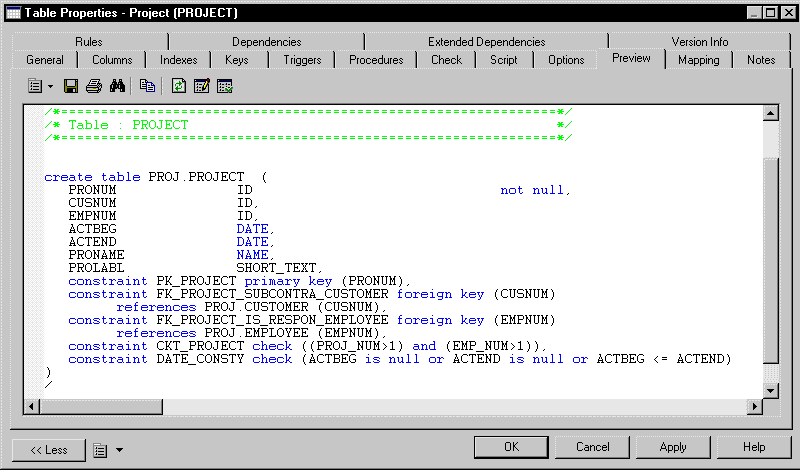
You can preview the constraints that will be generated on the Preview tab of the table property sheet.
When reverse engineering, the constraint order is respected:
  • The first constraint is retrieved to the Check page of the table property sheet

  • Each constraint following the initial constraint is retrieved as a constraint business rule attached to the table

  1. Select Model > Business Rules to open the List of Business Rules, and click the Add a Row tool.
  2. Enter a name and a code for the new rule, and click the Properties tool to open its property sheet:
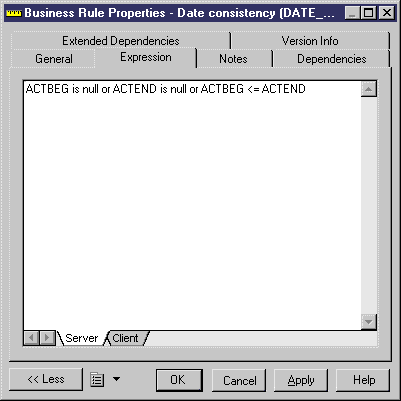
  3. Select Constraint in the Type list, and then click the Expression tab and enter an expression on the Server sub-tab:


  4. Click OK to save your changes and return to the model.
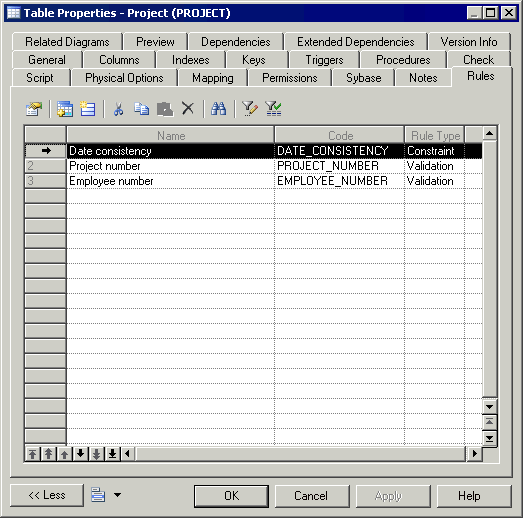
  5. Open the table or column's property sheet and click the Rules tab.
  6. Click the Add Objects tool to open a list of available business rules, select a constraint business rule from the selection list and click OK to attach it to the object.


  7. [optional] Click Apply to confirm the attachment of the rule and then click the table property sheet Preview tab to verify that the constraint has been created in the script.

    In the following example, multiple constraints are defined on the Project table:

    Check

    Description

    Check parameter (in the Check page of the table)

    This check verifies that the customer number is different from the employee number

    Validation business rule

    PROJ_NUM to check that the column project number is not null

    EMP_NUM to check that the employee number is not null

    Constraint business rule

    DATE_CONSTY to check that the start date of the project is inferior to the end date of the project