![]()
Now you create a window that inherits from the basesheet window you generated with the Template Application wizard and add DataWindow controls to it. In the Source editor, you change the inheritance of the generated sheet windows (w_customers and w_products) to use the new window.
The DataWindow controls you add to the new ancestor window inherit their definitions from a user object that was created for the tutorial application. The user object is provided in the PBL file that you just added to the target library list. The user object is a customized DataWindow control that includes scripts to perform standard database error checking.
![]() Why use a user object
You can build a user object in PowerBuilder to perform processing
that you use frequently in applications. Once you have defined a
user object, you can reuse it as many times as you need without
any additional work.
Why use a user object
You can build a user object in PowerBuilder to perform processing
that you use frequently in applications. Once you have defined a
user object, you can reuse it as many times as you need without
any additional work.
In this exercise you:
The new window you create now is an extension layer between the basesheet window and application sheet windows. Later in this lesson you make changes to the extension layer window. The changes you make are automatically extended to any new sheet windows that you inherit from the extension layer window.
In the current tutorial application, the w_customers and w_products windows already inherit from the w_pbtutor_basesheet window. Because you have not yet added any non-generic property values or functions to these sheet windows (other than their names and display text), you can write over these wizard-generated windows without having to transfer any code to the replacement windows. In this lesson you overwrite these windows with new windows that inherit from the extension layer window.
Select File>Inherit from the PowerBuilder menu.
The Inherit from Object dialog box displays.
Make sure that pbtutor.pbl is selected in the Libraries list box and that Windows is selected in the Objects Of Type drop-down list.
If you cannot see the full library list, you can change the size of the dialog box by clicking on one of its edges and holding down the mouse button while you drag the edge toward a corner of the screen. The pbtutor.pbl should be the first of two libraries listed in the Libraries list box.
Select w_pbtutor_basesheet in the Object column of the main list box and click OK.
Select File>Save As, and in the Save Window dialog
box, select w_master_detail_ancestor in
the Windows field for the new window name.
(Optional) Type the following text in the Comments box:
New ancestor basesheet for the w_customers and w_products sheet windows.
Make sure that pbtutor.pbl is selected in the Application Libraries list box and click OK.
Select File>Close to close the new ancestor basesheet.
You cannot create descendant windows if an ancestor window is open in the Window painter.
Select File>Inherit from the PowerBuilder menu.
Make sure that pbtutor.pbl is selected in the Libraries list box and that Windows is selected in the Objects Of Type drop-down list box.
Select w_master_detail_ancestor and click OK.
Type Maintain Customers in
the Tag text box on the General page of the Properties view.
Select File>Save As from the PowerBuilder menu and select w_customers in
the Windows list box.
Change the Comments text to:
Customer sheet window inheriting from w_master_detail_ancestor.
Click OK, then click Yes in the Save Window message box that asks if you want to replace the existing w_customers window.
The new sheet window inherits from w_master_detail_ancestor instead of from w_pbtutor_basesheet.
Repeat steps 7-11, with the following modifications:
Step |
Modified instruction |
|---|---|
9 |
Type |
10 |
Change the Comments text to: |
11 |
The message box prompts you to replace the existing w_products window. |
Close the new w_customers and w_products windows.
You cannot open an ancestor window in the Window painter if any of its descendants are already displayed in the painter.
From the PowerBuilder menu, select Run>Full Build Workspace.
You should rebuild the workspace after changing the inheritance
hierarchy and before making modifications to the new ancestor window.
You can see the status of the build in the Output window, which
displays below the System Tree at the bottom of the PowerBuilder
main window. The build is finished when the Output window displays Finished
Full build of workspace MyWorkspace.
Close the Output window.
Now you add a DataWindow control (saved as the user object, u_dwstandard) to the w_master_detail_ancestor window. It serves as the master DataWindow for the ancestor window and its descendants.
![]() How to create a user object like u_dwstandard
You can create a user object based on a DataWindow control
by clicking the New button and selecting Standard Visual from the
PB Object page of the New dialog box. This opens the Select Standard
Visual Type dialog box. You can then select DataWindow in the Types
text box and add user events as needed. You see how to add user
events later in this tutorial.
How to create a user object like u_dwstandard
You can create a user object based on a DataWindow control
by clicking the New button and selecting Standard Visual from the
PB Object page of the New dialog box. This opens the Select Standard
Visual Type dialog box. You can then select DataWindow in the Types
text box and add user events as needed. You see how to add user
events later in this tutorial.
Double-click w_master_detail_ancestor in the System Tree.
The w_master_detail_ancestor window opens in the Window painter. You generated this window with the Template Application wizard. The wizard also created and attached a menu to this window, m_pbtutor_sheet. The menu is indicated in the Properties view for the window. You change this property later.
Make sure the Layout view is visible in the Window painter.
Expand tutor_pb.pbl by double-clicking it in the System Tree.
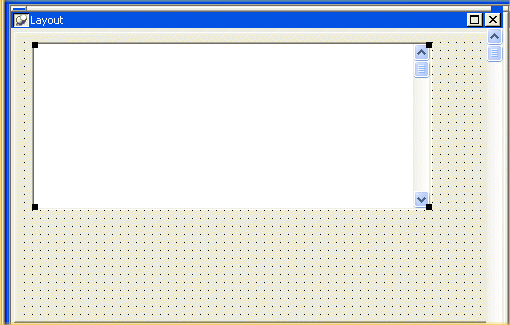
Drag u_dwstandard from the System Tree to the w_master_detail_ancestor window in the Layout view.
Widen the window so that the control is completely visible inside the window.
PowerBuilder creates a DataWindow control that inherits its definition from the user object.

Make sure the new control is selected in the Layout view.
Small black squares at the corners indicate that the control is selected. The Properties view displays the properties of the selected control.
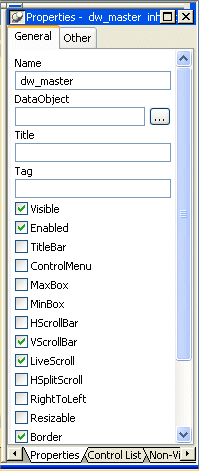
Select the text dw_1 in the Name text box in the Properties view.
Type dw_master in
the Name text box.
Select the VScrollBar check box.

PowerBuilder adds a vertical scroll bar to the control. It also changes its name to dw_master. The prefix dw_ is standard for DataWindow controls.
Now you add a second DataWindow control that is the detail DataWindow in the application.
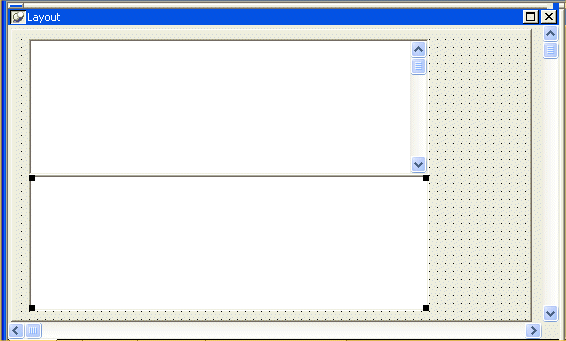
Resize the window so that there is room for a second DataWindow control below the first.
Drag u_dwstandard from the System Tree to below the dw_master control in the Layout view.
PowerBuilder creates another DataWindow control that inherits its definition from the user object u_dwstandard.
Move the DataWindow control so that it is completely visible inside the window.
If you need to, you can maximize the Layout view and enlarge the window object inside it to make more room for the DataWindow controls.

Make sure that the new control is selected in the Layout view.
The Properties view displays the properties of the selected control.
Replace the text dw_1 in the Name text box in the Properties view with
dw_detail.
PowerBuilder changes the name of the control to dw_detail.
Now you view the scripts the DataWindow controls inherited from u_dwstandard.
Double-click the dw_detail DataWindow in the Layout view
or
Select dw_detail from the first drop-down list box in the Script view if it is not already selected.
The Script view opens to the empty script for the dw_detail control’s ItemChanged event.
Unscripted events are alphabetized separately from scripted events. Scripted events are listed at the top of the drop-down list box. You will next look at the dberror event, which contains an ancestor script, so you need to scroll up in the event drop-down list box to find it.
Select dberror from the second drop-down list box in the Script view.
This script is also empty, but a purple script icon displays next to the event name. This indicates that the ancestor control (u_dwstandard) has an associated script.
Select Edit>Go To>Ancestor Script from the menu bar
or
Select u_dwstandard in the third drop-down list box.
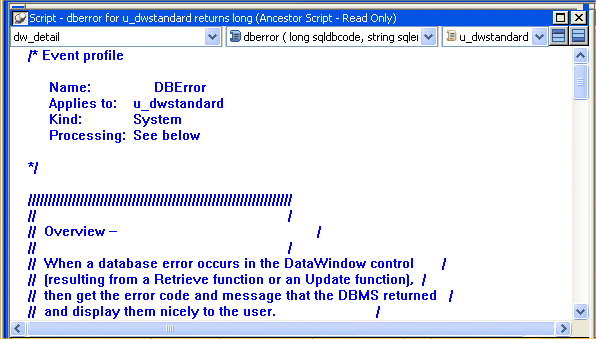
PowerBuilder displays the script for the DBError event in the Script view. The ancestor script is read-only when it is accessed from the Script view for one of its descendants.

Scroll through the window to view the database error-handling logic defined for the DBError event.
The script suppresses the default error message that the DBError event normally displays. Instead, it causes an appropriate message to be displayed for each database error that might occur. The script makes calls to user events that were declared for the user object.
Because you used the u_dwstandard object to define both DataWindow controls in the window, this logic is automatically reused in both controls.
Select Edit>Go To>Descendant Script from the menu bar
or
Right-click inside the script area of the Script view.
Select Go To>Descendant Script from the pop-up menu.
The third drop-down list box again displays w_master_detail_ancestor, the identifier of the object that contains the current control. The script for the DBError event of this control (dw_detail) is still blank.