Use the data source panel to create a data object (or representative) for any OData service from the Web, or from a local JSON file.
Expand the data source panel to see all the defined data sources, with their field definitions.
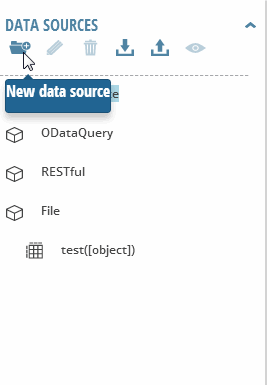
Creating a New OData Data Source
- In the Data Sources panel, click the new data source icon.
- In the wizard, enter:
- Name – enter a name for the data source
- URL – enter the full URL for the data source
- (Optional) User name – enter the user name with which to authenticate
- (Optional) Password – enter the password with which to authenticate
- Use JSONP – to use this option, the server to which you are making the
cross domain request must be JSONP enabled. Note: The OData service must support JSONP. The SuperList update function cannot use this option.
- Use Web server proxy – select this option to make calls to a Web server proxy instead of directly to the Web service. The proxy passes the call to the Web service and then passes the data back to the client application.
If the OData service you are using does not reside on the same server and have the same domain as your developed Web app, the application cannot access the OData service because of the "same origin" policy. See Same Origin policy. In these cases, you can choose either the "Use JSONP" option or the "Use Web server proxy" option.
- Click Confirm.
Creating a Data Source Using a Local JSON File
The JSON file you use must be in the JSON format. For example, if the data is in an array, it should look like this:
[
	{ "id": 1, "name": "Smith", "Salary": 5000.00, "Gender": true },
	{ "id": 2, "name": "John", "Salary": 4000.00, "Gender": true },
	{ "id": 3, "name": "Lilian", "Salary": 7000.00, "Gender": false }
[
The JSON file must be located under the IDE Root Folder, ares-project, or one of its sub folders. For the URL, enter either the full URL or the IP address for the JSON file.
For example, if your JSON file is located in ares-project/ares/employee.json, define the URL for the data object as:
http://127.0.0.1:9009//ide/ares/employee.json, or as /ide/ares/employee.json.
Using a Remote OData Service With no JSONP Support
Select the Use Web Server Proxy option.
Using a Remote OData Service With Parameters
You can use a remote OData service with parameters in situations where you have many OData services that use the same root and most of the same URL, with only minor differences between them, for example:
-
http://www.mycompany.com/corp/department
-
http://www.mycompany.com/corp/employee
-
http://www.mycompany.com/corp/finance
In this example, three data objects were created normally, and the objects can be called individually. To call the OData service dynamically, you can create a single generic data object with parameters defined in the URL. For example:
http://www.mycompany.com/corp/{?}
{?} is defined to represent one parameter, so that when the OData service is called, only one parameter is passed and the {?} is replaced with that parameter. ? is an integer starting with 0.