Create an ODBC data source name (DSN), which is used for connections to a Microsoft SQL Server database system.
-
Install or verify the presence of the proper version of the Microsoft SQL Server ODBC drivers matching the version of the SQL Server database to which the Agentry application will connect.
- Gather the following information:
-
DSN name – determine and record the name for the DSN, which is the name by which the ODBC connection for the SQL Server database is identified on the host system.
-
Server network name – the network name of the host system for the SQL Server database.
-
Login authentication method – determine whether a database client’s login and password will be validated using Windows NT authentication, or SQL Server authentication. Determine the proper method before creating the DSN.
-
Login and Password – if the login authentication method will be SQL Server authentication, obtain the login and password of a valid database user.
-
Default database – determine the proper database instance to which a database client connects when using the DSN created in this procedure.
-
Additional options – there are several options available within the Add System DSN wizard that do not usually need to be modified for Agentry. However, if special circumstances in an implementation require changes to these options, make such determinations prior to creating the new DSN for the Agentry application.
-
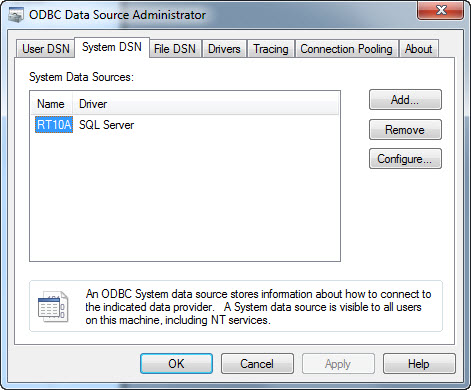
A DSN is created using the Add System DSN wizard provided in the Data Sources (ODBC) utility in Windows. Minimal information is provided here to assist you in completing this task. If you are not familiar with this procedure or the concepts of ODBC, review the Microsoft documentation before proceeding.
- In Windows, select . Select the System DSN tab.
- Click Add.
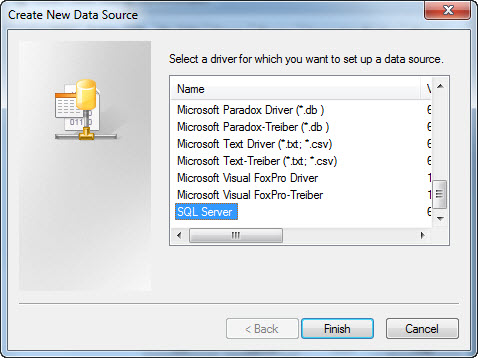
Select the appropriate SQL Server driver and click Finish.
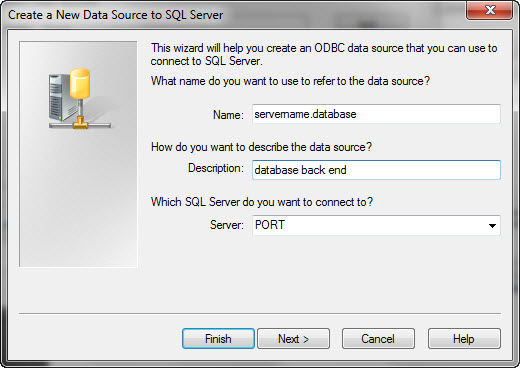
- Enter the DSN name and make a note of it, as you will need it during the Agentry
application installation. Also enter a description and network name.
Enter or select the server to which to connect, then click Next.
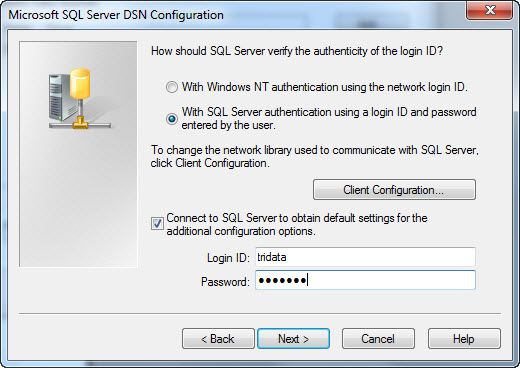
- Select the authentication method for database clients
using this DSN and, if SQL authentication is selected, the login
and password for the SQL Server database.
Click Next.
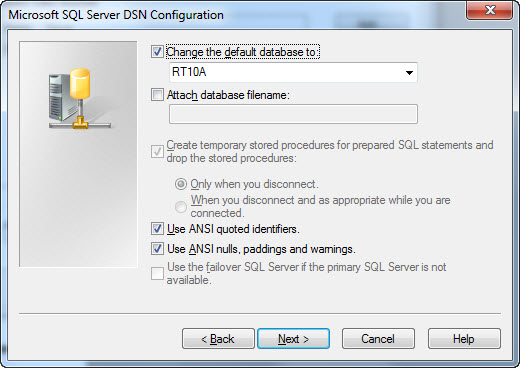
- Set the default database, and, for most situations, leave to the remaining
options set to their defaults. Any changes should be made only by an expert user
who understands the purpose and resulting behavior of each setting and the
overall needs of the implementation environment.
Click Next.
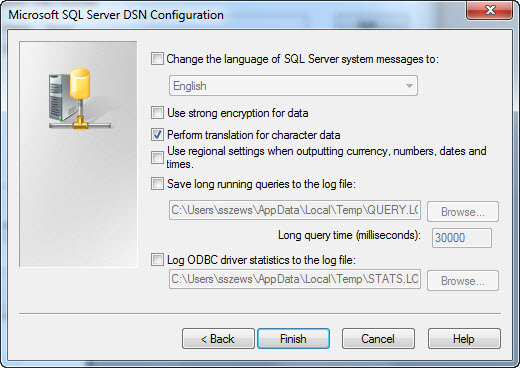
- Set the final options as needed, based on the environment and administrative
needs. These settings pertain primarily to locality and logging, and should be
changed only by someone who is familiar with their purposes.
Click Finish.
- Review the summary of the DSN configuration and click Test Data Source.
Once the test has completed successfully, click OK to close this wizard and return to the Data Sources (ODBC) utility.
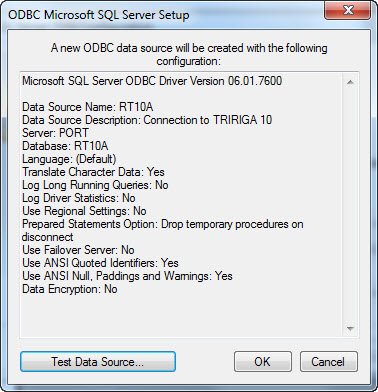
A new ODBC Data Source Name is created. This DSN will be used by the Agentry application to connect with the MS SQL Server database.