Set up project dependencies.
- Locate the MAF libraries, which are installed with SAP Mobile Platform Client SDK installer into the folder you specified during installation.
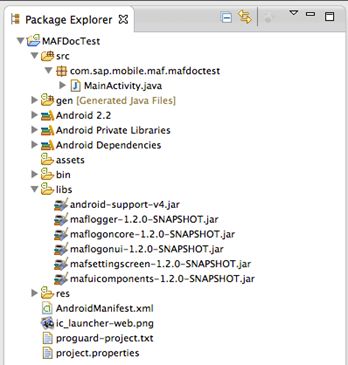
- Add the following MAF libraries to your Android project build path in the
libs folder.
- MAF Android libraries (HTTP REST):
- maflogger.jar maflogoncore.jar
- maflogonui.jar mafsettingscreeen.jar
- mafuicomponents.jar
- MAF Android libraries (HTTP REST):
- Locate MAF resources, which are installed, by default, in the SAP Mobile
Platform installation folder:
- maflogonui.akplib
- mafsettingscreen.apklib
- mafuicomponents.apklib
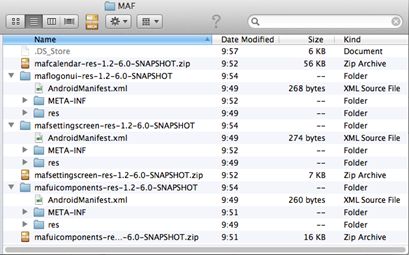
- Change the extension of the apklib archives to ".zip". Unzip the files,
which contain Android apklib Eclipse projects:
- maflogonui-res
- mafsettingscreen-res
- mafuicomponents-res
- To add the resources to your workspace, copy the extracted folders to your
workspace. Your folder structure is now similar to this:
- To import the resources to the Eclipse project, open Eclipse and select .
- In the New Project wizard, select , and click Next.
- Click Browse to select the folder where you extracted the resource projects.
- Select all projects, select Copy projects into
workspace, then click Finish.
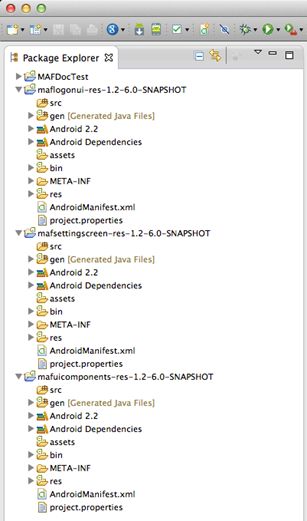
Three are now three new Android projects in your Eclipse workspace:
These projects do not include any source code, but do include these Android resource files:- Images
- Layouts
- Localization
- XMLs
- Mark the resource projects as Android library projects:
- Select a project.
- Open the project properties.
- Select Android and mark the project as library by selecting Is Library.
- Repeat steps a-c for all the resource projects.
- Set up dependencies:
- Your Android project must reference the Android library projects from your workspace. Open the project properties of your Android project and select Android.
- In the Library section, click Add.
- Select one of the listed projects, and click OK.
- Repeat steps a-c for the rest of the Android library projects. As a result, the referenced Android libraries get listed in your project properties window.
- Click OK to save the changes.
- Find and add SAP Mobile Platform client libraries to your project: SAP
Mobile Platform libraries are installed with SAP Mobile Platform Client SDK
installer into the folder you specified during installation. Add the
following .jar files to your Android project build path
in the libs folder:
- SAP Mobile Platform libraries
- Common.jar
- Connectivity.jar
- CoreServices.jar
- Request.jar
If you use HTTP REST based communication channel, add these libraries:- DataVaultLib.jar
- perflib.jar
- sap-e2etrace.jar
- SAP Mobile Platform libraries
- Locate and add Afaria client libraries to your project: Afaria libraries are installed with SAP Mobile Platform Client SDK installer into the folder you specified. Add the AfariaSLL.jar to your Android project build path in the libs folder.
- Locate and add Client Hub libraries to your project, which are installed with SAP Mobile Platform Client SDK installer into the folder you specified. Add the ClientHubSLL.jar to your Android project build path in the libs folder.