Use eclipse to build the user interface for the SMPFlightManagement application.
The SMPFlightManagement Android OData example project available at http://scn.sap.com/docs/DOC-8803 contains the source code for the user interface for the sample application. You can build the user interface automatically by importing the source files to the eclipse project.
In this section you will be provided with the sample of XML layout which is created when you drag and drop the elements from Palette pane to Graphical Layout editor.
- Right click on layout folder and go to New >
Android XML File.
Welcome screen
The welcome splash screen is displayed on the first launch of the SMPFlightManagement application. Create and include the image file. When the application is executed, it checks for the sample_flight.png, and displays it as the first screen of the application.
<RelativeLayout xmlns:android="http://schemas.android.com/apk/res/android"
    xmlns:tools="http://schemas.android.com/tools"
    android:layout_width="match_parent"
    android:layout_height="match_parent"
    android:background="@drawable/sample_flight" >
</RelativeLayout>
Settings screen
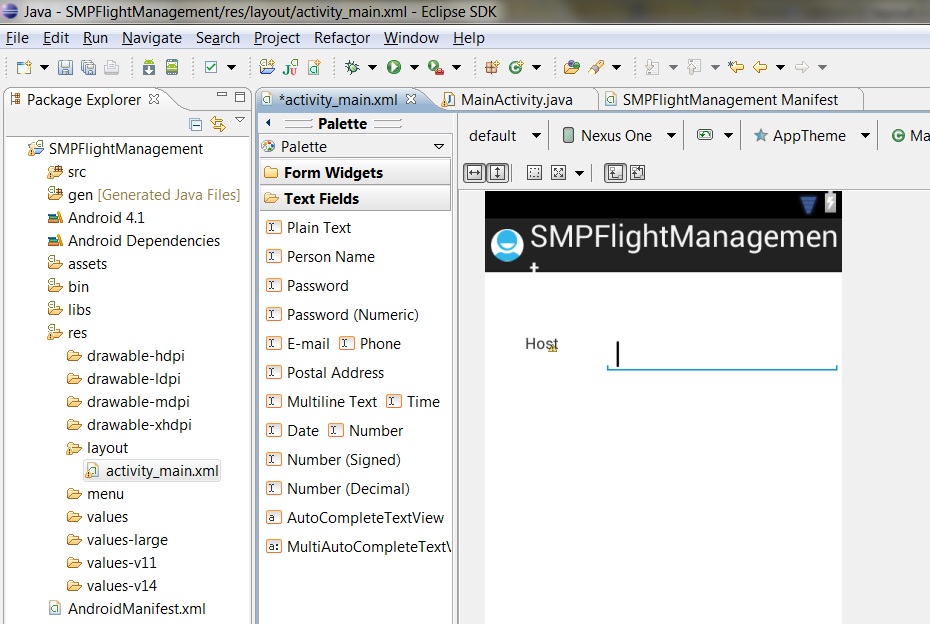
Create the empty Android XML file and drag and drop the elements in Graphical Layout editor as shown below:
Below is the sample XML generated code of the text label and text box. You can add more elements in similar fashion.<RelativeLayout xmlns:android="http://schemas.android.com/apk/res/android" xmlns:tools="http://schemas.android.com/tools" android:layout_width="match_parent" android:layout_height="match_parent" > <TextView android:id="@+id/textView1" android:layout_width="wrap_content" android:layout_height="wrap_content" android:layout_alignParentLeft="true" android:layout_alignParentTop="true" android:layout_marginLeft="36dp" android:layout_marginTop="55dp" android:text="Host" /> <EditText android:id="@+id/editText1" android:layout_width="wrap_content" android:layout_height="wrap_content" android:layout_alignTop="@+id/textView1" android:layout_marginLeft="40dp" android:layout_toRightOf="@+id/textView1" android:ems="10" android:inputType="textPersonName" > <requestFocus /> </EditText> </RelativeLayout>Application passcode screen
For subsequent launches you need to provide application passcode. Drag and drop the elements in Graphical Layout editor as required to retrieve the passcode as user inputs.
<RelativeLayout xmlns:android="http://schemas.android.com/apk/res/android"
    xmlns:tools="http://schemas.android.com/tools"
    android:layout_width="match_parent"
    android:layout_height="match_parent"
    android:background="@drawable/sample_flight_bg"
    tools:context=".PasswordActivity" >

    <TextView
        android:id="@+id/textView2"
        android:layout_width="wrap_content"
        android:layout_height="wrap_content"
        android:layout_centerHorizontal="true"
        android:layout_marginTop="100dip"
        android:text="Enter Application Passcode"
        android:textAppearance="?android:attr/textAppearanceSmall" />

    <EditText
        android:id="@+id/editText1"
        android:layout_width="wrap_content"
        android:layout_height="wrap_content"
        android:layout_centerHorizontal="true"
        android:layout_marginTop="134dp"
        android:ems="10"
        android:hint="Passcode"
        android:inputType="textPassword"
        android:textSize="15dip" >

        <requestFocus />
    </EditText>

    <Button
        android:id="@+id/button1"
        style="?android:attr/buttonStyleSmall"
        android:layout_width="wrap_content"
        android:layout_height="wrap_content"
        android:layout_below="@+id/editText1"
        android:layout_centerHorizontal="true"
        android:layout_marginTop="25dp"
        android:height="30dip"
        android:onClick="onLoginClick"
        android:text="Log In" />

</RelativeLayout>
Carriers list screen
For displaying the list of flight carriers, add the code snippet for layout.
<LinearLayout xmlns:android="http://schemas.android.com/apk/res/android"
    xmlns:tools="http://schemas.android.com/tools"
    android:layout_width="match_parent"
    android:layout_height="match_parent"
    android:orientation="vertical" >

    <ListView
        android:id="@+id/android:list"
        android:layout_width="fill_parent"
        android:layout_height="wrap_content"
        android:cacheColorHint="#ff6a00"
        android:divider="#F0AB00"
        android:dividerHeight="1px"
        android:drawSelectorOnTop="false" >
    </ListView>

    <TextView
        android:id="@+id/label"
        android:layout_width="fill_parent"
        android:layout_height="fill_parent"
        android:padding="10dip"
        android:textColor="@android:color/black"
        android:textSize="24dip"
        android:textStyle="bold" />

</LinearLayout>