Installing the Agentry Editor Plug-In and Eclipse Platform
The following items must be addressed prior to installing the Agentry Editor Eclipse plug-in:
- Determine if the proper installation for both Eclipse and the Agentry Editor plug-in is the 32-bit or 64-bit build.
- Access to the SAP Mobile SDK 2.3 package, as provided on the SAP Service Marketplace.
- DO NOT install the Agentry
Editor plug-in
into the SAP Mobile WorkSpace, which is an Eclipse implementation.
Rather, obtain the proper compressed archive of Eclipse 3.7.2 (Eclipse
Indigo) from one of the following two locations:
- 32-Bit Build: Click Here for Eclipse 32-Bit Download or enter the following URL in a web browser: http://www.eclipse.org/downloads/download.php?file=/technology/epp/downloads/release/indigo/SR2/eclipse-java-indigo-SR2-win32.zip
- 64-Bit Build: Click Here for Eclipse 64-Bit Download or enter the following URL in a web browser: http://www.eclipse.org/downloads/download.php?file=/eclipse/downloads/drops/R-3.7.2-201202080800/eclipse-SDK-3.7.2-win32-x86_64.zip
- Log into the intended host system as a user with Administrative privileges.
- Internet access to obtain the Eclipse plug-in installers is required.
The Agentry Editor is provided as a plug-in to Eclipse. This procedure provides the steps necessary to first install Eclipse and then to install the Agentry Editor to this Eclipse implementation. As noted in the prerequisites, the Eclipse installer should be obtained form the eclipse.org website, with the proper 32-bit or 64-bit build downloaded from that site. Eclipse is provided in a ZIP archive which is extracted to the desired installation location.
Once this is complete, the Agentry Editor plug-in can be added to the Eclipse implementation according to the instructions provided here. The build of the Agentry Editor plug-in must match the Eclipse build, and both 32-bit and 64-bit Agentry Editor builds are available.
- When Eclipse is running, select the menu item Help
| Install new Software...
The Available Software dialog displays.
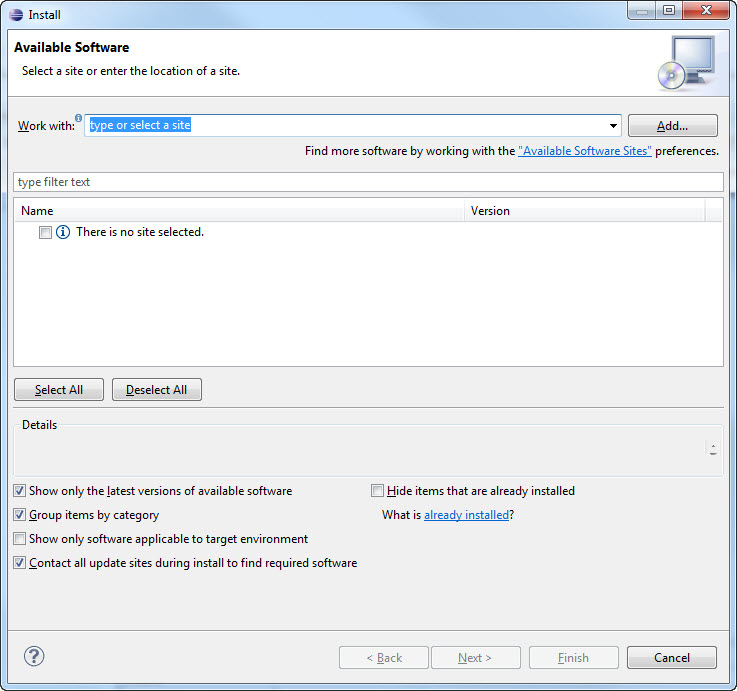
- Click the [Add] button located to the right of
the Work with field.
The Add Repository dialog displays.
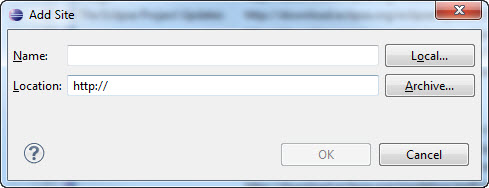
- Click the [Archive] button to the right of the
Location field. In the file explorer window now displayed, navigate
to and select the archive file for the Agentry
Editor plug-in
from the first step in this procedure. Click [OK] after returning
to the Add Repository screen.
This returns you to the Install dialog, where the Agentry Editor plug-in (either 32-bit or 64-bit) is listed.
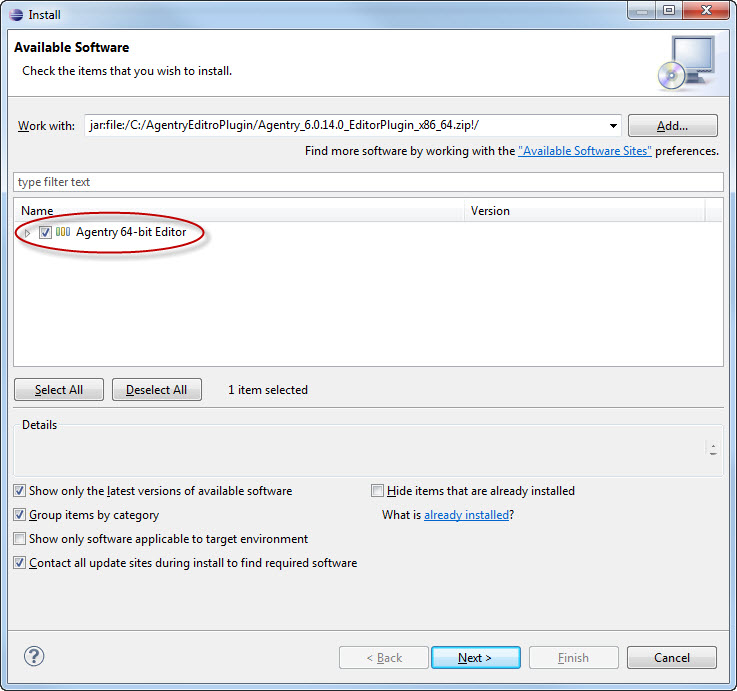
- Check the box for the Agentry
Editor and
click the [Next >] button.
The Install Details dialog displays.
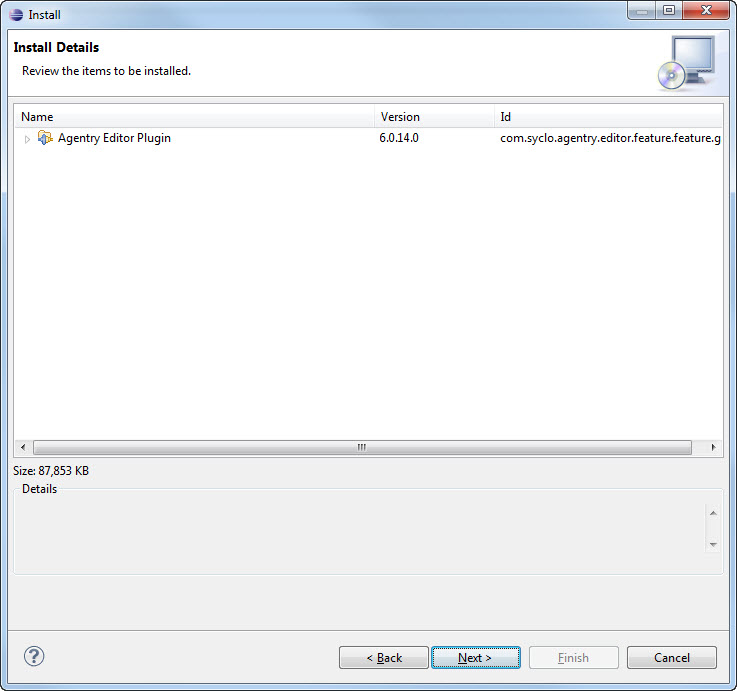
- Click the [Next >] button to proceed.
The License Agreement dialog displays.

- Select the radio button below the license information
to accept the agreement and click the [Finish] button. During
this process a security warning is displayed related to unsigned
content. This is a result of certain .jar files
not having been signed. You can safely continue with the installation
by selecting the option to continue in the warning dialog.
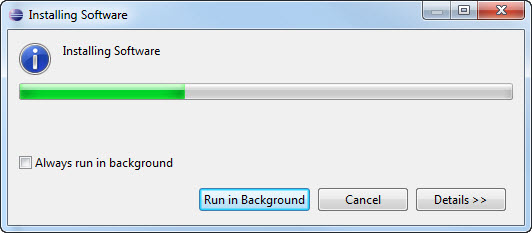
The installation will commence and a status dialog is displayed.
- When the plug-in has been installed, a prompt is displayed
to restart Eclipse. Select the [Restart Now] button. When
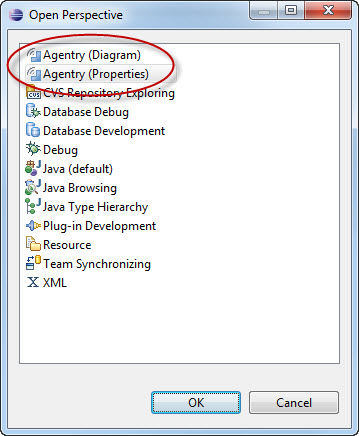
Eclipse restarts, go to the workbench. Select the menu item Window
| Open Perspective | Other...
The Open Perspective dialog displays, where the two Agentry perspectives are now listed.
The Eclipse environment and Agentry Editor plug-in are installed on your system.
Additional configuration of Eclipse is needed as it relates to the Agentry Editor plug-in. This configuration is performed within the Eclipse Platform and includes the following general items:
- Agentry projects work with several file types. You must create file associations within Eclipse for these types to allow the platform to properly handle, display, and edit them.
- Script files, including SQL and shell or batch scripts created in Agentry Editor are saved with a Unicode encoding. The default file encoding for an Eclipse workspace is different. You must modify file encoding options within the Eclipse preferences.
- When working with a database back end system, you must configure the Data Source Tools installed with Eclipse in order for the Agentry Editor connector studio to work with a database back end.
It may also be necessary to complete the configuration of one or more Agentry Servers. A publish from the Editor is a part of the Server configuration process as it relates to the Agentry application project’s system connections. If connectivity was already configured between the Agentry Server and the back end system, the publish is not necessary for connection configuration.