Create an ODBC Data Source Name (DSN), used for connections to an MS SQL Server database system.
Install or verify the presence of the proper version of the MS SQL server ODBC drivers matching the version of the SQL Server database to which the Agentry Server will connect.
- Gather the following information:
DSN Name: Determine and record the name for the DSN before the DSN is created. This is the name by which the ODBC connection for the SQL Server database is identified on the host system. It is needed when the Agentry Server is configured.
Server Network Name: The network name of the host system for the SQL server database.
Login Authentication Method: When creating the DSN, the option is provided to validate a database client’s login and password using either Windows NT authentication, or by using SQL server authentication. Determine the proper method before creating the DSN.
Login and Password: If the login authentication method will be SQL server authentication, obtain the login and password of a valid database user. If the chosen login and password are not valid, it is not possible to create the DSN.
Default Database: A DSN connection is made to a SQL server database server. It is likely this server has multiple database instances. Therefore, determine the proper database instance as it will be the default instance to which a database client connects when using the DSN created in this procedure.
Additional Options: There are several options available within the Add System DSN wizard that do not usually need to be modified for Agentry. However, if special circumstances in an implementation require changes to these options, make such determinations prior to creating the new DSN for the Agentry Server.
A DSN is created using the Add System DSN wizard provided in the Data Sources (ODBC) utility in Windows. This information is provided for reference purposes only. Those who are not familiar with this procedure or the concepts of ODBC should review documentation provided by Microsoft before proceeding.
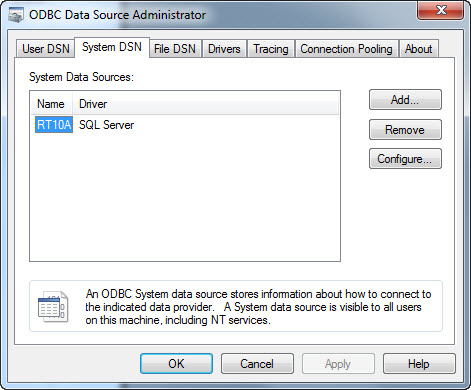
- Open the Data Sources (ODBC) utility in Windows
by navigating to . Select
the System DSN tab.
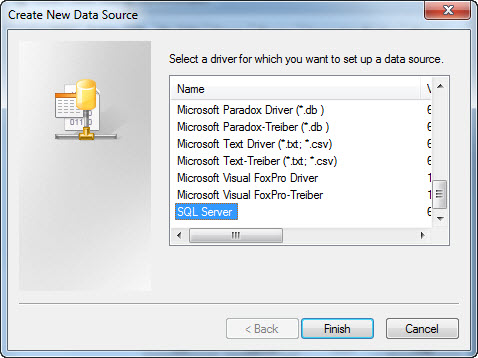
- Start the Add System DSN Wizard by clicking the [Add] button.
Select the appropriate SQL server driver from the list and click the [Finish] button.
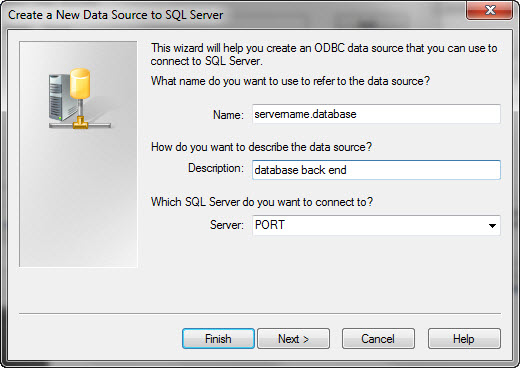
- Enter the desired DSN Name and note this value for use
during the Agentry
Server installation.
Also enter a Description and Network Name in the fields provided.
Enter the Server name by typing it directly or by selecting from those available on the network by opening the drop-down list for this field. Click the [Next] button to continue.
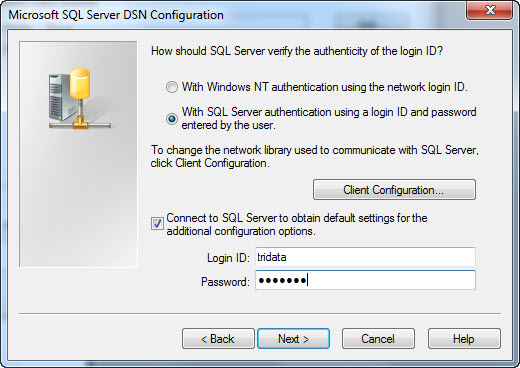
- Select the authentication method for database clients
using this DSN and, if SQL authentication is selected, the login
and password for the SQL Server database.
Remember that the login and password are only needed if the SQL Server authentication method was selected. Click the [Next] button to continue.
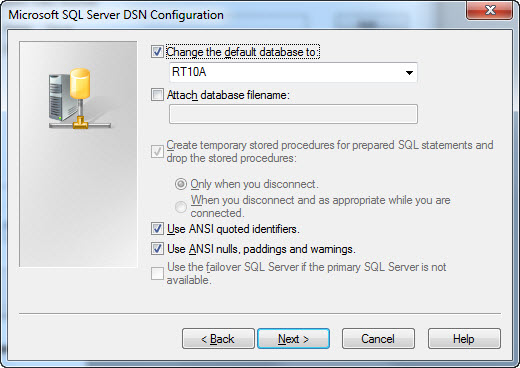
- Set the default database to the database with which the Agentry
Server will synchronize
data. In most cases the remaining options are left set to their
defaults. It is recommended that these settings are changed only
by an expert user that understands the purpose and resulting behavior
of each setting and the overall needs of the implementation environment.
Click the [Next] button to continue.
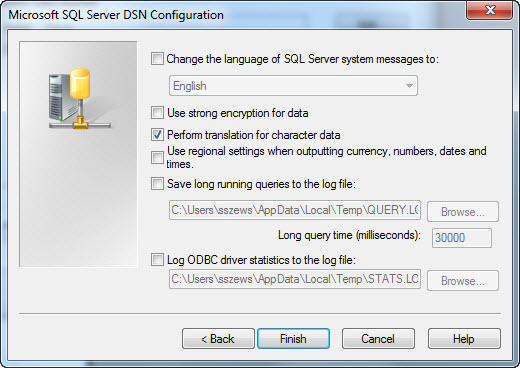
- Set the final options as needed, based on the environment
and administrative needs. These settings pertain primarily to locality
and logging. They should only be changed by someone familiar with
their purposes. The Agentry
Server does
not impose any requirements on the settings for these items.
Click the [Finish] button to complete creating the new DSN and to test it.
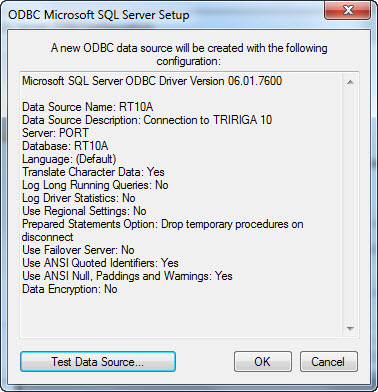
- Review the summary of the DSN configuration and perform
a test by clicking the [Test Data Source] button.
Once the test has completed successfully, click the [OK] button to close this wizard and return to the Data Sources (ODBC) utility. The new System DSN is listed and available to database clients needing to connect to this database, including the Agentry Server.
A new ODBC Data Source Name is created. This DSN will be used by the Agentry Server to connect with the MS SQL Server database.
Make note of the Data Source Name value entered when creating the DSN. This value is needed when configuring the Agentry Server after it is installed. Also note the login and password information for SQL authentication (if selected) as this is needed by the Agentry Server.