Deploying and Running the Device Application

Deploy the device application to a Windows Mobile 6.5.3 device emulator, and test its functionality.

  1. In Visual Studio, choose Tools > Device Emulator Manager.
  2. Scroll down to Windows Mobile 6.5.3 Professional Emulator, right-click, and select Connect.
    The Windows Mobile emulator launches.
  3. In Device Emulator Manager, right-click Windows Mobile 6.5.3 Professional Emulator again and select Cradle.

    Windows Mobile Device Center launches and connects automatically.


    Windows Mobile Device Center
  4. In the Solution Explorer of Visual Studio, right-click the SUP101 project and select Deploy.
  5. If you see the Deploy SUP101 dialog, select Windows Mobile 6.5.3 Professional Emulator and click Deploy.
  6. In the Windows Mobile emulator, select Start.
  7. Open the sup101 folder.
  8. Click SUP101 to start the application.
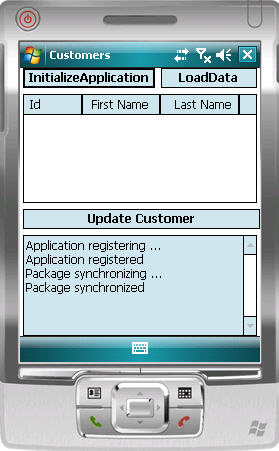
  9. Click InitializeApplication.
    Inside InitializeApplication, the application is registering and synchronizing data from the backend server. The initialization process also enables Target Change Notification by:
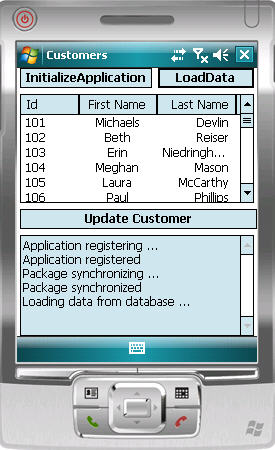
    ISynchronizationGroup sg = SUP101DB.GetSynchronizationGroup("default");
    sg.EnableSIS = true;
    sg.Save();
    
    A message displays in the output box below when complete.
    Customer List Screen
  10. Click LoadData to populate Customer data in the list view.
    To improve performance, SUP101DB.ExecuteQuery queries the customer list, selecting only required columns (fname, lname...) instead of the entire customer object.
    Customer List Refresh
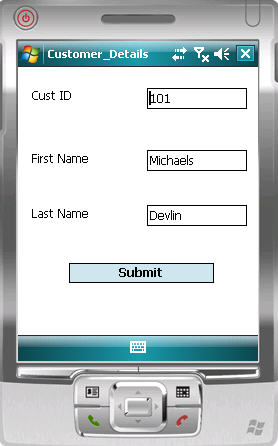
  11. Highlight a customer record and click Update Customer.

    Customer List Update
  12. Make changes, then click Submit to return to the Customers List screen.
    Inside Submit, customer information is updated and SUP101DB.beginSynchronize is called in the background to avoid blocking the user interface.