Creating the Customer Details Form

Create the user interface for the Customer_details form.

  1. Add another Windows Form to the project, and name this one Customer_details.
  2. From the Toolbox, drag and drop three labels onto the Customer_details form.
  3. Align the labels on the left side of the form.
    In the Properties view, in the Text field, rename the labels First Name, Last Name, and City.
  4. From the Toolbox, drag and drop three text boxes onto the Customer_details form and align them to the right of each of the three labels.
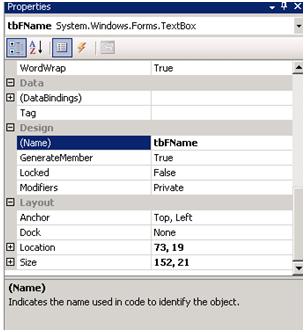
  5. Set the properties for each text box.
    • For First Name, use tbFName.
    • For Last Name, use tbLName.
    • For City, use tbCity.

    Customer Details Text Box Properties
  6. From the Toolbox, drag and drop two buttons from Common Device Controls to the Customer_details form below the labels and text boxes.
    1. In the Properties view, in the Text field, rename the button on the left to Cancel.
    2. In the Properties view, in the Text field, rename the button on the right to Submit.
    The form looks like this:


    vs_customer_details_screen

  7. Save the Customer_details.cs form.
  8. In Solution Explorer, in the SUP101 project, right-click Customer_details.cs, then select View Code.
  9. Replace the existing code with the code from the Customer_details.cs file you downloaded from the Sybase Product Documentation Web site:
    using System;
    using System.Linq;
    using System.Collections.Generic;
    using System.ComponentModel;
    using System.Data;
    using System.Drawing;
    using System.Text;
    using System.Windows.Forms;
    using SUP101;
    
    namespace SUP101
    {
        public partial class Customer_details : Form
        {
    
            Customer thisCustomer;
            public Customer_details()
            {
                InitializeComponent();
            }
    
            //Click event for Cancel button in Customer_detail screen
            private void Cancel_Click(object sender, EventArgs e)
            {
                Program.getForm1().Visible = true;
                Program.getForm2().Visible = false;
    
            }
    
            //Click event for Submit button in Customer_detail screen
            private void Submit_Click(object sender, EventArgs e)
            {
                thisCustomer.Fname = tbFName.Text;
                thisCustomer.Lname = tbLName.Text;
                thisCustomer.City = tbCity.Text;
                thisCustomer.Save();
                Program.getForm1().Visible = true;
                Program.getForm2().Visible = false;
    
            }
            private void AddDataToForm()
            {
                int id = Int32.Parse(Program.getCustomer());
    
                //Retrieves data from the local database.
                thisCustomer = Customer.FindByPrimaryKey(id);
                tbFName.Text = thisCustomer.Fname;
                tbLName.Text = thisCustomer.Lname;
                tbCity.Text = thisCustomer.City;
            }
    
            //Load method event for Customer_detail
            private void Customer_Details_Load(object sender, EventArgs e)
            {
                AddDataToForm();
            }
    
            //paint method event for Customer_detail
            private void Customer_Details_paint(object sender, PaintEventArgs e)
            {
                AddDataToForm();
            }
        }
    }
    
  10. In the the Customer_details.cs[Design] view, click the Submit button, then in the Properties view, add the Submit_Click event to the Submit button, and the Cancel_Click event to the Cancel button.
  11. Add events to the Customer_details.cs.
    1. Click the Customer_details.cs [Design] tab.
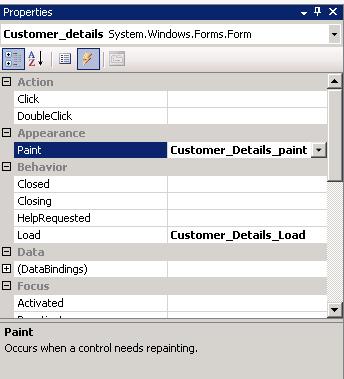
    2. In Properties view, select Customer_details System.Windows.Forms.Form.
    3. Click the Events icon (lightning bolt).
    4. In Load, add the Customer_Details_Load event.
    5. In Paint, add the Customer_Details_paint event.

    Customer Details Event Properties
  12. Save your changes.