Create the user interface for the Customers form.
Prerequisites
Delete Form1.cs from the SampleApp project.Task
- In Solution Explorer, right-click the SUP101 project and select Add > New Item.
- In the Add New Item dialog, select Windows Form from the Categories and Templates, enter Customers as the form name, and click Add. An empty form, Customers, displays on the Customer.cs [Design] tab.
- From the Toolbox, drag and drop three buttons on to the form.
- Select each button, and in the Properties view, change the Text of the buttons to:
- button1 – Sync
- button2 – Refresh
- button3 – Update
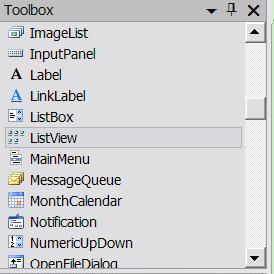
- In the Toolbox, select ListView from Common Device Controls, and drag and drop it to the Customers form.
- In the Toolbox, select Textbox from Common Device Controls, and drag and drop it to the Customers form.
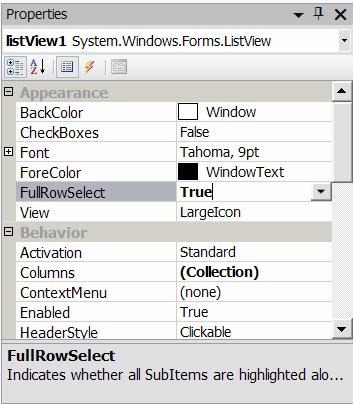
- In the Customers form, click the ListView, then in the Properties pane, set FullRowSelect to True.
- In Customers, select the Textbox, then in the Properties pane, set these properties:
- Multi-line – True
- Read-only – True
- Scrollbars – Vertical
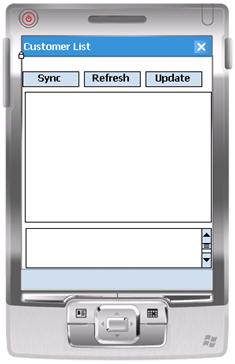
- Arrange the controls on the Customers form so they look like this:
- Save the Customers.cs form.
- In Solution Explorer, in the SUP101 project, right-click Customers.cs, then select View Code.
- Replace the code with the source code from the Customers.cs file you downloaded from the Sybase Product Documentation Web site:
using System; using System.Linq; using System.Collections.Generic; using System.ComponentModel; using System.Data; using System.Drawing; using System.Text; using System.Windows.Forms; using SUP101; namespace SUP101 { public partial class Customers : Form { public Customers() { InitializeComponent(); } //Click event for Sync button in Customers screen private void button1_Click(object sender, EventArgs e) { if (!SUP101DB.DatabaseExists()) { //This creates the database. SUP101DB.CreateDatabase(); } try { //This calls SUP101, the package database, user name and password to connect to the Unwired Server. //If your login name and password is different, then the changes must be reflected here. //The default is used below. SUP101DB.LoginToSync("supAdmin", "s3pAdmin"); SUP101DB.SubmitPendingOperations(); SUP101DB.Synchronize(); AddString("Synchronization completed."); } catch (Exception ex) { List<LogRecordImpl> lrs = LogRecordImpl.FindWithQuery(new Sybase.Persistence.Query()); AddString("log record count=" + lrs.Count); for (int i = 0; i < lrs.Count; i++) { AddString(lrs[i].Message); } } AddListView(); } private void AddString(String s) { textBox1.Text += s + "\r\n"; textBox1.SelectionStart = textBox1.Text.Length; textBox1.ScrollToCaret(); textBox1.Refresh(); } //Click event for Refresh button in Customers screen private void refresh_Click(object sender, EventArgs e) { //Check if "default" synchronization group has been synchronized. //All MBOs not specificly put inside any synchronization group in eclipse tooling, will be put inside "default" synchronization group //In the example, Customer MBO is in default synchronization group if (SUP101DB.IsSynchronized("default")) { Cursor.Current = Cursors.WaitCursor; AddString("Refresh data"); AddDataToListView(); Cursor.Current = Cursors.Default; } else { AddString("Please synchronize first."); } } private void AddListView() { this.listView1.Clear(); listView1.Columns.Add("Id", listView1.Width / 4, HorizontalAlignment.Left); listView1.Columns.Add("First Name", listView1.Width / 3, HorizontalAlignment.Center); listView1.Columns.Add("Last Name", listView1.Width / 3, HorizontalAlignment.Right); listView1.View = View.Details; listView1.FullRowSelect = true; } private void AddDataToListView() { this.listView1.Clear(); listView1.Columns.Add("Id", listView1.Width / 4, HorizontalAlignment.Left); listView1.Columns.Add("First Name", listView1.Width / 3, HorizontalAlignment.Center); listView1.Columns.Add("Last Name", listView1.Width / 3, HorizontalAlignment.Right); listView1.View = View.Details; listView1.FullRowSelect = true; List<Customer> c = Customer.FindAll(); if (c.Count > 0) { for (int i = 0; i < c.Count; i++) { ListViewItem item = new ListViewItem(c[i].Id.ToString()); item.SubItems.Add(c[i].Fname); item.SubItems.Add(c[i].Lname); listView1.Items.Add(item); } } } //Click event for Update button in Customers screen private void update_Click(object sender, EventArgs e) { if (listView1.FocusedItem != null) { Program.setCustomer(listView1.FocusedItem.Text); Program.getForm2().Visible = true; Program.getForm1().Visible = false; } else MessageBox.Show("Please select a row."); } } } - Be sure the bolded code line matches the Sybase Unwired Platform Admin login and password you indicated during installation.SUP101DB.LoginToSync("supAdmin", "s3pAdmin");
- Click the Customers.cs[Design] tab to go back to the Customers form design view to add event handlers to the buttons.
- Click the Sync button on the form.
- In the Properties view for the button, click the Event icon (lightning bolt),
- Next to the Click databinding, select button1_Click .
- Repeat these steps for each button, selecting these events for each Click databinding.
- Refresh – refresh_Click
- Update – update_Click
- Save your changes.