Provisioning iOS Devices

Use this procedure to provision your iOS device for APNs if you build your own Mobile Workflow application using the source code provided in <UnwiredPlatform_InstallDir>\UnwiredPlatform\ClientAPI\Workflow\ios\MobileWorkflow-2.1.0.tar.gz.

See the Apple developer documentation for Provisioning and Development. These procedures are documented in detail there. Applications developed for distribution must be digitally signed with a certificate issued by Apple. You must also provide a distribution provisioning profile that allows user devices to execute the application.

  1. Register with Apple to download and use the iOS SDK. A free account allows you to download the SDK and develop with the simulator. To deploy Mobile Workflow applications to devices, you must create a certificate in your developer account and provision your device. See the Apple Local and Push Notification Programming Guide at http://developer.apple.com/library/ios/#documentation/NetworkingInternet/Conceptual/RemoteNotificationsPG/ProvisioningDevelopment/ProvisioningDevelopment.html for details.
  2. Use the iPhone Provisioning Portal at http://developer.apple.com/devcenter/ios/index.action to create the SSL certificate and Keys. Configure the certificate to enable for Apple Push Notification service.
  3. On your Mac, launch the Keychain Access program. This is located in the Utilities folder.
    1. In Keychain Access, select Keychain Access > Certificate Assistant > Request a Certificate from Certificate Authority.
    2. In the Certificate Information window, enter the information. Use a unique Common Name.
      Note: Make sure you use a different Common name than a development certificate you already have. This creates a private key with the name you enter here.
      A certificate request is created and saved in the Desktop folder by default.
  4. In the Apple Provisioning Portal, continue with the App ID provisioning and browse to the certificate request file created in Keychain Access in the previous step, then click Generate.
  5. Click Continue.
  6. Click Download Now.
    The certificate is downloaded onto your Mac and the Keychain utility appears and the certificate is imported into the "login" keychain.
  7. Verify that the certificate is associated with a private key.
  8. Create and install a Provisioning profile for the Mobile Workflow application.
  9. In XCode, open the MobileWorkflow project..
    Note: Note the product name. This is used to configure the mobile workflow in Sybase Control Center and corresponds to the Application Name property in SCC. By default, the product name is Workflow. This needs to be configured in both the SUPObj.cpp file and the properties for the target. There is a 15-character limit for the product name.
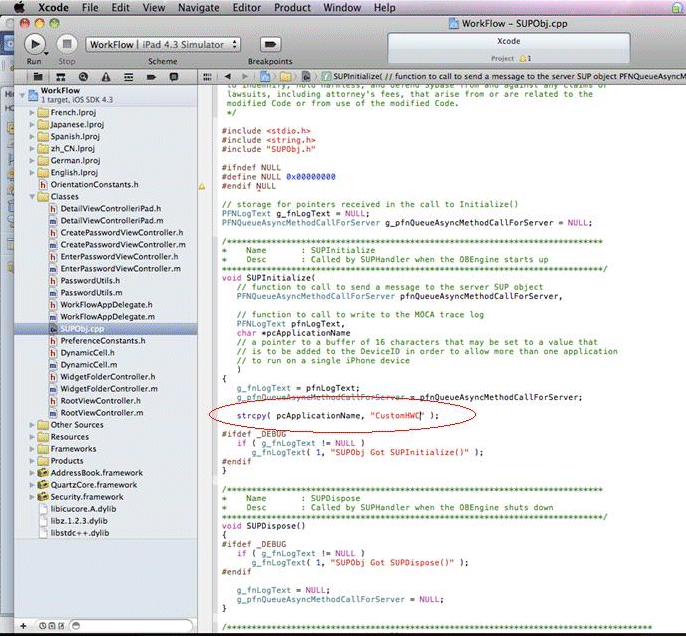
  10. Edit the SUPObj.cpp file:
    1. Open the SUPObj.cpp file in Xcode and look for the line strcpy( pcApplicationName, "Workflow" );
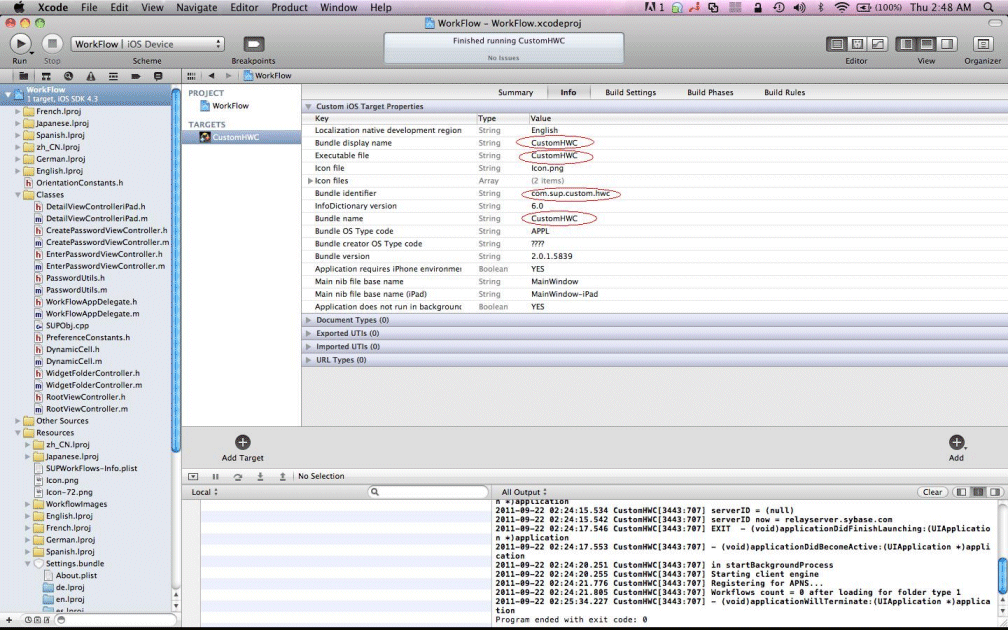
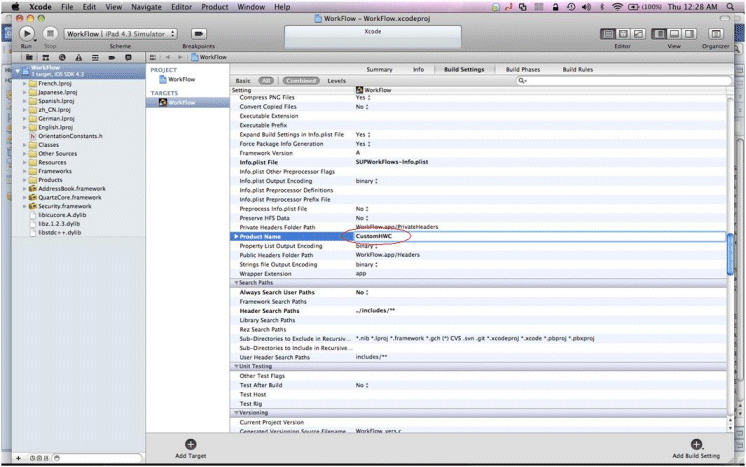
    2. Make sure "Workflow" is changed to the same name as defined in the Bundle Name, Bundle Display Name , and Product Name.

      SUPObjcpp
    Note: The Bundle Identifier must correspond to the Bundle identifier specified in the App ID. By default, the project comes with a bundle ID of com.sybase.mobileworkflow. Change it to something unique. Make sure the Bundle Display Name, Bundle Name, Executable File,and Application Name are all the same as the string given in SUPObj.cpp.

    Bundle_Identifier

    MWF_Provisioning_ios_10a

    MWF_Product_Name
  11. Copy the exported <certificate_name>.p12 certificate to the machine where Sybase Control Center is installed and follow the instructions in Configuring Apple Push Settings for the Mobile Workflow Application and use the certificate you just created.
    Note: Make sure you select only the certificate in the Keychain tool before exporting