Debug the Mobile Workflow package html and js files using a Windows desktop browser.
This procedure uses Google Chrome as an example, but you can use any browser that supports JavaScript debugging.
- Change the level of the Mobile Workflow tracing to Debug:
- Open <UnwiredPlatform_InstallDir>\UnwiredPlatform-XX\Servers\MessagingServer\Data\TraceConfig.xml with a text editor.
- In the WorkflowClient module section, change the tracing level to Debug, as shown:
<Module
      Name="WorkflowClient"
      Level="Debug"
      Desc="Workflow client" />
- Open the browser to use for debugging and open the Java Console.If you are using Chrome:
- Add the following command line option to the shortcut used to start Chrome:
..\chrome.exe" --allow-file-access-from-files
- Add the following command line option to the shortcut used to start Chrome:
- You can debug a client-initiated Mobile Workflow application up until the point where a menu item of the Submit Workflow type is performed. If the menu item action is an Online Request, place the XMLWidgetMessage (available in the WorkflowClient trace log located in <UnwiredPlatform_InstallDir>\UnwiredPlatform\Servers\UnwiredServer\logs\WorkflowClient) that is the expected response message into an rmi.xml file and place it at the same level as the generated workflow.html file.
- From WorkSpace Navigator, drag and drop the workflow.html file for the Mobile Workflow application to debug onto the browser window.
- Find the name of the screen to debug:
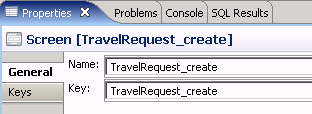
- In Flow Design, click the screen to debug.
- In the Properties view, click General in the left pane.The screen name is shown in Name, in this example, that is TravelRequest_create.
- In the URL, add the ?screenToShow=<Screen_name> parameter to the end of the URL, for example:file:///C:/Documents%20and%20Settings/<user_name>/workspace/MobileWorkflow101/Generated%20Workflow/travelrequest/html/workflow.html?screenToShow=TravelRequest_create
- To simulate an e-mail message triggered Mobile Workflow application:
- Create a file called transform.xml and place the contents of the XMLWidgetMessage into it. The contents of the XMLWidgetMessage are in the WorkflowClient trace log in <UnwiredPlatform_InstallDir>\UnwiredPlatform\Servers\UnwiredServer\logs\WorkflowClient).
- To provide data to the Mobile Workflow application you are debugging, place the transform.xml file at the same level as the generated workflow.html file (Generated Workflow\<Workflow_application_name>\html).
- Add a ?loadtransformdata=true parameter to load the data into the Workflow application.
- Create a file called transform.xml and place the contents of the XMLWidgetMessage into it.
- Set up client tracing for the device user in Sybase Control Center. This is the location where the messages from the method logToWorkflow are written.
- In Sybase Control Center, set the device debug trace level to 4 (debug). See Sybase Control Center for Unwired Platform documentation for information about setting the device trace level.
- Redeploy the Mobile Workflow package.
- In Sybase Control Center, select Get Trace after using the Mobile Workflow.The log file is written to <UnwiredPlatform_InstallDir>\logs\<machine_name-server.log>.
- In Sybase Control Center, set the device debug trace level to 4 (debug).