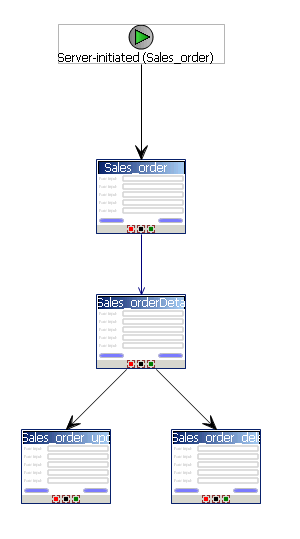
Create a new workflow application with a server-initiated starting point.
- Configure the starting point:
- In the Select a Mobile Business Object and Object Query screen, select Search.
- Select the project that contains the Sales_order MBO and select Search. Select the Sales_order MBO and select OK.
- Select the findByParameter object query. The order_id parameter appears in the Parameters field. Click Next.
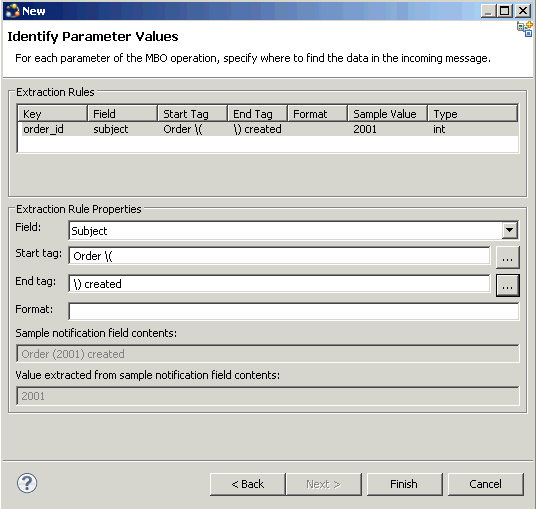
- Specify a sample notification. Enter Order (2001) created in the Subject line. Click Next.
- Click and drag to select "Order (", while this phrase is highlighted, right-click and select Select as Matching Rule:
- Click Next. Select order_id. In the Extraction Rule Properties:
- Select Subject as the field.
- Select "Order (" as the Start tag.
- Select ") created" as the End tag.
When the notification is sent to the client, the sample value (2001 in this example), is replaced with the order_id key, which identifies the id attribute of the object query. The form the client receives is populated with values returned by the findByParameter object query. - Click Finish to create default screens and starting points.Screens are populated with menu items and controls based on the MBO definition.