Import the Unwired WorkSpace projects (mobile application) and associated libraries into the iPhone development environment.
Note: For more information on Xcode, refer to the Apple Developer Connection: http://developer.apple.com/tools/Xcode/.
- In the Xcode IDE, create a new Xcode project.
-
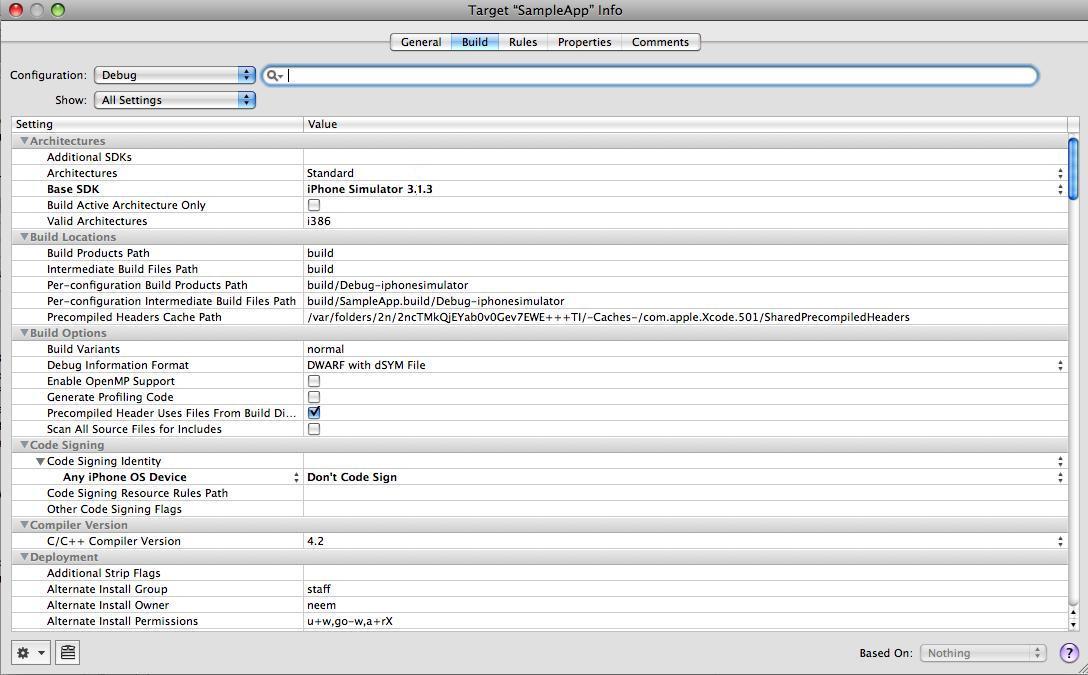
Set the base SDK configuration for an iPhone simulator or device. You can select a debug or release build.
- Copy the generated code from your Microsoft Windows environment to a location on your Mac (for example, your Home directory).
-
Copy over the include files from <unwired server install>\ClientAPI\ObjectiveC\includes and the libraries from <unwired server install>\ClientAPI\ObjectiveC\libs to a directory on your Mac (for example, your Home directory).
- After copying the directories into a local directory on your Mac, open Finder and locate the <unwired server install>\ClientAPI\ObjectiveC\includes folder.
- Drag the <unwired server install>\ClientAPI\ObjectiveC\includes\internal and <unwired server install>\ClientAPI\ObjectiveC\includes\public subfolders into Groups & Files, under the project name.
- If prompted to copy existing items into the destination group’s folder, ensure Copy items into destination group’s folder (if needed) is selected and then click Add to copy the include\internal and include\public directories into your project’s folder. This step ensures that all .h and .m files are added to the project’s search path.
-
Add the generated *.h and *.m files to the project:
- In the Xcode Groups & Files pane, right-click <Project Name>, and create a new group in your project.
- Import the generated code into the new group by selecting Add, then Existing Files.
- Navigate to the directory that contains the generated code.
- Select the generated code. In the Finder, drag the Generated Code folder into Xcode under your project's name.
- If prompted to copy existing items into the destination group’s folder, ensure Copy items into destination group’s folder (if needed) is selected and then click Add to copy the Generated Code folder into your project’s folder. This step ensures that all .h and .m files are added to the project’s search path.
-
Add libclientrt.a, libSUPObj.a, and libMO.a to your project.
- In the Xcode Groups & Files pane, select and right-click <Project Name> and select Add, then Existing Files.
- Navigate to the directory where you copied the libraries.
- Select the libclientrt.a, libSUPObj.a, and libMO.a libraries in Finder. Drag the libraries into Xcode under your project's name.
Note: The library version should correspond to the configuration you are building. For example, if you are building for a debug version of the simulator, navigate to libs/Debug-iphonesimulator/ to add the libraries. -
Add Settings.bundle to the Xcode project:
- Select and right-click <Resources>, and select Add, then Existing Files.
- Navigate to the includes directory, select Settings.bundle, and add it.
Note: This allows the iPhone device client user to use the Settings application to input their user preference information, such as server name, server port, user name, and activation code. - Edit the library search paths in the Xcode project by selecting Project > Edit Active Target <ProjectName> > Build > Search Paths > Library Search Paths, and specifying the path to the location where you copied the libraries.
-
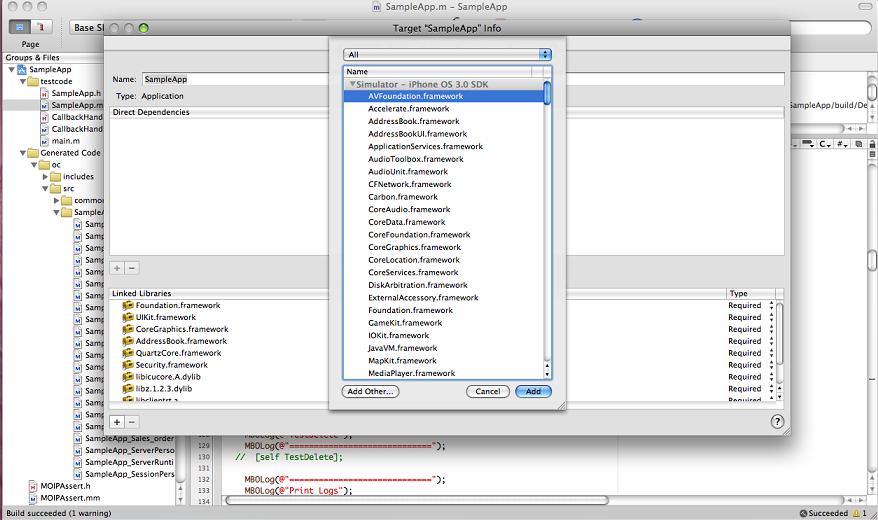
Add the following libraries from the SDK to the project by selecting Project > Edit Active Target <ProjectName> > General.
- Security.framework
- AddressBook.framework
- QuartzCore.framework
- CoreFoundation.framework
- libicucore.A.dylib
- libz.1.2.3.dylib
- libstdc++.6.dylib
- Write your application code to reference the generated MBO code. See Referencing the iPhone Client Object API.