Configure the build settings for the Xcode project, then build the project.
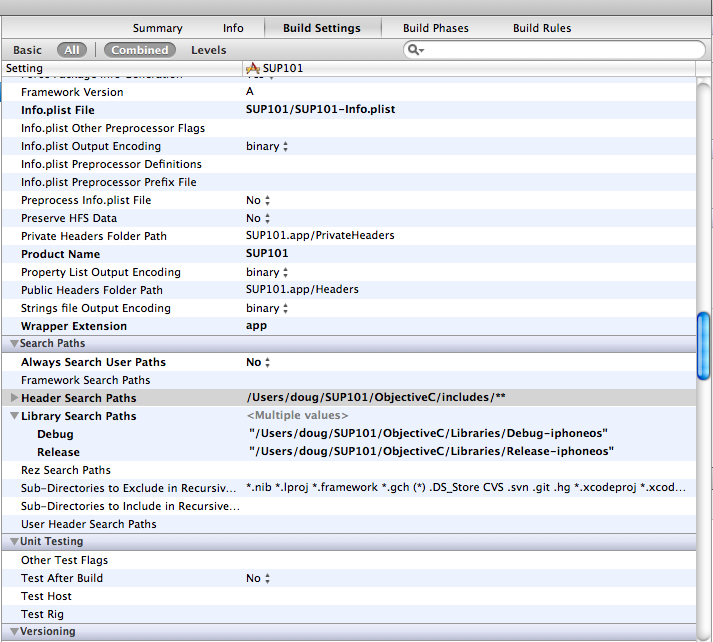
- In the right pane, click the Build Settings tab, then scroll down to the Search Paths section, then enter the location of the iPhone simulator libraries in the Header Search Paths and Library Search Paths fields.$SRCROOT is a macro that expands to the directory where the Xcode project file resides. This tutorial project was created in the /SUP/SUP101 directory.
- In Header Search Paths, enter the path to the ObjectiveC/includes directory. In this example, the path is indicated as "$SRCROOT/SUP101/ObjectiveC/includes/**".
- In Library Search Paths, enter the path to the ObjectiveC/Libraries/Debug-iphonesimulator directory. In this example, the path is indicated as "$SRCROOT/SUP101/ObjectiveC/Libraries/Debug-iphonesimulator".