![]()
![]()
![]()
![]()
Install Sybase IQ Server. See the Sybase IQ Installation and Configuration Guide.
Create the demo database.
On UNIX –
Change to the IQ install directory and source the IQ environment:
cd <IQ install
directory>/IQ-15_1
source IQ-15_1.csh
If it has not been created already, create the directory to hold the new database. Following the convention of this demo, the directory is /myiqdemo.
Change to the directory where you want to create the database:
cd /myiqdemo
Run the following command:
$IQDIR15/demo/mkiqdemo.sh
On Windows –
Open a command window:
Start | Programs | MS-DOS
Prompt or Start | Run and enter cmd.
If it has not been created already, create the directory to hold the new database. Following the convention of this demo, the directory is C:\myiqdemo.
Change to the directory where you want to create the database, using either of the following:
c:
cd C:\myiqdemo
Run:
"%ALLUSERSPROFILE%\SybaseIQ\demo\mkiqdemo"
To create the demo database in a predetermined location, click:
Start | Programs | Sybase | Sybase IQ 15.1 | Start Sybase IQ Demo Database.
To list all the options to customize database creation, execute:
On UNIX –
$IQDIR15/demo/mkiqdemo.sh -help
On Windows –"%ALLUSERSPROFILE%\SybaseIQ\demo\mkiqdemo"
-help
An IQ database consists of multiple stores. The paths to an IQ store can be relative or absolute.
You can create the demo database using either relative or absolute paths. If you want to copy or move your demo database around, it is easier to use a relative path. This is the default option for mkiqdemo.
![]() IMPORTANT: To convert your demo database
to a multiplex, you must use absolute paths.
IMPORTANT: To convert your demo database
to a multiplex, you must use absolute paths.
On UNIX –
Change to the directory where you want to create the database:
cd /myiqdemo
Use the -absolute switch:
$IQDIR15/demo/mkiqdemo.sh
-absolute
On Windows –
Open a command window:
Select Start | Programs | MS_DOS Prompt or Start | Run and enter cmd.
Change to the directory where you want to create the database
c:
cd \myiqdemo
Run: "%ALLUSERSPROFILE%\SybaseIQ\demo\mkiqdemo" -absolute
If SQL Anywhere or an earlier version of Sybase IQ resides on the same machine or subnet as Sybase IQ 15.0, edit the iqdemo.cfg configuration file. By default, both products use the default port 2638; therefore, you must change the port for your IQ Server.
In addition, to avoid confusion on shared systems, add your user name to the server name to make it unique. For example, if your user name is jsmith, you might use jsmith_iqdemo as the server name for the demo database.
The iqdemo.cfg file is created in the same directory as the demo database. You can edit this file and change the startup parameters. You can also copy this file and change the startup parameters to make configuration files for any of your databases.
Start the IQ server. Change to a directory where the configuration and database files reside and issue a command in this format:
start_iq @configuration_file.cfg dbname.db
For example, to start the demo database, enter:
start_iq @iqdemo.cfg iqdemo.db
Start Interactive SQL Java, the query tool.
On UNIX, type dbisql at the system prompt.
On Windows, click Start | Programs | Sybase | Sybase IQ 15.1 | Interactive SQL Java, enter dbisql in a command shell, or select Start | Run and enter dbisql.
Connect to the demo database:
In the Connect dialog, enter DBA for the User ID and sql for the Password. (This example shows Windows output.)
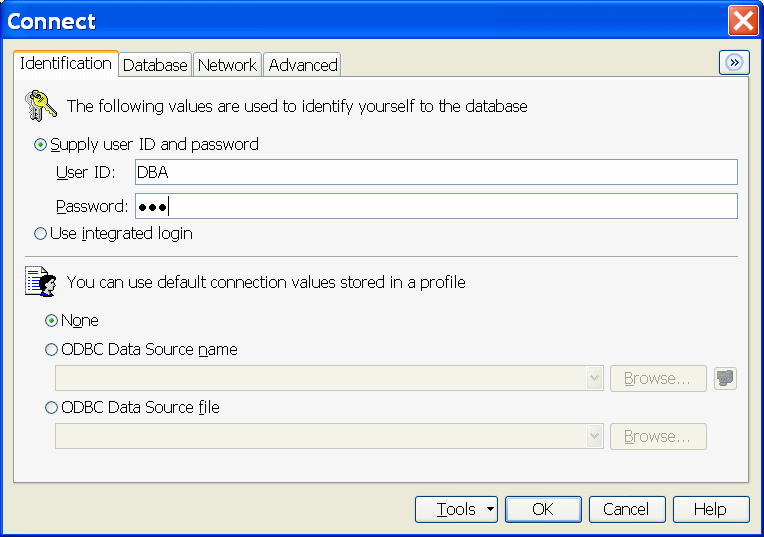
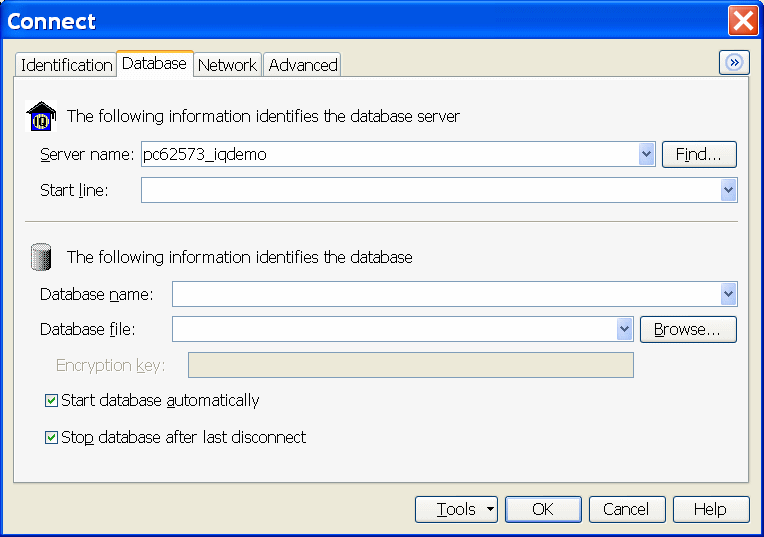
On the Database tab, click Find and select the server name. If the server name is not listed, type the server name, and then click OK.
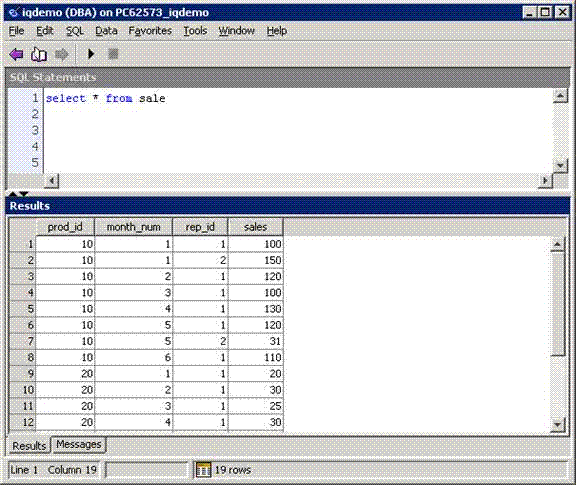
Run a test query to view columns in the sale table. In the top window (SQL Statements), type:
SELECT * FROM sale
Click Execute (right-facing triangle in the button bar) or use the F5 key.
Figure 3: Running a test query
To exit Interactive SQL Java, select File | Exit or
enter quit and click Execute or
use the F5 key.
