An input field can be either a column or a computed field. Before you retrieve data, its value is shown as two question marks (??).
The text can include many copies of a named input field. The same data will appear in each instance of the input field.
The columns you select for the DataWindow object become input fields in the rich text. Because the input field’s name matches the column name, PowerBuilder displays the column’s data in the input field.
If an input field exists in the text, you can copy and paste it to create another copy. If you need to recreate a column input field that you deleted, use this procedure.
![]() To insert a column input field in the text:
To insert a column input field in the text:
Select Insert>Control>Column from the menu bar.
Click in the text where you want the column input field to appear.
PowerBuilder displays a list of the columns selected for the DataWindow object.
Select a column for the input field.
You select an input field by clicking inside it. A computed input field is selected when the whole field is highlighted.
![]() To set properties for an input field:
To set properties for an input field:
Click in the input field in Design view.
Display the pop-up menu and select Properties.
On the Font page, specify text formatting.
On the Format page, specify a display format.
On the Validation page, specify a validation rule for the column.
If there are multiple copies of an input field, the validation and format settings apply to all the copies. Background color on the Font page applies to all input fields. Other settings on the Font page apply to individual instances.
The user cannot change the format or validation rule. At runtime, these pages are not available in the dialog box.
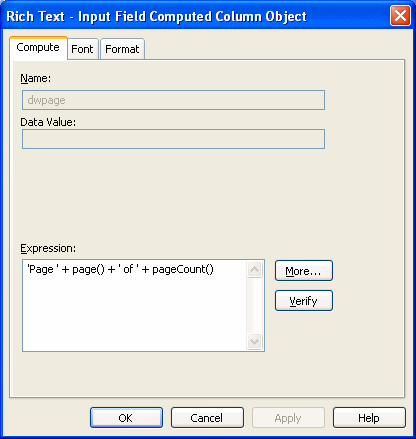
Computed field input fields When you display the dialog box for a computed field, the settings are a little different. You can specify the input field name and its expression on the Compute page and there is no validation.
Data Value in preview For both columns and computed fields, you see a value in the Data Value box when you preview the DataWindow object. The user sees a value in the Data Value box when the current row has a value. For columns, users can change the value.
Computed fields have an expression that specifies the value of the computed field. In rich text, they are represented as input fields, too. You specify a name and an expression. The data value comes from evaluating the expression and cannot be edited.
Select Insert>Control>Computed Field.
Click in the text where you want the computed field to appear.
If you do not select a predefined computed field, PowerBuilder displays the dialog box for the computed field:

On the Compute page, name the computed field and specify its expression.
(Optional) On the Font page, specify text formatting.
(Optional) On the Format page, specify a display format.
If there are multiple copies of a computed field input field, the expression and format settings apply to all the copies. Font settings apply to individual instances. For more about computed field expressions and display formats, see Chapter 19, “Enhancing DataWindow Objects.”