The PowerDesigner installation CD contains everything you need to install the Repository Web Browser. Before beginning the installation, you should already have created your repository database and have the DBMS user name and password to hand.
-
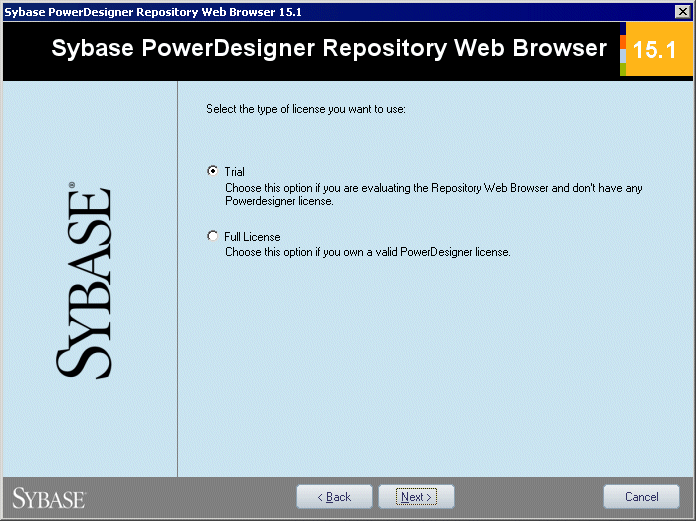
Click Next to go to the license page, and select the type of license that you want to use.
-
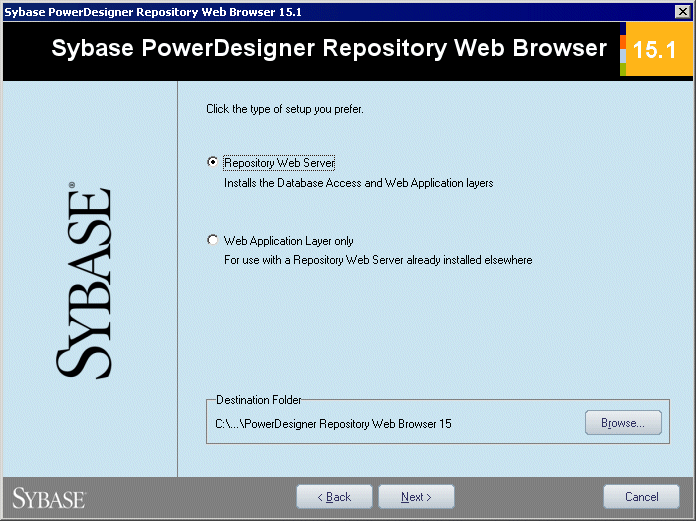
Click Next to go to the web server page.
If you have already installed one or more repository web servers, you can select the second option to install the web application layer only. You will then be prompted to specify connection information for a repository web server to which it will connect. Setup suggests a location in which to install the Web Browser, which you can change by clicking the Browse button.
-
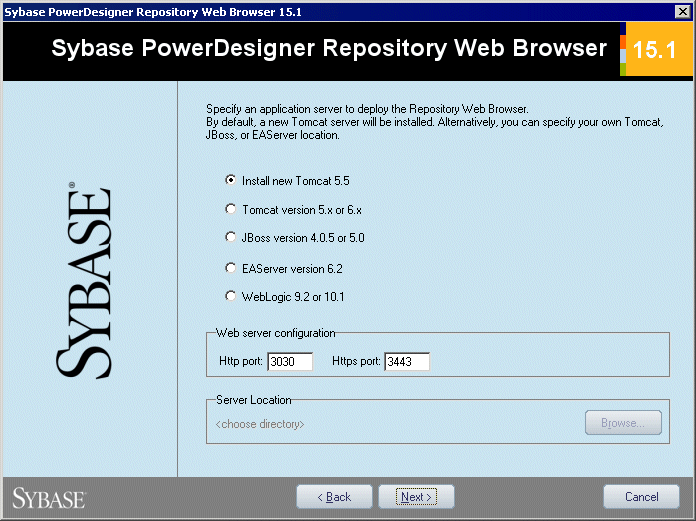
Click Next to go to the application server page. By default, the installer will install a new Tomcat Server. If you want to use one of the other supported servers, select it and specify its location. Default sever ports may be provided that you must verify. At least one port is required in order to create a connection profile and connect to the repository database.
Note: If you choose the WebLogic application server, you must deploy the archive directory (by default, the weblogic_openfolder directory inside your PowerDesigner Repository Web Server installation directory) from your WebLogic Administrative Console once the setup has completed.
-
Click Next to go to the JDK page. By default, a new JDK is installed. If you want to use an existing JDK, deselect the check box and specify its location:
-
Click Next to go to:
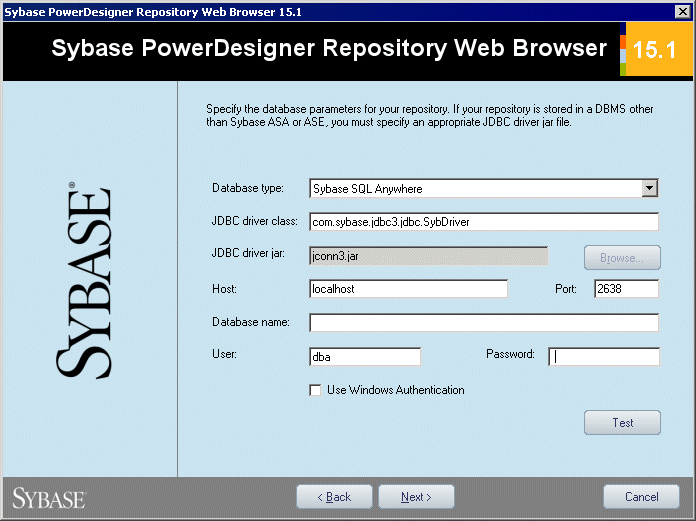
- [for a full Repository web server install] The database parameters page lets you enter the appropriate parameters for your database. If you select the Use Windows Authentication checkbox, you will need to select the This account option on the Log On tab of the web server service property sheet before starting the service.
-
[for a Web application layer only install] The connection information page of the repository web server lets you enter the appropriate parameters for connecting to the existing repository web server instance.. You must enter at least one port:
- [for a full Repository web server install] The database parameters page lets you enter the appropriate parameters for your database. If you select the Use Windows Authentication checkbox, you will need to select the This account option on the Log On tab of the web server service property sheet before starting the service.
-
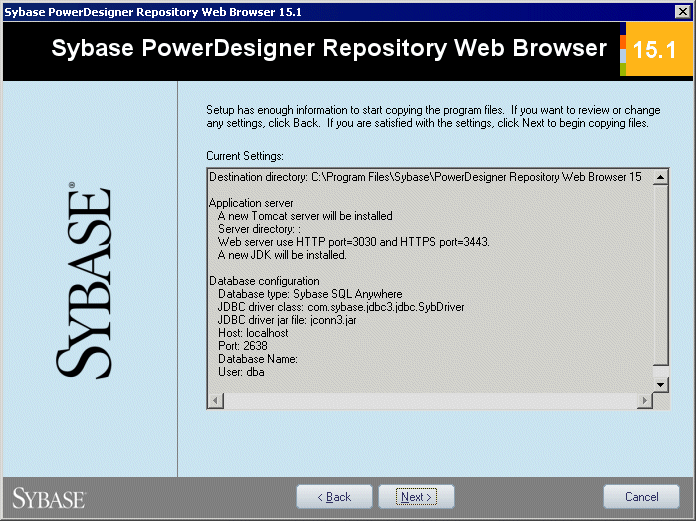
Click Next to go to the information page which summarizes your choices:
-
Click Next to accept the current settings and start copying files.
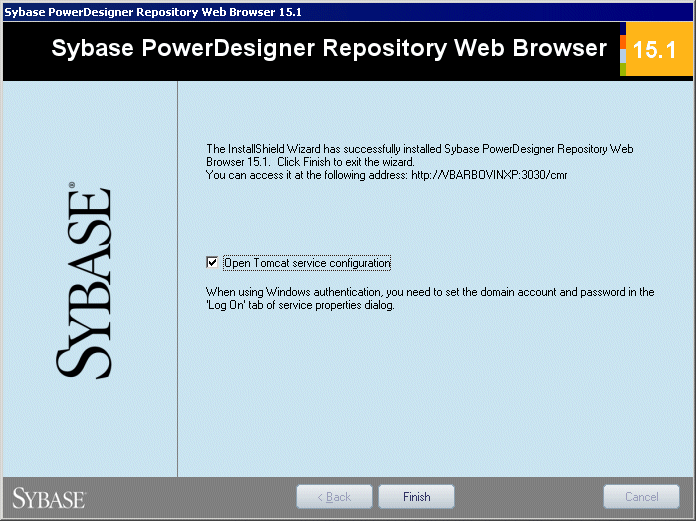
The install begins. A progress box is displayed and Setup copies files to the destination directory. When the setup is complete, one of the following pages appears depending on your selection on the web server page:
- [Repository web server] The complete page opens with two check boxes selected by default to let you start the Repository Web Server service and open the Repository Web page:
- [Web application layer] The complete page opens with a check box selected by default to let you display the service property sheet and enter its account name and password. Then you will have to start the service.
- [Repository web server] The complete page opens with two check boxes selected by default to let you start the Repository Web Server service and open the Repository Web page: