 Start a personal database server running the sample database (command line)
Run the following command to start the personal database server, name the database server demo12 using the -n server option, and connect to the copy of the sample database:
dbeng12 -n demo12 "%SQLANYSAMP12%\demo.db" |
On Windows, the database server appears as an icon in the system tray.
You have successfully started a personal database server running the sample database. However, you cannot see or manipulate the data in the database yet.
The SQL Anywhere personal server icon is the only visible indication that anything has happened.
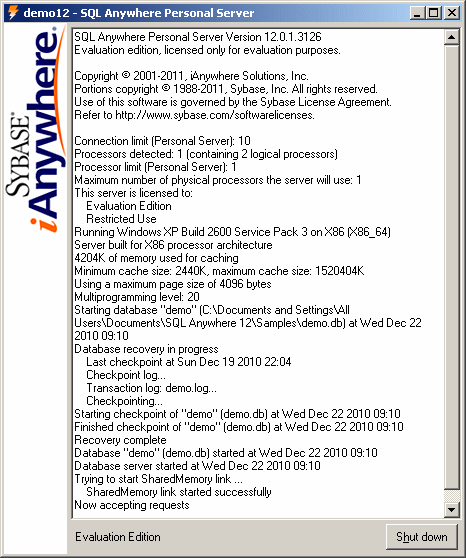
On Windows, double-click the SQL Anywhere personal server icon in the system tray to display the database server messages window.

The database server messages window displays useful information, including:
The server name The name in the title bar (in this case demo12) is the server name. In this tutorial, you assigned the server name using the -n server option. If you don't provide a server name, the database server is given the name of the first database started. This name can be used by applications when they connect to a database.
The version and build numbers The numbers following the server name (for example, 12.0.1.3600) are the version and build numbers. The version number represents the specific release of SQL Anywhere, and the build number relates to the specific instance of the software that was compiled.
Startup information When a database server starts, it sets aside some memory that it uses when processing database requests. This reserved memory is called the cache. The amount of cache memory appears in the window. The cache is organized in fixed-size pages, and the page size also appears in the window.
Database information The names of the database file and its transaction log file appear in the window.
In this case, the startup cache size and page size are the default values. For many purposes, including those of this tutorial, the default startup options are fine.
Proceed to Lesson 2: Connecting to the database.
 See also
 |
Discuss this page in DocCommentXchange.
|
Copyright © 2012, iAnywhere Solutions, Inc. - SQL Anywhere 12.0.1 |